JAY LITTLE BEAR
Real Name: Private Jay Little Bear
Identity/Class: Human (Native American, World War II era)
Occupation: Soldier, marine, former professional wrestler
Group Membership: Deadly Dozen, Leatherneck Raiders
Affiliations: Sister Angelique, Ronson Carpenter, Chaka, Lt. Erikson, General Ten Per Cent, Captain Griggs, Ben Grimm, Howling Commandos (Isadore "Izzy" Cohen, Timothy "Dum-Dum" Dugan, Nick Fury, Gabe Jones, Eric Koenig, Dino Manelli, Percival "Pinky" Pinkerton, Robert "Reb" Ralston), John Kennedy, Gweny Lee, Richard Longtree, Manuel, Red Fox, Terry Reiker, Samurai Squad, Sam Sawyer, Wildcat Smith, General Theresa, Father Thompson
Enemies: Antonio, Baron Wolfgang von Strucker, Herbert Cholmondeley, Captain Conner, HYDRA, Japanese soldiers, Jake Malloy, Major Nagasha, Nazis, Colonel Sakata, Dr. Lola Steimle, Dr. Steinem, Dr. Sweikert
Known Relatives: Unnamed grandfather
Aliases: "Chief"
Base of Operations: Able Company base, England First Appearance: Captain Savage and his Leatherneck Raiders#1 (January, 1968)
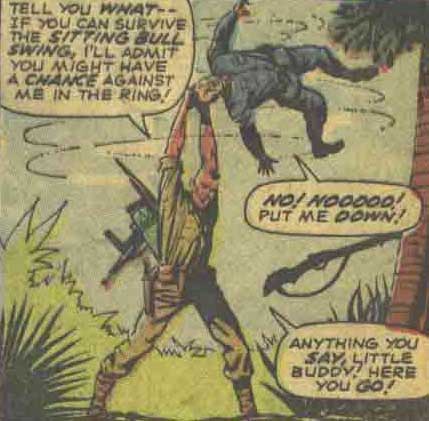
Powers/Abilities: Jay Little Bear was a former professional wrestler, and was virtually undefeated in hand-to-hand combat. His fighting moves included "The Sitting Bull Swing," where he would grab an opponent by his hair and toss him. In combat, he carried a rifle, knife, tomahawk, and bow and arrows. He sometimes attached grenades to his arrows, or wires for climbing.
History: (Captain Savage and his Leatherneck Raiders#1 (fb) - BTS) - Jay Little Bear had been a professional wrestler in the United States, but when World War II erupted, he was drafted, and forced to give up his money-making career. Little Bear became a marine, and was eventually assigned to Captain Simon Savage's Leatherneck Raiders.
(Captain Savage and his Leatherneck Raiders#1) - Jay Little Bear joined the Leathernecks as they assaulted a Japanese base on Tarawa. The Leathernecks destroyed the munitions the Japanese had on Tarawa, and were then picked up by the Sea Wolf alongside the Howling Commandos.
(Captain Savage and his Leatherneck Raiders#2) - The Leathernecks invaded a Japanese building and stole documents about the "phantom submarine" which had been sinking American and Japanese vessels, and the information led them to Hydra Island, where they encountered the Japanese Samurai Squad. The two teams fought each other, with Little Bear grappling with the gigantic Toshiro Monsoon, only to be ambushed and captured by HYDRA, with only Captain Savage and the Samurai Squad's Sgt. Morita remaining free.
(Captain Savage and his Leatherneck Raiders#3) - While Savage and Morita fought their way through Hydra Island, the Lethernecks and Samurai Squad escaped their cells and confronted HYDRA's leader, Baron Wolfgang von Strucker, but he showed them that the forces of HYDRA were so great that they had no hope of escape, and showed them Savage and Morita about to be attacked by HYDRA agents.
(Captain Savage and his Leatherneck Raiders#4) - When the Leathernecks and Samurai Squad were distracted, Strucker dropped a cage from the ceiling on top of them, then arranged to have them all killed by firing squad. As he faced the firing squad, Little Bear's only regret was to be killed without a chance to fight back. However, Savage and Morita came to their rescue. Strucker set the island to self-destruct, but the Leathernecks and Samurai Squad escaped together in one of HYDRA's submarines. When they had escaped from the exploding island, they met up with the Samurai Squad's rendezvous ship, and allowed their counterparts to depart on friendly terms.
(Captain Savage and his Leatherneck Raiders#5) - The Leathernecks helped manipulate Rolfe Harrison into an arm-wrestling match with Little Bear, which led to a barfight between the American and Australian troops who had been watching. Harrison was forced to assist the Leathernecks in capturing Herbert Cholmondeley, who was making fake money for the Japanese. After the completion of their mission, Little Bear and Harrison resumed their arm-wrestling, and Savage awarded all of the Leathernecks with a three-day pass.
(Captain Savage and his Leatherneck Raiders#6) - The Leathernecks went on an obstacle course run underwater, during which Little Bear's bow caught on one of the phony mines, setting it off. They failed the practice, and Sgt. Yates was furious with Little Bear for making him look bad. On their next mission, the Leathernecks teamed with a hundred marines in an assault on Burma, where they liberated a P.O.W. camp that had been holding Isadore "Izzy" Cohen of the Howling Commandos. They succeeeded in their mission, and saw Private Cohen off as he went to rejoin the Howlers.
(Captain Savage and his Leatherneck Raiders#7) - The Leathernecks were on leave at Hawaii when they were ordered to rescue Lt. Ben Grimm, who was a prisoner of Colonel Sakata. They invaded Sakata's island on surfboards, and escaped the island aboard a plane flown by Savage under directions by Grimm. They finally met up with a squad of American planes, who escorted them home.
(Captain Savage and his Leatherneck Raiders#8 (fb) - BTS) - Moose Barclay called Little Bear a coward, and challenged him to a match. Little Bear agreed, and they held the match in their barracks, with many of the marines and sailors present betting money on them.
(Captain Savage and his Leatherneck Raiders#8) - Barclay and Little Bear put up a terrific fight, but were interrupted when Captain Savage appeared, demanding an explanation. Little Bear was distracted at the sight of his C.O., and Barclay used the opportunity to knock him down. Barclay was declared the winner, much to Little Bear's chagrin. On their next mission, they were sent to an island where two important Japanese generals were holding a conference, and told to capture them both without causing any casulties. The Leathernecks failed in their mission, but were then informed by Commander Morton that the entire mission was a training exercise, and that all of the Japanese soldiers they had fought were members of Nisei Squadrons. Morton revealed that this was in preparation for an upcoming mission alongside the Howling Commandos.
(Captain Savage and his Battlefield Raiders#9) - After Savage shaved his beard off because he looked too much like Jake Malloy, a gunrunner in Burma, he took the Leathernecks on a training exercise before their next mission, which was to capture Malloy himself. The Leathernecks journeyed to Burma and met Malloy and his men, who welcomed them heartily into their camp. Even though Malloy was supplying arms to pro-Japanese guerillas, he considered himself a patriot, and had the utmost respect for the marines. When the Japanese invaded Malloy's camp, he led his men alongside the Leathernecks against them. However, the Leathernecks still had to complete their mission, and took Malloy into their custody. As they returned to Australia with Malloy, he began to file through his bonds.
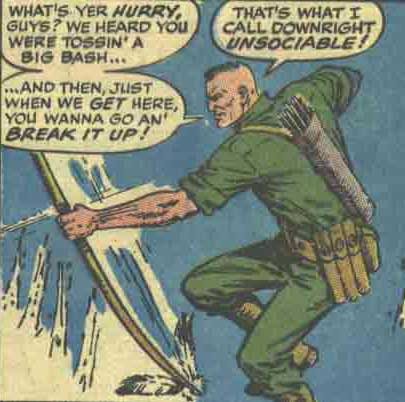
(Captain Savage and his Battlefield Raiders#10) - When the Japanese invaded an island where an American base was, Little Bear was struck down by a tree during a bombardment. Sgt. Yates carried Little Bear to safety, and when he revived, he and Yates joined up with other marines in coming to the rescue of Captain Savage and the others at the base, driving off the Japanese.
(Captain Savage and his Battlefield Raiders#11) - The Leathernecks were teamed with the Howling Commandos for a mission to a Pacific island where the Japanese had employed the American scientist Terry Reiker, exploiting her anti-war beliefs. The Howlers and Leathernecks fought their way past scores of Japanese soldiers in the jungle of the island. When the Leathernecks finally reached the castle where Reiker was, a sniper shot Lee Baker, killing him.
(Sgt. Fury and his Howling Commandos#64) - As the Leathernecks mourned for Lee Baker, Sgt. Fury reminded the Leathernecks that they had a mission to complete, but Jay was overwrought by Lee's death, and questioned the very act of war. Fury simply observed that it was "us or them" and they carried on. The Leathernecks and Howlers broke into the fortress where Dr. Terry Reiker was being kept, and forced her to leave with them, despite her protestations.
(Captain Savage and his Battlefield Raiders#12) - The Leathernecks stood side-by-side as Baker's coffin was loaded into a plane bound for Los Angeles. To help the Leathernecks deal with their grief, they were assigned to spy on the Japanese fleet aboard the Sea Wolf. Unfortunately, they were sighted by the fleet, and were struck by depth charges that resulted in Savage hitting his head and passing out. Command fell to Captain Griggs, who surrendered the Sea Wolf to the Japanese. The Leathernecks were sent to the prison camp of Major Nagasha, where they met the American priest Father Thompson. Thompson helped the Leathernecks escape the camp, and get to a boat and off the island.
(Captain Savage and his Battlefield Raiders#13) - The Leathernecks were sent on a mission to Italy to help the Partisan General Theresa protect Castello Rizzi from the Nazis. They used the obsolete weapons of war found in the castle to hold the Germans back, and ultimately destroyed a German air base, while American forces moved in and defeated the Germans.
(Captain Savage and his Battlefield Raiders#14) - The Leathernecks were sent to Manila Bay in the Philippines to rescue American scientists who had been made prisoners of the Japanese. They were aided in their mission by Manuel, a local boy with many resources. To help move the scientists along, they dressed them in their uniforms so that they would be held in a P.O.W. camp. The Leathernecks then dressed up as women to get into the camp, then rescue the scientists. They were picked up by PT 109 boat officer John Kennedy after succeeding in their mission.
(Captain Savage and his Battlefield Raiders#15) - The Leathernecks journeyed down the Mekong River to destroy the rubber being gathered by the Japanese, and made a deal with the pirate General Ten Per Cent to give him 10% of the rubber. They were aided by the guerilla Red Fox in finding the rubber, which had been hidden inside of a Buddhist temple to keep the Americans from bombing it. The Leathernecks moved the rubber back to its original warehouse, and the American bombers destroyed it.
(Captain Savage and his Battlefield Raiders#16) - The Leathernecks were trained for winter combat by Lt. Erikson, and journeyed to Alaska to help drive out Japanese invaders. They met the Inuit Chaka, and Jay helped convince Chaka to side with them, as they were both of native origins. With the aid of Chaka, they discovered that a Japanese professor had buried gasoline in key points in Alaska so that a short-range bomber pilot could refuel there, and launch strikes on American soil. The Leathernecks and Chaka fought the Japanese, and Chaka gave his life to destroy the Japanese with a grenade.
(Captain Savage and his Battlefield Raiders#17 (fb) - BTS) - Yates and Stone were sent to help Little Bear get into a Japanese camp and destroy it. Within the camp, Little Bear met Gweny Lee, a Chinese girl who was there for unknown reasons. Unfortunately, Little Bear was captured before he could complete his mission.
(Captain Savage and his Battlefield Raiders#17) - Little Bear was interrogated, but did not give up any information. He escaped his cell, and was aided by Gweny Lee in escaping the Japanese. Although he could have abandoned his mission there, Jay continued on to destroy the munitions depo in the camp. While setting the explosives, some crates fell on Jay, injuring his leg. He was nearly killed by a Japanese officer, but Gweny Lee saved him, and the two escaped the island in a raft as the munitions depo exploded.
(Captain Savage and his Battlefield Raiders#18 (fb)) - Little Bear and Gweny Lee drifted in their raft for a day and a half before being found by a navy plane which transported them back to Australia.
(Captain Savage and his Battlefield Raiders#18) - The Leathernecks were reunited with Little Bear, and met Gweny Lee. Back in the barracks, the other Leathernecks teased Little Bear for being in love with Gweny Lee. The Leathernecks then went on a mission to rescue an American officer from a Japanese camp, and succeeded. Little Bear happily destroyed the camp, imagining that Gweny Lee had been kept at a similiar facility.
(Captain Savage and his Battlefield Raiders#19) - Yates, LaRocque, Little Bear and Stone held a new year's party with Gweny Lee and a pair of LaRocque's ladyfriends. The four Leathernecks trained together as they waited for Captain Savage to return from a mission aboard the Sea Wolf.
(Combat Kelly and the Deadly Dozen#1 (fb) - BTS) - Jay was sent to prison for unrevealed reasons, which he considered "a bum rap." At some point, he met and befriended Combat Kelly.
(Combat Kelly and the Deadly Dozen#1 (fb)) - After being made the leader of the Deadly Dozen, Combat Kelly arranged with Captain Sam Sawyer to have Little Bear released from prison to join the Deadly Dozen. Little Bear joined the Deadly Dozen on a mission to Germany to destroy a new German jet plane created by Dr. Steinem. The Deadly Dozen successfully raided the Luftwaffe complex where the jet was stored, using his bow to take out guards silently.
(Combat Kelly and the Deadly Dozen#1) - After Ace Hamilton had killed Dr. Steinem, Little Bear came on the scene, and Ace claimed that he had done it in self-defense, though Little Bear suspected otherwise. Kelly had Little Bear and the others destroy the jet plane using grenades. The destruction of the jet threatened to set off all of the jet fuel in the complex, and the Dozen escaped before the explosion destroyed the entire complex. They then met up with their rendezvous plane, and returned to England.
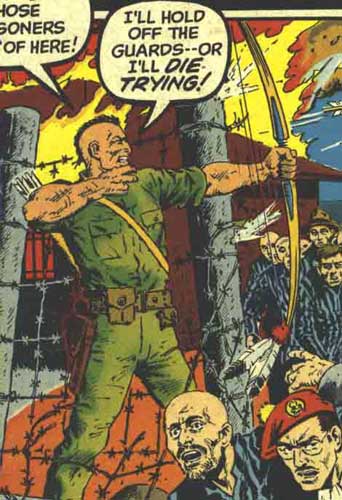
(Combat Kelly and the Deadly Dozen#2) - Little Bear joined Combat Kelly, Dino Manelli and Percival Pinkerton in tunneling into a Nazi concentration camp to rescue its prisoners, who included fellow Native Americans Ronson Carpenter, Wildcat Smith and Richard Longtree. They set off an explosives in their tunnels and in a guard tower to create cover smoke, but Carpenter, Smith and Longtree were all killed trying to help save their fellow prisoners. When they returned to England, Kelly asked that the three men be given the Medal of Honor, but Sawyer refused, and told Little Bear that they had all been accused of cowardice before being captured, but their families were never told. Sawyer asked Little Bear to understand that although they had died as heroes, they could not be acknowledged as such.
(Combat Kelly and the Deadly Dozen#3 - BTS) - In January, 1945, the Deadly Dozen entered the frontlines of the war during the push into Germany following the Battle of the Bulge. During a lull in the action, Kelly narrated to them the story of how he became a convict. Not long after he finished his tale, the fighting resumed.
(Sgt. Fury and his Howling Commandos#104) - The Deadly Dozen were under the command of Captain Conner, who was unrealistic about the threat posed by the German forces. Jay was happily reunited with the Howling Commandos when they came to reinforce the Deadly Dozen, and the Howlers showed Conner that thousands of Germans were headed for their position, only for Conner to crack-up.
(Combat Kelly and the Deadly Dozen#4) - Sgt. Fury beat up Conner in anger, then assumed command the situation, ordering Miller and Wagner to bring Conner back to headquarters. Fury led his and Kelly's squads into battle against the Germans, and they succeeded against enormous odds, driving off the Germans. When Conner returned, he tried to kill Fury and Kelly for commiting mutiny, but Miller caught up to Conner and killed him for abandoning him and Wagner after an attack. The Deadly Dozen brought Miller and Wagner's bodies back with them, but left Conner's.
(Combat Kelly and his Deadly Dozen#5) - Little Bear joined the Deadly Dozen for training on an obstacle course, and his bow was caught on barbed wire during the session. He was freed by Combat Kelly.
(Combat Kelly and his Deadly Dozen#6 (fb)) - Little Bear joined the Deadly Dozen at a USO dance, but their pass was brought to an end when Captain Sawyer summoned them for another mission. The Deadly Dozen were assigned to work with pilot "Mad-Dog" Martin in order to break through a Nazi fortress. As they observed the fortress in Martin's B-17, Ace fired on German planes, and Little Bear was disgusted by the glee he took at killing, and punched him in the face. After Martin dropped them off to join the troops on the surface, he seemingly abandoned them.
(Combat Kelly and his Deadly Dozen#6) - Martin returned and crashed his plane into the fortress, allowing the Deadly Dozen a chance to take the fortress. He won the respect of the Deadly Dozen with his actions.
(Combat Kelly and his Deadly Dozen#7) - As the fortress was mopped up by the Allies, the Deadly Dozen had to walk to their rendezvous point. They found a farmhouse in France near the German border where Sister Angelique lived, and found that she had German soldiers as guests. The Germans agreed to turn themselves over to the Deadly Dozen. Little Bear befriended Paul and Phillipe, two French children who were charges of Sister Angelique. Although tempers flared between the two groups when one of the Germans tried to rape Erika, one of Sister Angelique's charges, Sister Angelique halted them by taking up a gun and threatening to shoot them. The Deadly Dozen finally departed with the Germans as their prisoners.
(Combat Kelly and his Deadly Dozen#8) - The Deadly Dozen performed an underwater obstacle course run in preparation of their next mission, to confront Dr. Sweikert, a sadistic Nazi surgeon. The Deadly Dozen halted Dr. Lola Steimle, and Jay tried to bring her down, but she put up such a fight that he needed help from the others. Laurie Livingston impersonated Steimle in order to enter Sweikert's facility, with Kelly disguised as her driver.
(Combat Kelly and his Deadly Dozen#9) - After 24 hours had passed, Jay took command of the squad, and led them in an attempt to rescue Laurie and Kelly. Jay sent Doc Watson to create a diversion by speaking to the guard so that he could be drawn out and killed by Ace, but Ace took too long, and Watson was killed. As they fought their way in, Jake Jensen saved Jay from a German, only to be shot dead himself, and Donald Sample sacrificed himself to get the team inside the facility. After Howard Shigeta was killed, and Little Bear was disgusted by Ace killing even the nurses in the hospital, the two men split up to find Kelly and Laurie. Little Bear later found Ace dead, but located Laurie and Kelly. He and Kelly dressed up as doctors in the hopes of escaping the facility, and brought Laurie to an ambulance, but as they loaded her in, Jay was shot in the back by a German. Determined to save Laurie and Kelly, Jay closed the doors of the ambulance and sent Kelly on his way before dying.
Comments: Created by Gary Friedrich, Dick Ayers and Syd Shores.
Ben Grimm's presence in Captain Savage#7 is one of those Marvel-time problems for which there is no explanation as of yet. Given Grimm's references to his ever-lovin' Aunt Petunia, it's hard to rationalize this as an appearance by one of his ancestors. Perhaps Grimm was traveling through time?
by
Sparring partner of Moose Barclay
Formerly, mobile aboard the U.S.S. Sea Wolf, usually in the Pacific Ocean; barracks at an American base in Australia
CLARIFICATIONS: Images taken from:
First Posted: 06/29/2005 Any Additions/Corrections? please let me know.
Non-Marvel Copyright info
Jay Little Bear should not be confused with:
Combat Kelly and the Deadly Dozen#2, cover
Captain Savage and his Leatherneck Raiders#1, page 3, panel 4
Captain Savage and his Battlefield Raiders#10, page 19, panel 3
Captain Savage and his Leatherneck Raiders#2-6 (March-September, 1968) - Gary Friedrich (writer), Dick Ayers (pencils), Syd Shores (inks), Stan Lee (editor)
Captain Savage and his Leatherneck Raiders#7 (October-November, 1968) - Archie Goodwin (writer), Dick Ayers (pencils), Syd Shores (inks), Stan Lee (editor)
Captain Savage and his Leatherneck Raiders#8 (November, 1968) - Gary Friedrich (writer), Dick Ayers (pencils), Syd Shores (inks), Stan Lee (editor)
Captain Savage and his Battlefield Raiders#9-10 (December, 1968-January, 1969) - Gary Friedrich (writer), Dick Ayers (pencils), John Severin (inks), Stan Lee (editor)
Captain Savage and his Battlefield Raiders#11 (February, 1969) - Gary Friedrich (writer), Dick Ayers (pencils), John Severin (inks), Stan Lee (editor)
Captain Savage and his Battlefield Raiders#12 (March, 1969) - Gary Friedrich (writer), Don Heck (pencils), Syd Shores (inks), Stan Lee (editor)
Captain Savage and his Battlefield Raiders#13-15 (April-July, 1969) - Arnold Drake (writer), Don Heck (pencils), Syd Shores (inks), Stan Lee (editor)
Captain Savage and his Battlefield Raiders#16 (September, 1969) - Arnold Drake (writer), Don Heck (pencils), John Severin (inks), Stan Lee (editor)
Captain Savage and his Battlefield Raiders#17-19 (November, 1969 - March, 1970) - Gary Friedrich (writer), Dick Ayers (pencils), John Severin (inks), Stan Lee (editor)
Sgt. Fury and his Howling Commandos#64 (March, 1969) - Gary Friedrich (writer), Dick Ayers (pencils), John Severin (inks), Stan Lee (editor)
Combat Kelly and the Deadly Dozen#1 (June, 1972) - Gary Friedrich (writer), Dick Ayers (pencils), Jim Mooney (inks), Stan Lee (editor)
Combat Kelly and the Deadly Dozen#2 (August, 1972) - Gary Friedrich (writer), Dick Ayers (pencils), Mike Esposito (inks), Stan Lee (editor)
Sgt. Fury and his Howling Commandos#104 (November, 1972) - Gary Friedrich (writer), Dick Ayers (pencils), Vince Colletta (inks), Roy Thomas (editor)
Combat Kelly and the Deadly Dozen#4 (December, 1972) - Gary Friedrich (writer), Dick Ayers (pencils), Mike Esposito (inks), Roy Thomas (editor)
Combat Kelly and the Deadly Dozen#5-6 (February-April, 1973) - Gary Friedrich (writer), Dick Ayers (pencils), Vince Colletta (inks), Roy Thomas (editor)
Combat Kelly and the Deadly Dozen#7 (June, 1973) - Gary Friedrich (writer), Dick Ayers (pencils), John Tartaglione (inks), Roy Thomas (editor)
Combat Kelly and the Deadly Dozen#8-9 (August-October, 1973) - Gary Friedrich (writer), Dick Ayers (pencils), Vince Colletta (inks), Roy Thomas (editor)
Last updated: 06/29/2005
All other characters mentioned or pictured are ™ and © 1941-2099 Marvel Characters, Inc. All Rights Reserved. If you like this stuff, you should check out the real thing!
Please visit The Marvel Official Site at: http://www.marvel.com