DEADLY DOZEN
Membership: Combat Kelly, Ralph "Hoss" Cosgrove, Timothy "Dum-Dum" Dugan, Roland "Ace" Hamilton, Jake Jensen, Jay Little Bear, Laurie Livingston, Dino Manelli, Jack "Mad-Dog" Martin, Michael "Bullseye" Miller, Percival "Pinky" Pinkerton, Donald Sample, Howard Shigeta, Emory "Snakeye" Simpson, Larry "Hillbilly" Wagner, Doc Watson
Purpose: To employ military convicts as commandos for dangerous assignments during World War II
Affiliations: Sister Angelique, Ronson Carpenter, Howling Commandos (Isadore "Izzy" Cohen, Nick Fury, Gabe Jones, Eric Koenig, Robert "Reb" Ralston), Richard Longtree, Sam Sawyer, Wildcat Smith
Enemies: Captain Conner, Nazis, Dr. Lola Steimle, Dr. Steinem, Dr. Sweikert
Base of Operations: Able Company base, England
First Appearance: Sgt. Fury and his Howling Commandos#98 (May, 1972)
History: (Sgt. Fury and his Howling Commandos#98) - The Deadly Dozen were organized by Captain Sam Sawyer, who promoted Timothy "Dum-Dum" Dugan of his Howling Commandos squadron to lead the Dozen, who were comprised mainly of convicts. Alongside hiw fellow Howlers Percival Pinkerton and Dino Manelli, Dugan was assigned Ralph "Hoss" Cosgrove, Roland "Ace" Hamilton, Jake Jensen, Laurie Livingston, Michael "Bullseye" Miller, Donald Sample, Howard Shigeta, Emory "Snakeye" Simpson, and Larry "Hillbilly" Wagner.
Dugan began to train the Dozen, and had to deal with the group's eclectic personalities. Finally, they were granted a mission to stop a band of German spies who were landing on English shores, with instructions to bring them back alive. Dugan's Deadly Dozen succeeded in their mission.
(Combat Kelly and the Deadly Dozen#1 (fb)) - Dugan was called back to Sawyer, and informed that he would not be leading the Deadly Dozen after all, because Sawyer had decided to turn leadership of the squad over to Combat Kelly, another army convict. Dugan introduced the squad to Kelly, and Kelly was annoyed to find a woman-- Laurie-- on the team. Sawyer decided to remove Cosgrove from the line-up because he didn't think he would work out, but insisted that Laurie remain. Kelly arranged to have his old friends Jay Little Bear and Doc Watson added to their team, and the retooled Deadly Dozen were summoned by Sawyer for their first mission together.
The Deadly Dozen were assigned to destroy a new German jet which had been designed by Dr. Steinem at a Luftwaffe complex in Germany. Miller disabled the complex's alarm systems, and they traveled through the plant in silence, until Kelly had Wagner perform his country music over the P.A. system as a diversion. The Deadly Dozen began a firefight with the Germans.
(Combat Kelly and the Deadly Dozen#1) - Dr. Steinem was found by Ace Hamilton, who killed him rather than take him prisoner. The Deadly Dozen managed to destroy the jet by hurling a barrage of grenades at it, and the explosion threatened to reach the complex's jet fuel supply. The Deadly Dozen fought their way out of the complex before it exploded, then escaped in their rendezvous jet.
(Combat Kelly and the Deadly Dozen#2) - Combat Kelly, Jay Little Bear, Dino Manelli and Percival Pinkerton tunneled into a Nazi concentration camp to rescue the prisoners there, including Richard Longtree, Wildcat Smith and Ronson Carpenter. The four Deadly Dozen members set explosives in the tunnels that they detonated, along with the camp's sentry tower so that the smoke would give them time to escape, but as they fled to the nearby woods, the Germans began to fire on the escaping prisoners. Longtree, Smith and Carpenter were all killed trying to help their fellow escapees when they shot down a German plane, only to be crushed by it when it fell from the sky. Returning to England, Kelly told Sawyer that the three men deserved the Medal of Honor, but Sawyer refused to grant it because the three men had all been accused of cowardice before.
(Combat Kelly and the Deadly Dozen#3) - In January, 1945, the Deadly Dozen entered the frontlines of the war during the push into Germany following the Battle of the Bulge. During a lull in the action, Kelly narrated to them the story of how he became a convict. Not long after he finished his tale, the fighting resumed.
(Sgt. Fury and his Howling Commandos#104) - The Deadly Dozen were under the command of Captain Conner, who refused to show any sign of weakness, and the Dozen began to fear he would get them killed. Manelli contacted Sgt. Fury, and he came to reinforce the Deadly Dozen with his Howling Commandos. Captain Conner remained in command, however, and refused to advance their lines. When the Howlers showed him that thousands of Nazis were advancing on their position, Conner cracked up.
(Combat Kelly and the Deadly Dozen#4) - Fury beat up Conner, then assumed command of the situation, and sent Miller and Wagner to bring Conner back to headquarters, while the rest of them prepared to face the attacking Germans. The Howling Commandos and Deadly Dozen managed to hold off against unbelieveable odds, and the Germans finally retreated. However, Wagner had been killed while escorting Conner, and Conner abandoned the wounded Miller so that he could have revenge on Fury and Kelly. Conner confronted the two men with a rifle, threatening to kill them both for mutiny, but Miller caught up to Conner and shot him in the back. Miller then died from his wounds. General McCord arrived afterwards and gave Conner a decoration for bravery, thinking he had led the Howlers and Dozen to victory. Fury saw to it that Wagner and Miller's bodies were brought back for burial, but left Conner's body on the battlefield.
(Combat Kelly and the Deadly Dozen#4 (fb) - BTS) - Dino Manelli and Percival Pinkerton returned to the Howling Commandos.
(Combat Kelly and his Deadly Dozen#5) - After completing an obstacle course run, Livingston, Shigeta and Watson met up, and reminisced about their first meeting over drinks.
(Combat Kelly and his Deadly Dozen#6 (fb)) - The Deadly Dozen went to a USO dance, where Laurie danced with Kelly. They were broken up when Sawyer found another mission for them, and Sawyer assigned Captain Jack "Mad-Dog" Martin, a pilot who had abandoned three fellow fliers. The other members of the Deadly Dozen did not trust Martin, but had to work with him. The Deadly Dozen were sent to observe a Nazi fortress which had to be taken out so that the Allies could advance. From Martin's B-17, Sample studied the fortress, but could not find any weak spots. Martin dropped off the Deadly Dozen to aid the ground forces, but then seemed to abandon them.
(Combat Kelly and his Deadly Dozen#6) - Kelly prepared to lead the Deadly Dozen and surrounding troops at the fortress, but they were surprised by the sudden return of Mad-Dog Martin, who lost a wing from his plane in a dogfight, then flew his plane into the fortress' wall, blowing a hole through it. The Allies were finally able to break into the fortress, and captured it. The Deadly Dozen thought that Martin had died in the crash, but he turned alive, having bailed out, and they finally accepted him as a member.
(Combat Kelly and his Deadly Dozen#7) - As the Allies mopped up the fortress, the Deadly Dozen were sent to their rendezvous point on foot. Traveling through France, they found a farmhouse run by Sister Angelique, a French nun who had allowed a band of Germans to stay with her for food and shelter. When the Dozen entered her home, Ace attacked the Germans, and was finally shot in the arm by Erika, a Jewish girl who Sister Angelique cared for. Sister Angelique was a pacifist, and convinced the Deadly Dozen that if they wanted to share her shelter, they would have to put aside their animosity with the Germans, and surrender their weapons. Kelly made his men comply, and the Germans promised to turn themselves into their custody. Kelly befriended the German's leader, but Ace decided to kill the Germans in their sleep that evening. As he set out to do so, he found one of them trying to rape Erika, and they began to fight. The Americans and Germans nearly killed each other in the brawl that ensued, but Sister Angelique took up a rifle and threatened to shoot them all unless they stopped. The fighting ended, and the Deadly Dozen left Sister Angelique, taking all of the Germans as their prisoners.
(Combat Kelly and his Deadly Dozen#8) - The Deadly Dozen went on an underwater obstacle course test with live mines, and Laurie was caught on a net, but Kelly set her free. Kelly and Laurie began to be drawn to each other, and fell in love. However, Sawyer found another mission for the Deadly Dozen, sending them to confront Dr. Sweikert, a German who was performing horrendous medical experiments on his subjects. After swimming from their boat to the German coast, the Dozen captured Dr. Lola Steimle, who was supposed to go to work for Sweikert. Laurie impersonated Steimle, and Kelly dressed up as her driver, but when they reached Sweikert's facility, Kelly was found out, and left Laurie so that she could continue the mission. However, Kelly was captured, and Dr. Sweikert knew from his files what Dr. Steimle looked like, and so took Laurie prisoner as well.
(Combat Kelly and his Deadly Dozen#9) - 24 hours after Kelly and Laurie had left them, the rest of the Deadly Dozen decided they had to move in. Doc Watson tried to draw out one of the facility's guards so that Ace could shoot him, but Ace took too long, and Watson was killed. As the Deadly Dozen fought their way in, Jake Jensen was shot dead as well. The hospital put up steel doors to keep the Deadly Dozen out, and Donald Sample blew them open with a grenade, using his own body to shield his fellow soldiers from the blast. As they searched for Kelly and Laurie, Shigeta was shot in the back, leaving only Ace and Little Bear. Ace was killed in a firefight with a guard, but Little Bear reached Kelly, and they took Laurie with them, as she had been operated on by Sweikert. Little Bear and Kelly disguised themselves as doctors in order to get out, but as they loaded Laurie into an ambulance, Little Bear was shot in the back. Dying, Little Bear made sure the ambulance doors were shut, and sent Kelly on his way.
Kelly returned to Captain Sawyer and threw away his stripes and badges, resigning from his service.
Comments: Created by Gary Friedrich, Dick Ayers and Mike Esposito.
This team was clearly inspired by the 1967 movie The Dirty Dozen (based on a 1965 novel), which also featured ex-cons being recruited for dangerous missions.
The Deadly Dozen's colorful mix of headgear and accents was derived from the Howling Commandos. The Howlers could be recognized from each other because Pinky wore a beret, Izzy wore a helmet, Dugan wore a bowler, Reb had a southern accent, etc.
The Deadly Dozen's trademarks were: Jay Little Bear (mowhawk, red skin, bow and arrow); Roland Hamilton (smirk, deck of cards); Michael Miller (black skin, afro); Jake Jensen (black skin, ball cap, white temples); Emory Simpson (bandanna, cigarette, eyepatch); Donald Sample (mustache, beret); Doc Watson (army cap, mustache); Laurie Livingston (well...female); Larry Wagner (guitar, southern accent, long hair); Dino Manelli (garrison cap, curly hair); Percival Pinkerton (umbrella, English accent, shades, beret); Howard Shigeta (yellow skin); Hoss Cosgrove (headband); Combat Kelly (red hair).
This series is extremely choppy, as it's 12-member cast meant that few members received characterization (the bulk of it going to Kelly, Laurie, Little Bear and Ace), and Gary Friedrich seemed to change his mind about what kind of title he wanted to write on a monthly basis.
In Sgt. Fury#98, Sawyer promoted Dugan to sargeant so that he could lead the Deadly Dozen, but when Combat Kelly#1 picks up the story, he's a corporal again. If Friedrich originally intended for Dugan to headline his own book, he changed his mind quickly.
Ralph Cosgrove is written out in issue #1, and Simpson never appears after #1. Little Bear and Doc Watson were both added in #1 and continued to appear, but Mad-Dog Martin, introduced in #6-7, didn't turn up for the last story.
Issue #2 only featured four cast members, and issues #3 and #5 are flashback tales that do help elaborate on the characters' pasts, but don't really fit the format of the supposed team book.
Dino and Pinky's return to the Howlers was never elaborated on-- they simply resumed service with the Howlers in Sgt. Fury#106. In that story, Sawyer claimed that Fury was "short-handed," even though all 8 Howlers were present. Possibly Dick Ayers drew Pinky and Dino in by accident, and Friedrich had to run with it?
Issue #9 is a favorite among some fans, who find it funny in a dark way.
Speaking of funny, there's Captain America's dialogue in Fred Hembeck's Fantastic Four Roast#1: "And who can forget Sgt. Fury and his Howling Commandos Dum Dum, Pinky, Izzy, Gabe, Eric and Reb? Some of you may also recall Captain Savage and his Leatherneck Raiders. I myself only vaguely remember Combat Kelly and his Deadly Dozen, however..."
The Deadly Dozen have an entry in Marvel Legacy: The 1970's Handbook.
by Prime Eternal
CLARIFICATIONS: Images taken from: Last updated: 10/14/13
Any Additions/Corrections? please let me know.
Non-Marvel Copyright info
The Deadly Dozen should not be confused with:
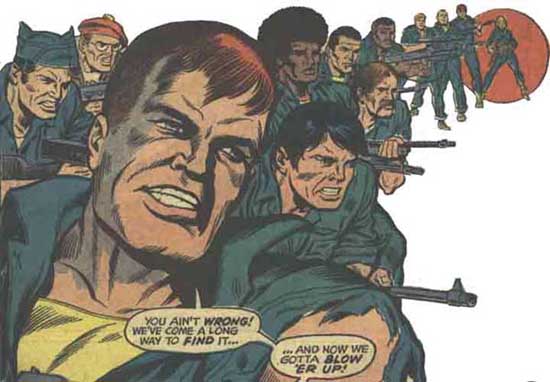
Combat Kelly#1, page 1
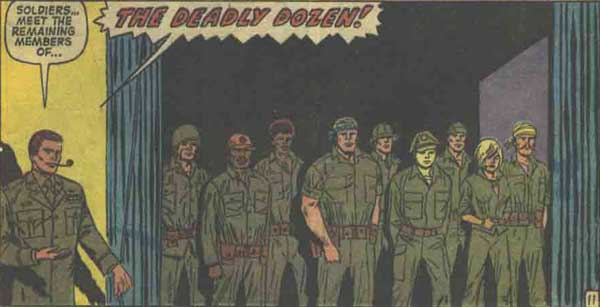
Sgt. Fury#98, page 11, panel 5
Combat Kelly and the Deadly Dozen#1 (June, 1972) - Gary Friedrich (writer), Dick Ayers (pencils), Jim Mooney (inks), Stan Lee (editor)
Combat Kelly and the Deadly Dozen#2 (August, 1972) - Gary Friedrich (writer), Dick Ayers (pencils), Mike Esposito (inks), Stan Lee (editor)
Combat Kelly and the Deadly Dozen#3-4 (October-December, 1972) - Gary Friedrich (writer), Dick Ayers (pencils), Mike Esposito (inks), Roy Thomas (editor)
Combat Kelly and the Deadly Dozen#5-6 (February-April, 1973) - Gary Friedrich (writer), Dick Ayers (pencils), Vince Colletta (inks), Roy Thomas (editor)
Combat Kelly and the Deadly Dozen#7 (June, 1973) - Gary Friedrich (writer), Dick Ayers (pencils), John Tartaglione (inks), Roy Thomas (editor)
Combat Kelly and the Deadly Dozen#8-9 (August-October, 1973) - Gary Friedrich (writer), Dick Ayers (pencils), Vince Colletta (inks), Roy Thomas (editor)
Sgt. Fury and his Howling Commandos#104 (November, 1972) - Gary Friedrich (writer), Dick Ayers (pencils), Vince Colletta (inks), Roy Thomas (editor)
All other characters mentioned or pictured are ™ and © 1941-2099 Marvel Characters, Inc. All Rights Reserved. If you like this stuff, you should check out the real thing!
Please visit The Marvel Official Site at: http://www.marvel.com