 Real
Name: Unknown
Real
Name: Unknown
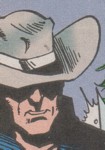
BLOWFLY
Real
Name: Unknown
Identity/Class: Human technology user
Occupation: Slave Gatherer
Group Membership: his team of slave gatherers
Affiliations: "Brumm", "Dudikoff", Heinrich, "Opaque", "Outback", "Red Lens", Slug, "Smylex", Sultan
Enemies: Tigra (Greer Nelson), Aborigines, many other slaves he sold
Known Relatives: None
Aliases: None
Base of Operations: small headquarter in an unknown area of Australia
First Appearance: Marvel Comics Presents I#162/1 (early September, 1994)
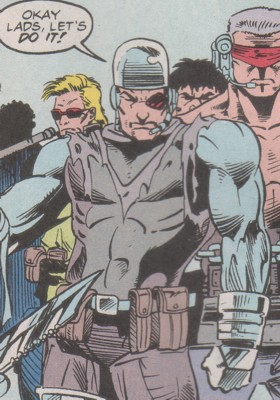
Powers/Abilities: None. He wore armor and was skilled in the use of many different guns, knives and spears.
 History:
(Marvel Comics Presents I#162/1 - BTS) - Blowfly was the leader of a group of high tech slave gatherers
for Sultan and others. He set up a HQ in the lands of the Aborigines. The
government didn't bother him and the Aborigines were in no position to complain.
(Marvel Comics Presents I#162/1) - Blowfly was hired by Sultan to bring him three women. He wanted to know if that was all his employer wanted and Sultan told him that he could bring anything else of interest along with them. Together with his team he attacked a village of the Aborigines. He started to shoot some Aborigines after Heinrich was injured by one of them. After all opposition was eliminated Blowfly asked Heinrich if he was alright. Blowfly then left the village with his team and the captured Aborigines.
(Marvel Comics Presents I#162/1 - BTS) - Blowfly drove to Temasika with three captured Aborigines women and Sultan bought them. One of the Sultan's ministers wanted some for himself and Blowfly returned to his HQ in Australia.
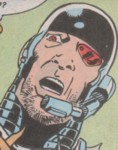
(Marvel Comics Presents I#163/2) - Blowfly told Heinrich about the wishes of Sultan's minister when he returned and told the captured Aborigines that they would all get a new home soon. He went into the HQ to drink a beer with Heinrich. When the lights went out and the base appeared to be under attack, he quickly got outside. He sent Heinrich back in to finish their unknown enemy. He heard terrible noises from the inside and all his men ran away. He thought it was just a trick of the Aborigines, but then he saw Tigra. He tried to shoot her, but none of his bullets hit her and Tigra captured him.
(Marvel Comics Presents I#164/4) - Tigra brought Blowfly tied up in chains to his captured men. The Aborigines wanted to kill three of his men because they had lost three of their women. Tigra didn't want this and asked Blowfly to bring her to the place where he took the women to. He agreed to do it and drove Tigra with his Hovercraft to Temasika. She warned him to wait for him because the lives of his crew depended on it. Blowfly seemed to be alright with it, but when she returned with the three women he was gone. Far away the Hovercraft of Blowfly could still be seen.
Comments: Created by David DeVreis, John Czop & Pablo Marcos
Blowfly and his crew of slave gatherers weren't given much background or story to work with. Most of them were just there to make up the numbers. Only two members except Blowfly were even named. Sometimes it isn't even clear who is around at the time because the reader sees them from a distance standing in the shadows.
Clarifications:
Blowfly has no known connections to
Heinrich has no known connections to
Slug has no known connections to
All unnamed characters who got names from me have no known connections to
"Brumm"
He participated in the attack on a Aborigine village and used a big gun like most of the others. He really liked his work and screamed "Yee-harrr!" while shooting at innocents. He fled when the lights went out in the HQ and was captured and brought to his allies by some Aborigines. His destiny after Blowfly's betrayal is unknown.
--Marvel Comics Presents I#162/1 (163/2 - BTS
"Dudikoff"
He participated in the attack on a Aborigine village and used a big gun like most of the others. He liked to wear red sunglasses. Somehow he fled from the HQ when the lights went out. He was later captured by the Aborigines and brought to his already captured allies. His destiny after Blowfly's betrayal is unknown.
--Marvel Comics Presents I#162/1 (163/2 - BTS

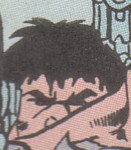
Heinrich
Heinrich used a big gun and a knife and participated in the attack on a Aborigine village. Heinrich immediately found a woman worth taking with them and was injured by an elderly Aborigine with a spear. After the opposition was eliminated he was asked by Blowfly if he was alright. The spear didn't hurt Heinrich too much and he just pulled it out. Together with Outback he goaded the captured Aborigines when they didn't move fast enough. He asked Blowfly how everything went when he returned from Temasika and was pleased to hear that the ministers of Sultan wanted more slaves. He drank a beer in the HQ with Blowfly, and was quick enough to get to the outside when the lights went out. He was sent back in to eliminate their attacker. Heinrich thought it was some predatory feline, but it was Tigra (so he was parly right - Loki). Heinrich was finished off by Tigra in a fast way. His gun was useless and his blood was spilled.
--Marvel Comics Presents I#162/1 (163/2

"Opaque"
He participated in the attack on a Aborigine village and used a big rifle like most of the others. He stood in the shadows all the time. He was never seen again and probably didn't make it out of the HQ when the lights went out.
--Marvel Comics Presents I#162/1 (163/2 - BTS
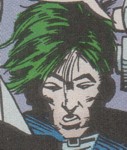
"Outback"
He participated in the attack on a Aborigine village and used a big rifle like most of the others. He goaded the captured Aborigines when they didn't move fast enough. He left the HQ when the lights went out and ran away when he heard the terrible noises from the inside. He wanted to return to the Hovercraft with the others, but nobody knew how to work it and so Slug decided against this option. He was captured by the Aborigines and tied up with chains. His destiny after Blowfly's betrayal is unknown.
--Marvel Comics Presents I#162/1 (163/2-164/4
"Red Lens"
He participated in the attack on a Aborigine village and used a big gun like most of the others. He left the HQ when the lights went out. He was the last one to make it and ran away when he heard the terrible noises inside the building. He was captured along with some allies by the Aborigines and the tied him up with chains. His destiny after Blowfly's betrayal is unknown.
--Marvel Comics Presents I#162/1 (163/2-164/4
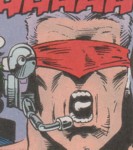
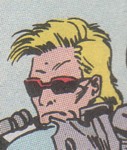
Slug
He participated in the attack on a Aborigine village and used a big gun like the most of the others. For unknown reasons he wore a headband in front of his eyes. He was fast enough to get out of the HQ when the lights went out. He screamed for Heinrich when he heard the noises from the inside. Heinrich didn't return and Slug ran away with his allies. He heard the screams of Blowfly from the distance. He didn't listen to Outback when he wanted them to return to the Hovercraft because nobody knew how to work it. He was captured by the Aborigines and they tied him up with chains. He was afraid to die when he heard that the Aborigines wanted to kill three of them because they lost three women to them. His destiny after Blowfly's betrayal is unknown.
--Marvel Comics Presents I#162/1 (163/2-164/4
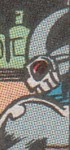
"Smylex"
He participated in the attack on a Aborigine village and used a gattling cannon and blade he had instead of hands. He was fast enough when the lights went out in the HQ and left the building. He ran away with his allies when he heard the noises from the inside. He was captured along with some allies by the Aborigines. They took away his weapons and tied him up with chains. His destiny after Blowfly's betrayal is unknown.
--Marvel Comics Presents I#162/1 (163/2-164/4
images:
Blowfly body shot: Marvel Comics Presents I#162, p6, pan2
Blowfly head shot: Marvel Comics Presents I#164, barcode side, p11, pan4
Heinrich head shot: Marvel Comics Presents I#162, p6, pan2
Slug head shot: Marvel Comics Presents I#163, p13, pan5
"Outback" head shot: Marvel Comics Presents I#163, p13, pan5
"Red Lens" head shot: Marvel Comics Presents I#163, p12, pan1
"Opaque" head shot: Marvel Comics Presents I#162, p6, pan2
"Brumm" head shot: Marvel Comics Presents I#162, p6, pan2
"Dudikoff" head shot: Marvel Comics Presents I#162, p6, pan2
"Smylex" head shot: Marvel Comics Presents I#163, p13, pan5
Appearances:
Marvel Comics Presents I#163 (September, 1994) - David Devries (writer), John Czop (pencils), Pablo Marcos (inks), Richard Ashford (editor)
Marvel Comics Presents I#164 (October, 1994) - David Devries (writer), John Czop (pencils), Pablo Marcos (inks), Richard Ashford (editor)
First Posted: 08/23/2004
Last updated: 08/23/2004
Any Additions/Corrections? please let me know.
Non-Marvel Copyright
info
All other characters mentioned or pictured are ™ and © 1941-2099
Marvel Characters, Inc. All Rights Reserved. If you like this stuff, you
should check out the real thing!
Please visit The Marvel Official Site at:
http://www.marvel.com/
Special Thanks to www.g-mart.com for hosting the Appendix, Master List, etc.!