 MORGAN
MORGAN
Real Name: Morgan (his last name?)
Identity/Class: Human, gangster; later technology user
Occupation: Mob leader, drug dealer, racketeer
Group Membership: Leader of his own gang; unnamed team under Nightshade's leadership
Affiliations: Black Tarantula, Cottonmouth, Gamecock, "Cockroach"
Hamilton, Hammerhead, Erik Killmonger, Lucifer/Aries, Mr.
Hyde, Nightshade, Stiletto (allies);
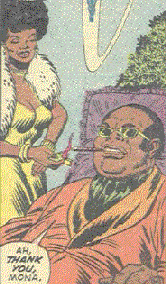
Billie, Bim, Enforcer Squad, Glitterbug, Joey, Jomo, Knuckles, Mac, Man Mountain Quint, Mona,
the Pusher, Reese, Reno, Rocky, Roscoe, Smasher Kreel, Spencer Jarret, Vinnie, Zooka
(agents)
Enemies: Black Goliath (Dr.
Bill Foster), Black Panther (T'Challa), Bullseye, Luke Cage (Power Man),
Captain America/Nomad (Steve Rogers), Cornell
Cottonmouth, Daredevil (Matt Murdock), Dr. Faustus, Falcon, Grand
Director, Iron Fist, Kingpin (Wilson Fisk), Joy Meachum, National Force (Grand Director/William Burnside, others), Nolo Contendre, Spider-Man, Trust;
formerly Nightshade
Known Relatives: None
Aliases: Bossman Morgan
Base of Operations: Harlem, New York; he had numerous offices, as well as a roof garden
First Appearance: Captain America I#152 (August, 1972)
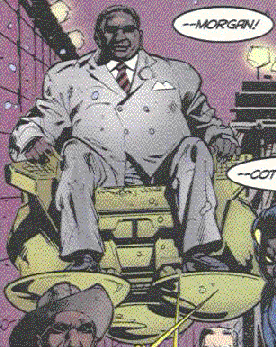
Powers/Abilities: None. Morgan was originally an ordinary mob boss, with access to dozens of thugs and enforcers. After his injury, he was outfitted with a hover chair for mobility, as he was presumably paralyzed below the waist. His hoverchair allowed him to float and fly through the air, although it did not seem to be built for speed, agility, or to contain any significant weaponry. In addition to the chair, he also used a cane/staff, which could fire bursts of energy.
Height: 5'8"
Weight: 237 lbs.
Eyes: Unrevealed
Hair: Black
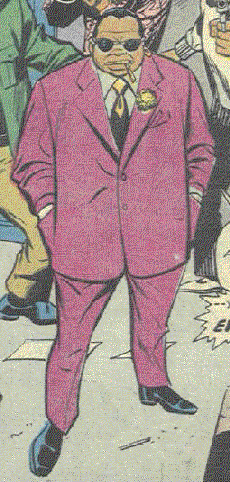
History: The majority of Morgan's past is unknown. He established himself as one of Harlem's leading crimelords, dealing in drugs, racketeering, extortion, and the like.
 (Captain America I#152) - Morgan
was employed by Mr. Hyde to order a batch of illicit chemicals.
The Falcon stopped the transport, tracked the source back to
Morgan, and dragged the information out of him, despite the
efforts of Morgan's men.
(Captain America I#152) - Morgan
was employed by Mr. Hyde to order a batch of illicit chemicals.
The Falcon stopped the transport, tracked the source back to
Morgan, and dragged the information out of him, despite the
efforts of Morgan's men.
(Captain America I#154) - Morgan accepted money from apparently unknown parties to leave Tyler's warehouse unlocked. The money turned out to be from the Captain America of the 1950s, who used it as a site to try to beat information out of the Falcon. After the Falcon got free, he tracked the location back to Morgan, but let him go (threatening to squash him like a bug if they ever met head on) after learning Morgan had no idea to whom he had rented the warehouse.
(Captain America I#157) - The Falcon again met up with Morgan, questioning him as to why crime had seemingly stopped in the city. Morgan tried, and failed, to recruit the Falcon to his side. The Falcon took off after Morgan got a got reporting the death of Captain America. (Surprisingly enough, Captain America did not, in fact, die).
(Captain America I#158) - The Falcon attempted to force Morgan to reveal the location of the Viper (Jordan Dixon/Strike) and the identity of the Cowled Commander. However, Morgan refused to talk, even at the threat of violence, because he knew he would be killed if he revealed info about them.
(Captain America I#165) - Morgan summoned the Falcon and
again, this time offering him super-powers if he would come work
for him. The Falcon refused, and Morgan told him he would have
him killed if he refused again.
(Power Man#19-20) - Cornell Cottonmouth tested Luke Cage by sending him to steal a heroin shipment from Morgan. Morgan and his men caught Cage in the act and attacked him. Cage defeated his men and then forced Morgan to allow him escape from the building.
(Captain America I#177-178) - Morgan allies himself with Lucifer/Aries/Rafe Michel - hybrid/duo/trio, giving him escape from the police, in exchange for requesting he kill the Falcon. Lucifer/Aries agreed, but had lost most of their powers and so had a difficult time accomplishing the task. Morgan became increasingly frustrated with them as they failed repeatedly.
(Captain America I#179) - The Falcon tracked down Morgan and taunted him with his failed assassination attempt
(Captain America I#183) - Morgan sent the Gamecock to kill the Falcon. Failing to locate the Falcon, the Gamecock encountered and was defeated by Captain America, then using the identity of Nomad. Nomad then confronted Morgan who admitted to sending the Gamecock, but had no information regarding the missing Falcon.
(Spectacular Spider-Man II#4-5) - With the Kingpin and Hammerhead temporarily out of the picture, Morgan sought to expand his power base. One of his agents unwittingly tried to extort money from the Vulture, and received the expected punishment. Morgan tried to recruit the Vulture to his side, and was quickly dismissed. The Vulture called him a joke and hung him from a lamppost. Eager for revenge, Morgan hired the Hitman to take out the Vulture. The Hitman and the Vulture both ran afoul of Spider-Man, who broke up their struggle. The Vulture was captured, but the Hitman got away.
(Spectacular Spider-Man II#7) - Spider-Man learned that it was Morgan who had hired the Hitman, and he warned him against crossing him in the future (giving him a Spider-powered chair spin in the process).
(Power Man and Iron Fist#51-52) - Morgan's operations were cut into by the plot of Nightshade, using her robot gang, which was seemingly led by R. U. Rossum. Morgan suspected that Rand-Meachum was somehow involved, and so he and his men confronted Iron Fist and tried to force information from him. Iron Fist took out his men, told Morgan he was barking up the wrong tree, and sent him on his way. Joy Meachum offered Morgan ten million dollars to kill Iron Fist, but he knew he had no chance, so he laid down his gun and walked away.
(Captain America I#232-233) - Doctor Faustus' plot involving the National Force stirred up a lot of racial tension in New York City. This drew the attention of Morgan, who sought to fight back against the National Force and its apparent leader, the Grand Director (who was actually his previous ally, the Captain America of the 1950s). Captain America knew that the Force wished to continue to inflame the situation, and tried to prevent Morgan from igniting a citywide race war. Morgan refused to listen, and sent a small army of men to take out the National Force, and Captain America if he got in their way. Captain America got between the two factions and kept their attention on attacking him until the National GUARD could arrive and drive both groups off.
(Marvel Team-Up I#88) - The Hole in the Wall gang kidnapped Franklin Richards and held him hostage, coercing Sue Richards (then the Invisible Girl) into doing their will. They had her steal a large amount of cash from Morgan's gang. As she continued to follow their orders, Morgan and his men tracked both she and the Hole in the Wall gang, and caught her in the crossfire against the rival gang. She was assisted by Spider-Man, but he was caught in the crossfire as well, and only her shield was protecting them all. Captain Jean DeWolff led a tactical NYPD squad to the scene of the struggle, broke it up, and arrested both gangs, including Morgan himself.
(Punisher I#2) - False information detailing the assassination of the Kingpin spread across the New York crime world. Trust employed Nolo Contendre to take out severl mob leaders. He sabotaged Morgan's elevator and the mobster seemingly died.
BTS - Morgan survived the fall, although he was apparently left a paraplegic.
(Black Panther III#16-17) - Now utilizing a fancy hoverchair, Morgan (alongside Cottonmouth, Cockroach Hamilton, and Stiletto) was one of the agents used by Nightshade and Erik Killmonger, and sent after the Black Panther. The Panther was joined/assisted by the Falcon, Power Man and Iron Fist, and eventually Black Goliath. Morgan and his allies ended up with the short end of the stick in the "Stupid Villain Bop."
(Daredevil II#82 (fb) - BTS) - Morgan was imprisoned at Ryker's Island and became one of the leader's among the prisoners.
(Daredevil II#82 - BTS) - Carlos LaMuerto approached Daredevil and told him that he had to choose a side. He remarked that Matt wasn't hanging around with Owl, Hammerhead or Morgan.
(Daredevil II#83 - BTS) - Morgan bribed a guard to be able to visit Matt Murdock in his cell.
(Daredevil II#83) - On crutches Morgan and two of his men visited Matt in his cell, but Matt didn't even greet him. Morgan offered him help to find out who was responsible for Foggy's death (Foggy wasn't really dead, but nobody knew this at this point), but Murdock didn't take the offer. Morgan began to threaten him, but eventually left with his men when he realized how angry Murdock currently was. Upon passing Fisk's cell Morgan told Fisk that everyone was waiting for Fisk to return to the general population in prison.
(Daredevil II#85) - Morgan met with Hammerhead and LaMuerto to discuss the planned riot at Ryker's Island that would leave Kingpin and Murdock both dead.
(Daredevil II#86) - Morgan, LaMuerto and Hammerhead watched the riot from an upper deck. They were waiting for their armed men, but they didn't came because Murdock had stopped them. Suddenly Bullseye attacked them and seemingly killed Morgan with a card, which cut open his throat.
Comments: Created by Gerry Conway and Sal Buscema.
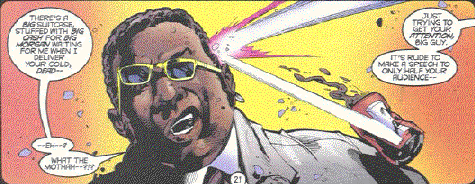
For the record, the soda that beaned Morgan was thrown by Cage.
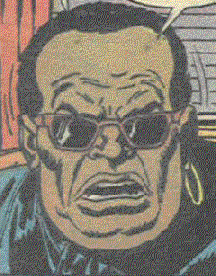
Morgan is one of the characters most likely to refer to an opponent as a "Jive Turkey."
As mentioned by Bob Almond, the
inker for the excellent Black Panther series, the initial plot
for Black Panther#16+17 had Discus and Gamecock, in place of Cottonmouth and Cockroach
Hamilton.
I think Discus may thus be an ally of Morgan as well, but he
may have been in the potty during the battle--Snood.
In addition, also per Bob:
"when Priest originally listed Morgan in the script I
informed editor Ruben Diaz that Morgan had been last seen
apparantly dead from that elevator fall from the PUNISHER LS and
I sent him a scan of the panel. Priest and Ruben
decided that the details of that sequence were ambiguous enough
to allow them to say that Morgan didn't die but was crippled and
they had Sal draw him in the hover chair. I assumed the thing had
weapons but none were used in the story. Sal forgot to draw
Morgan's earring so I added that in all of the panels with his
head. It's a minor thing but to me Morgan ain't Morgan without it
and I thought veteran readers would agree."
--We do!!!!!
Morgan received an entry in the All-New OHotMU Update#3.
Profile by Snood. Update by Markus Raymond (Daredevil II).
CLARIFICATIONS:
No known connections to:aka
the Forever Man, a former San Francisco recluse, who tried to
remake the world, and died in the process, and turned out to be
eternally resurrected, @ Spider-Woman I#33, Avengers I#218
Aries, who combined with Lucifer, is Grover
Raymond, @ Avengers I#120. He should be distinguished from:
who battled the Defenders under Scorpio and the East and
West Coast Avengers under Quicksilver, @ Defenders I#49, 50
--I don't know if there's any connection between the last two
Zodiac incarnation.
Lucifer is a native of the extra-terrestrial
Quist/Arcane, and the man responsible for the first crippling of
Professor X, @ X-Men I#9
Nomad, an alias used by
Captain America, Steve Rogers, when he retired from duty after
learning of high level US Government corruption,
@ Captain America I#180, should be distinguished from:
Scourge, @ Young
Men#24+Captain America I#153 (Bucky), Captain America I#282
(Nomad), Thunderbotls#34 (Scourge)
Appearances:
Captain America I#152 (August, 1972) - Gerry Conway (writer), Sal Buscema (pencils), Frank Giacoia (inks), Stan Lee (editor)
Captain America I#154 (October, 1972) - Steve Englehart (writer), Sal Buscema (pencils), John Verpoorten & Tony Mortellaro (inks), Roy Thomas (editor)
Captain America I#157-158 (January-February, 1973) - Steve Englehart & Steve Gerber (#157) (writer), Sal Buscema (pencils), John Verpoorten (inks), Roy Thomas (editor)
Captain America I#165 (September, 1973) - Steve Englehart (writer), Sal Buscema (pencils), Frank McLaughlin (inks), Roy Thomas (editor)
Power Man#30 (April, 1976) - Don McGregor (writer), Rich Buckler & Arvell Jones (pencils), Keith Pollard (inks), Marv Wolfman (editor)
Power Man#31 (May, 1976) - Don McGregor (writer), Sal Buscema (pencils), Crusty Bunkers (inks), Marv Wolfman (editor)
Captain America I#177-179 (September-November, 1974) - Steve Englehart (writer), Sal Buscema (pencils), Vinnie Colletta (inks), Roy Thomas (editor)
Captain America I#183 (March, 1975) - Steve Englehart (writer), Frank Robbins (pencils), Frank Giacoia (inks), Len Wein (editor)
Spectacular Spider-Man II#4-5 (March-April, 1977) - Archie Goodwin (writer), Sal Buscema (pencils), Mike Esposito (inks), Archie Goodwin (editor)
Spectacular Spider-Man II#7 (June, 1977) - Archie Goodwin (writer), Sal Buscema (pencils), Jim Mooney (inks), Archie Goodwin (editor)
Power Man and Iron Fist#51-52 (June-July, 1978) - Chris Claremont & Ed Hannigan (#52) (writer), Mike Zeck (pencils), Ernie Chan (#51) & Ricardo Villamonte (#52) (inks), Jim Shooter (editor)
Captain America I#232-233 (April-May, 1979) - Roger McKenzie & Jim Shooter (#232) (writer), Sal Buscema (pencils), Don Perlin (inks), Roger Stern (editor)
Marvel Team-Up I#88 (December, 1979) - Chris Claremont (writer), Sal Buscema (pencils), Eduardo Barreto (inks), Al Milgrom (editor)
Punisher I#2 (February, 1986) - Steven Grant (writer), Mike Zeck (pencils), John Beatty (inks), Carl Potts (editor)
Black Panther III#16-17 (March-April, 2000) - Christopher Priest (writer), Sal Velluto (pencils), Bob Almond (inks), Ruben Diaz (editor)
Daredevil II#82 (April, 2006) - Ed Brubaker (writer), Michael Lark (artist), Warren Simons (editor)
Daredevil II#83 (May, 2006) - Ed Brubaker (writer), Michael Lark (pencils), Stefano Gaudiano (inks), Warren Simons (editor)
Daredevil II#85-86 (July-August, 2006) - Ed Brubaker (writer), Michael Lark (pencils), Stefano Gaudiano (inks), Warren Simons (editor)
First Posted: 07/06/2002
Last updated: 12/09/2007
Any Additions/Corrections? please let me know.
All characters mentioned or pictured are
™ and © 1941-2099 Marvel Characters, Inc. All Rights
Reserved. If you like this stuff, you should check out the real
thing!
Please visit The Marvel Official Site at: http://www.marvel.com
Special Thanks to www.g-mart.com for hosting the Appendix, Master List, etc.!