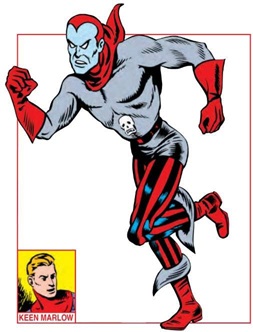
 "KEEN" MARLOW
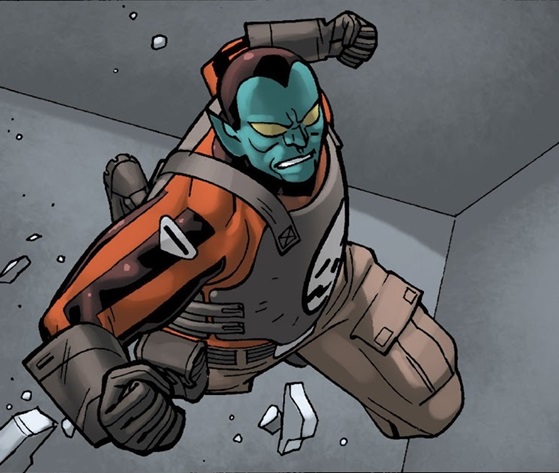
"KEEN" MARLOW
Real Name: Kevin Marlow
Identity/Class: Human mutate (World War I era to
the modern era)
Occupation: Retiree;
former military
operative, detective, intelligence operative, freedom fighter, hotel
waiter (while in disguise), reporter
Group Membership: None;
formerly an
unidentified military organization, the Central Detective Agency (Lt.
Jerry Crane, Kathy Dashiell), Allied Intelligence, the German
underground
Affiliations: Prof. Herman Berg, Blake, Bucky (James Barnes), Carol Butts, Captain America (Steve Rogers), the Central Detective Agency, Magma Cherni, "Trigger" Connolly, the Destroyer (Brian Falsworth), the Destroyer (Roger Aubrey) (see comments), the Destroyer (Darius), Eric, Vince Fago, Father Time (Larry Scott), the FBI, Felecia, Fraulein Voltz, the Freedom Station (Hans, others), Haley, Human Torch ("Jim Hammond"), Jack Frost, Chin Kiang, the Kore (Mother Ting, Lin Yan, others), Fred Kurt, Sgt. Stan Lee, Wing Lee, Harriet Marlow, Martha, Meyers, Mueller, Namor the Sub-Mariner (Namor McKenzie), Pastor Muller, Frank Piraud, Ruth Piraud, Prof. Eric Schmitt, Talley, Toro (Thomas Raymond), the US Coast Guard, Paul Voltz, Florence von Banger (Florence von Ward), J.W. Warburton, Tim Warburton, the Whizzer (Bob Frank, Sr.)
Enemies: Fred "Numbers" Bellman,
Bruiser, Bugsy, Crocodile, Doctor Devastation, the Horde (Krakoom,
numerous others), Ken Houdin, the Imperial Japanese military (Captain
Suicide, the
Face, General Kolie, General Muki,
General Sakki, the Juggernaut, numerous others), Dicky Marlow, Nazis
(Baron Uuh,
Heinrich
Bungler, Captain Achhimmel, Captain Freitag, Frank Craben, Doctor
Dragon/Leonard Schaefer, Fritz, the Headsman, Herr Gruber, Herr Schink,
Herr
Sin/Wilhelm von Sin, Rudolph Hess, Hieler, Adolf Hitler,
Karl, Ludlow, Major von Glib, the Red Skull/Johann Shmidt, Rudolph,
Frederick von Banger, Col. Von Bitters, Inga von Leche, Von Maus, Capt.
Maik von Nieusance, numerous others), Organite, the Pineapple Gang
(Flint, "Killer" Sikes, Spike, others), the Scar,
Rocky Scarpulla, Scavenger,
Technotronica
Known Relatives: Harriet Marlow (wife),
Felecia (daughter), Haley (granddaughter), Richard (brother, deceased),
Darius (Destroyer, son-in-law), unidentified
mother (presumed deceased), Florence von Banger
(Florence von Ward, ex-fiancee, presumed deceased)
Aliases: Der Zerstorer (German translation of
codename), Destroyer, "Keene" (misspelling of nickname), Louis Kramer,
Keen Marlowe (misspelling of real name);
(additional nicknames/insults): "Boy," "the
Dare-Devil Yankee," "Dear," "Dog,"
"Enemy of Dictators," "Enemy of Nazism,"
"Fool," "Friend," "the Greatest Single Enemy of the Axis," "Herr
Destroyer," "Honey," "Idiot," "Irresponsible Adventurer," "Justice
Loving
Crusader," "Meddler," "Mein Herr," "Mighty Battler for Justice Inside
Nazi
Germany," "the Mighty Destroyer," "Mighty Nemesis Inside Germany,"
"Nazidom's
Undying Enemy," "Pal," "the Proud Avenger of Justice," "Sir," "Svine,"
"Wise Guy," "Young Man;"
impersonated Capt. Freitag, the Headsman, Spike,
Col. Von Bitters, Von Maus, Capt. Miak von Nieusance
Base of Operations: A suburban home in an
unidentified USA city;
formerly New
York, USA; mobile
throughout the South Pacific; briefly France; mobile throughout Germany
First Appearance: Mystic Comics I#6 (October, 1941)
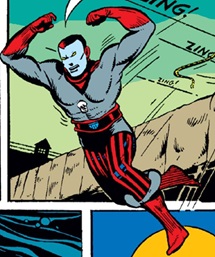
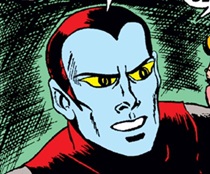
 Powers/Abilities: Kevin "Keen"
Marlow has superhuman strength allowing him to life 1000lbs. and
endurance sufficient to swim the English Channel. His durability is
also at superhuman levels, rendering him bulletproof and able to
survive an exploding bomb at point blank range with no discernible
physical damage. He also has enhanced reflexes and agility rivaling
that of a mountain tiger.
Powers/Abilities: Kevin "Keen"
Marlow has superhuman strength allowing him to life 1000lbs. and
endurance sufficient to swim the English Channel. His durability is
also at superhuman levels, rendering him bulletproof and able to
survive an exploding bomb at point blank range with no discernible
physical damage. He also has enhanced reflexes and agility rivaling
that of a mountain tiger.
Due to the variant Super-Soldier Serum in his bloodstream, Marlow also ages extremely slowly, appearing as and having the physical fitness of a man some twenty to thirty years younger than his true age. He also possesses enhanced healing in comparison to a normal man his age and build.
"Keen" Marlow is an excellent
athlete and hand-to-hand combatant, a master at disguise and voice
imitation, a capable pilot, skilled boxer and an accomplished detective
and investigator.
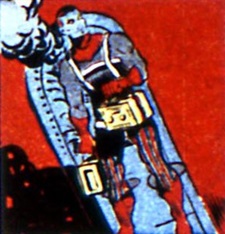
Marlow's original Destroyer
costume provided some protection against heat and he had been witnessed
changing from his civilian clothing to this costume almost immediately
or even while within the grasp of an enemy. It was unclear how he was
able to accomplish such an immediate transition (see comments). His later costume
was armored to provide additional durability and it contained several
pouches that store additional gear such as palm-sized explosive
devices. In his early days as the Destroyer, Marlow was known to carry
various daggers and knives in battle and he kept a small knife hidden
in the sleeve of his original costume. While during World War II, he
was known to occasionally use conventional firearms, Marlow preferred
not to use guns following the war, though he did once use an
experimental gun capable of immediately killing twenty enemies in one
blast.
In his early days, the Destroyer would often leave calling cards printed with a skull on them.
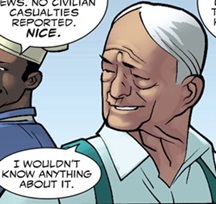
In his later years, "Keen" Marlow
had an extremely weak heart, damaged from three separate heart attacks.
Height: 6'1"
Weight: 215 lbs.
Eyes: Blue
Hair: Gray; formerly blonde
 History:
(Mystic Comics I#6 (fb) - BTS) - Kevin Marlow was born to a British
mother and as he grew up, he was nicknamed "Keen."
(Official Handbook of the Marvel Universe: Golden Age
2004 - Destroyer entry - BTS) - An American citizen with no
criminal record, "Keen" Marlow presumably eventually obtained a degree
in journalism.
(Mystic Comics I#6 (fb) - BTS) - As an adult, "Keen" became a renowned American newspaper reporter.
(Mystic Comics I#6 / 4 (fb) - BTS) - Marlow became
connected with the United States FBI and he used those connections to
start a drive against fifth columnists, resulting in the imprisonment
of the bund and Communist leaders.
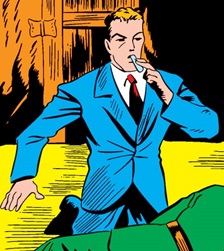 (Mystic Comics I#6 (fb)) - Following
the outbreak of World War II and false news reports coming out of
Germany in 1940, "Keen" Marlow met with his editor, who revealed that
he was
sending Marlow to Germany to write an inside story about what was
really happening in the country. When the editor mentioned that he
wanted Marlow to write the truth about Nazi Germany, an excited Marlow
asked when he would start and the editor informed Marlow that he would
be leaving that very day.
(Mystic Comics I#6 (fb)) - Following
the outbreak of World War II and false news reports coming out of
Germany in 1940, "Keen" Marlow met with his editor, who revealed that
he was
sending Marlow to Germany to write an inside story about what was
really happening in the country. When the editor mentioned that he
wanted Marlow to write the truth about Nazi Germany, an excited Marlow
asked when he would start and the editor informed Marlow that he would
be leaving that very day.
A week later, Marlow disembarked in Hamburg, Germany concerned that the Germans might discover that his mother was British. Deciding to first visit the Strohm prison, Marlow found the prison ghastly and he was turned away by a Nazi soldier when he tried to enter. Marlow then waited until nightfall and snuck over the prison walls, only to set off an alarm. Quickly spotted by guards, Marlow was captured as a spy and brought before the lieutenant, who ordered Marlow taken to the torture chamber. Refusing to be tortured, "Keen" Marlow furiously fought back against the Nazis but he was quickly felled by the lieutenant from behind. Awaking to find himself in a prison cell facing Nazi interrogation, Marlow was accused of being a spy and, despite his insistence that he was merely an American newspaperman trying to find a story, the Nazis revealed that they had also discovered Marlow's half-British heritage. Feeling as if Marlow had attempted to fool them, the Nazis had Marlow bound to the wall and whipped. Exclaiming that he was no spy and proclaiming the Nazis to be fools, Marlow soon passed out from the pain of the whipping.
(Official Handbook of the Marvel Universe A to Z TPB
Vol. 3 - Destroyer (Marlow/Aubrey) entry update text - BTS) - Marlow
shared a prison cell with the British Brian Falsworth.
 (Mystic Comics I#6 (fb)) - Soon
after,
German scientist Prof.
Eric Schmitt was thrown into Marlow's cell for refusing to provide the
Germans with his Super-Soldier formula. Witnessing Prof. Schmitt
hitting his head, Marlow rushed to the scientist's aid and the
depressed Schmitt revealed that he no longer wished to live in a
country where every man was treated as a slave. Thinking perhaps the
much younger Marlow could yet fight back, Schmitt revealed his
discovery of a secret formula that could help Marlow fight the Nazis.
The dying Schmitt then gifted Marlow with a vial of his formula and
guided Marlow on how to deactivate the acid trap on the vial meant to
keep the formula from falling into the wrong hands. Once the trap was
nullified, Prof. Schmitt urged Marlow to drink the formula, promising
that the formula would give Marlow power unmatched by any man. As the
serum took effect, Marlow witnessed Prof. Schmitt pass away and he
vowed to use the gift Schmitt had given him against the Nazis as the
Destroyer.
(Mystic Comics I#6 (fb)) - Soon
after,
German scientist Prof.
Eric Schmitt was thrown into Marlow's cell for refusing to provide the
Germans with his Super-Soldier formula. Witnessing Prof. Schmitt
hitting his head, Marlow rushed to the scientist's aid and the
depressed Schmitt revealed that he no longer wished to live in a
country where every man was treated as a slave. Thinking perhaps the
much younger Marlow could yet fight back, Schmitt revealed his
discovery of a secret formula that could help Marlow fight the Nazis.
The dying Schmitt then gifted Marlow with a vial of his formula and
guided Marlow on how to deactivate the acid trap on the vial meant to
keep the formula from falling into the wrong hands. Once the trap was
nullified, Prof. Schmitt urged Marlow to drink the formula, promising
that the formula would give Marlow power unmatched by any man. As the
serum took effect, Marlow witnessed Prof. Schmitt pass away and he
vowed to use the gift Schmitt had given him against the Nazis as the
Destroyer.
(Official Handbook of the Marvel Universe A to Z HC
Vol. 3 - Destroyer (Marlow/Aubrey) entry - BTS) - After
fellow prisoner Brian Falsworth subsequently downed another portion of
Schmitt's derivative Super-Soldier Serum, he found its effects were
less pronounced than Marlow's.
 (Mystic Comics I#6 (fb)) - The
guards
soon returned and, thinking Marlow had murdered
Prof. Schmitt, they attacked Marlow with a whip. Empowered by Schmitt's
formula, Marlow made quick work of the guards and rushed out into the
prison yard, where another group of guards were about to execute
prisoners via firing squad. Marlow rushed to take down the guards and
rescued the prisoners, soon turning one of the prison guns against the
Nazi soldiers to hold them at bay while the prisoners were led out of
the prison. Once most of the prisoners were freed, Marlow and some of
the prisoners locked the prison guards up in the cells.
(Mystic Comics I#6 (fb)) - The
guards
soon returned and, thinking Marlow had murdered
Prof. Schmitt, they attacked Marlow with a whip. Empowered by Schmitt's
formula, Marlow made quick work of the guards and rushed out into the
prison yard, where another group of guards were about to execute
prisoners via firing squad. Marlow rushed to take down the guards and
rescued the prisoners, soon turning one of the prison guns against the
Nazi soldiers to hold them at bay while the prisoners were led out of
the prison. Once most of the prisoners were freed, Marlow and some of
the prisoners locked the prison guards up in the cells.
Once all of the prisoners were
outside, Marlow proclaimed them all free and suggested they travel to
other nations, where they would be treated like men. Returning to his
Hamburg hotel room, Marlow considered returning to America to tell the
story of the prison as assigned but ultimately decided to remain in
Germany to finish the mission he had sworn to Prof. Schmitt to uphold:
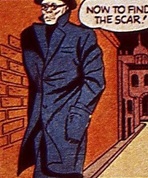
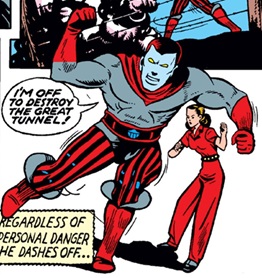
fighting Nazis. Still set on using the codename of the Destroyer,
Marlow devised a costume to disguise his true identity and donned it
before running out into the night to begin his fight. Noticing a woman
being accosted by Nazi soldiers a few blocks away, the Destroyer rescued
the woman and defeated the Nazis, pinning a black calling card
emblazoned with a skull on one of the soldiers.
(Official Handbook of the Marvel Universe: Golden Age 2004 - Destroyer entry - BTS) - Marlow decided to keep his identity as the Destroyer a secret, although when he needed to travel back to the United States, he apparently allowed his former cell mate Brian Falsworth to use the Destroyer identity in Germany during his absences.
(Official Handbook of the Marvel Universe A to Z HC
Vol. 3 - Destroyer (Marlow/Aubrey) - BTS) - Marlow established the
cover identity of travel writer Louis Kramer.
 (Mystic Comics I#6 (fb)) - A month later, following a
rampage through
Germany by the Destroyer, several Nazi soldiers enlisted the aid of
Nazi police officer Frederick von Banger to capture and decapitate the
Destroyer. Von Banger accepted the task on the condition that he be
provided ten men to assist him and while von Banger was hand-picking
the men who would aid in capturing the Destroyer, "Keen" Marlow
secretly infiltrated the soldiers and posed as one of them. After von
Banger had selected the ten soldiers (Marlow included as one of them)
at his home, he ordered the soldiers to stay at his side and announced
that the Destroyer wouldn't be able to escape him. Revealing his ruse,
Marlow announced that, on the contrary, von Banger wouldn't be able to
escape the Destroyer before donning his costume and confronting the
Nazi officer. Frederick von Banger quickly drew a sword but the
Destroyer pulled out a small knife hidden in the sleeve of his costume
and hurled into the arm of von Banger, pinning him to the wall. Warning
that the next knife would go through von Banger's heart, the Destroyer
ordered von Banger to call off his men and the cowardly von Banger did
as he was told. With the terrified Nazi soldiers against the wall, the
Destroyer warned them all that there was now someone who could beat
them at their own game in the form of himself. Marlow then proclaimed
that wherever there was injustice imposed by the Gestapo, wherever
someone was in need of protection from a power-mad dictator, the
Destroyer would be there. While the Destroyer was giving his speech,
Frederick von Banger activated a trap door beneath the Destroyer and
the hero fell down into a small pit. Von Banger then pulled a level
that caused water to pour into the pit before closing the top of the
trap door with a wooden cover. When the water neared his head, the
Destroyer pulled out a knife and braced himself against the walls of
the pit to force the knife up through the wooden door to free himself.
(Mystic Comics I#6 (fb)) - A month later, following a
rampage through
Germany by the Destroyer, several Nazi soldiers enlisted the aid of
Nazi police officer Frederick von Banger to capture and decapitate the
Destroyer. Von Banger accepted the task on the condition that he be
provided ten men to assist him and while von Banger was hand-picking
the men who would aid in capturing the Destroyer, "Keen" Marlow
secretly infiltrated the soldiers and posed as one of them. After von
Banger had selected the ten soldiers (Marlow included as one of them)
at his home, he ordered the soldiers to stay at his side and announced
that the Destroyer wouldn't be able to escape him. Revealing his ruse,
Marlow announced that, on the contrary, von Banger wouldn't be able to
escape the Destroyer before donning his costume and confronting the
Nazi officer. Frederick von Banger quickly drew a sword but the
Destroyer pulled out a small knife hidden in the sleeve of his costume
and hurled into the arm of von Banger, pinning him to the wall. Warning
that the next knife would go through von Banger's heart, the Destroyer
ordered von Banger to call off his men and the cowardly von Banger did
as he was told. With the terrified Nazi soldiers against the wall, the
Destroyer warned them all that there was now someone who could beat
them at their own game in the form of himself. Marlow then proclaimed
that wherever there was injustice imposed by the Gestapo, wherever
someone was in need of protection from a power-mad dictator, the
Destroyer would be there. While the Destroyer was giving his speech,
Frederick von Banger activated a trap door beneath the Destroyer and
the hero fell down into a small pit. Von Banger then pulled a level
that caused water to pour into the pit before closing the top of the
trap door with a wooden cover. When the water neared his head, the
Destroyer pulled out a knife and braced himself against the walls of
the pit to force the knife up through the wooden door to free himself.
Finding the room seemingly empty, the Destroyer pulled the lever controlling the water flow to its furthest, flooding the area. A hidden Nazi sentry attempted to attack the Destroyer from behind but he easily defeated the soldier and left the unconscious soldier outside von Banger's flooded home with a sign that read "Sorry I couldn't wait, von Banger. I'm afraid you will find your house rather damp!" He then ran off in search for his next adventure.
(Official Handbook of the Marvel Universe A to Z HC Vol. 12 - Union
Jack (Brian Falsworth) entry - BTS) - Following the debut of the heroic American adventurer Captain America, who had been
empowered by Project: Rebith's Super-Soldier Serum, both "Keen" Marlow
and Brian Falsworth realized that the formula given to them by Prof.
Schmitt had been a variant of the same Super-Soldier Serum that had
been separately developed in America, Germany and the UK.
(Mystic Comics I#6 / 4 (fb)) - The Destroyer became famous as a sort of mythical or legendary figure inside Nazi Germany conducting his one-man war against murderous killers and unrewarded for actions except for the gratitude of the hundreds of oppressed German citizens.
(Mystic Comics I#6 / 4 (fb) - BTS) - Having heard of the Destroyer's actions over in America, a comic book editor working for Timely Comics opted to use a story about the Destroyer as the opening story of a comic book being published called Mystic Comics. Seemingly as part of an agreement to use the Destroyer in his comic book, the editor learned of the Destroyer's secret identity as "Keen" Marlow.
 (All-Winners Comics I#2 / 3) - In June 1941, "Keen" Marlow decided
to spend a quiet evening with Florence von Ward and he arrived at
Florence's home to find it in shambles. Suspecting the work of the Nazi
Gestapo, Marlow was soon met from behind by a Nazi soldier, who
revealed that Florence had been taken to a concentration camp because
her uncle, Prof. Herman Berg, refused to aid the Nazis. As a friend of
Florence's, Marlow was captured as well but he near-instantaneously
donned his Destroyer costume, surprising the soldier before punching
the Nazi into a trash can. Determined to locate Florence, the Destroyer
then rushed off to the town of Dilldorf, where Florence's uncle was
said to reside. Arriving at Prof. Berg's home just as Nazi soldiers
were trying to force Berg to create bomb filled with Black Plague
germs, the Destroyer burst through the wall and began battling the
Nazis. Eventually, the lead soldier picked up a container filled with a
volatile chemical, causing the Destroyer to pause long enough to bit
hit over the head with the butt of one of the soldiers' guns. The hero
was then carried outside and dumped over the side of thousand foot
cliff. Recovering mid-fall, the Destroyer grabbed onto a shrub and used
it to swing to safety. Following a brief rest, the Destroyer decided to
rescue Florence before returning to save Prof. Berg. Guided to the
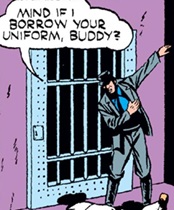
nearest concentration camp by a villager, the Destroyer infiltrated the
camp and knocked out a guard, donning his uniform to use as a disguise.
Boldly venturing into the camp in disguise, Marlow soon overheard a
group of guards discussing whipping Florence and he followed them,
using a whip against the guards before revealing his ruse and defeating
the guards. He then freed Florence and had the other prisoners disguise
themselves as guards to escape. Feigning the moving of Florence as a
prisoners, the Destroyer and the other prisoners managed to safely exit
the concentration camp before he and Florence parted ways with the
newly-freed prisoners.
(All-Winners Comics I#2 / 3) - In June 1941, "Keen" Marlow decided
to spend a quiet evening with Florence von Ward and he arrived at
Florence's home to find it in shambles. Suspecting the work of the Nazi
Gestapo, Marlow was soon met from behind by a Nazi soldier, who
revealed that Florence had been taken to a concentration camp because
her uncle, Prof. Herman Berg, refused to aid the Nazis. As a friend of
Florence's, Marlow was captured as well but he near-instantaneously
donned his Destroyer costume, surprising the soldier before punching
the Nazi into a trash can. Determined to locate Florence, the Destroyer
then rushed off to the town of Dilldorf, where Florence's uncle was
said to reside. Arriving at Prof. Berg's home just as Nazi soldiers
were trying to force Berg to create bomb filled with Black Plague
germs, the Destroyer burst through the wall and began battling the
Nazis. Eventually, the lead soldier picked up a container filled with a
volatile chemical, causing the Destroyer to pause long enough to bit
hit over the head with the butt of one of the soldiers' guns. The hero
was then carried outside and dumped over the side of thousand foot
cliff. Recovering mid-fall, the Destroyer grabbed onto a shrub and used
it to swing to safety. Following a brief rest, the Destroyer decided to
rescue Florence before returning to save Prof. Berg. Guided to the
nearest concentration camp by a villager, the Destroyer infiltrated the
camp and knocked out a guard, donning his uniform to use as a disguise.
Boldly venturing into the camp in disguise, Marlow soon overheard a
group of guards discussing whipping Florence and he followed them,
using a whip against the guards before revealing his ruse and defeating
the guards. He then freed Florence and had the other prisoners disguise
themselves as guards to escape. Feigning the moving of Florence as a
prisoners, the Destroyer and the other prisoners managed to safely exit
the concentration camp before he and Florence parted ways with the
newly-freed prisoners.
 Rushing back to Prof. Berg's home,
the Destroyer and Florence arrived just as one of the Nazi soldiers
tossed one of Berg's Black Plague bombs down towards the German village
as a test. The Destroyer moved swiftly to catch the bomb before its
detonation and he hurled back at the soldiers, where it exploded. As
the Black Plague sickened the soldiers, Prof. Berg yelled for Florence
and the Destroyer to hold their breath and once they were a safe
distance from the Plague, the Destroyer questioned Berg on whether any
more of the Black Plague bombs were created. Berg confirmed that the
other successfully created bomb was in the hands of the Nazi Gestapo
chief, who sent the bomb to Adolf Hitler himself in preparation of
dropping it on London. Florence expressed concern for the Destroyer but
he insisted he must stop the bomb from being dropped on London and
suggested that Florence and Prof. Berg escape Germany into Switzerland.
After being given a fake bomb by Prof. Berg, the Destroyer then made
his way to Hitler's stronghold, where he sabotaged Rudolph Hess' plane
with the fake bomb just before Hess took off to bomb London on Hitler's
orders. Hess soon took off and as Hitler bragged about his genius, one
of his soldiers spotted and pointed out the Destroyer. Revealing that
he had substituted the real bomb with one that couldn't even dent an
egg, the Destroyer tossed the real bomb over a mountain pass to prevent
any destructive explosions and an angry Hitler ordered his soldiers to
capture the hero. Easily making his way through the soldiers, the
Destroyer delivered an uppercut so powerful that it launched Hitler
into the air. The Destroyer dove off the nearby cliff and safely
parachuted to escape.
Rushing back to Prof. Berg's home,
the Destroyer and Florence arrived just as one of the Nazi soldiers
tossed one of Berg's Black Plague bombs down towards the German village
as a test. The Destroyer moved swiftly to catch the bomb before its
detonation and he hurled back at the soldiers, where it exploded. As
the Black Plague sickened the soldiers, Prof. Berg yelled for Florence
and the Destroyer to hold their breath and once they were a safe
distance from the Plague, the Destroyer questioned Berg on whether any
more of the Black Plague bombs were created. Berg confirmed that the
other successfully created bomb was in the hands of the Nazi Gestapo
chief, who sent the bomb to Adolf Hitler himself in preparation of
dropping it on London. Florence expressed concern for the Destroyer but
he insisted he must stop the bomb from being dropped on London and
suggested that Florence and Prof. Berg escape Germany into Switzerland.
After being given a fake bomb by Prof. Berg, the Destroyer then made
his way to Hitler's stronghold, where he sabotaged Rudolph Hess' plane
with the fake bomb just before Hess took off to bomb London on Hitler's
orders. Hess soon took off and as Hitler bragged about his genius, one
of his soldiers spotted and pointed out the Destroyer. Revealing that
he had substituted the real bomb with one that couldn't even dent an
egg, the Destroyer tossed the real bomb over a mountain pass to prevent
any destructive explosions and an angry Hitler ordered his soldiers to
capture the hero. Easily making his way through the soldiers, the
Destroyer delivered an uppercut so powerful that it launched Hitler
into the air. The Destroyer dove off the nearby cliff and safely
parachuted to escape.
Hours later, Rudolph Hess dropped
his fake bomb, which contained nothing more than a greeting letter to
London from the Destroyer. Hess was then shot at and forced to flee to
Scotland and both "Keen" Marlow and Florence von Ward heard news of
Hess' landing in Scotland over the radio.
 (History of the Marvel Universe
II#6) - Like many superheroes of his era, the Destroyer learned the
lesson that with great power, came great responsibility.
(History of the Marvel Universe
II#6) - Like many superheroes of his era, the Destroyer learned the
lesson that with great power, came great responsibility.
(Mystic Comics I#6) - Months
after it began, the Destroyer continued his sabotage campaign
throughout Germany, blowing up Nazi buildings, including one behind the
head of the Nazi police as he was scolding his men for allowing the
Destroyer to continue his destructive actions.
(Mystic Comics I#6 / 2) - As he arrived in a small German town, the Destroyer overheard the vows of Florence von Ward to avenge the death of her father at the hands of the ruthless Scar. Promising Florence that she would not be alone in her fight, the Destroyer offered to help Florence avenge her father and after she accepted his aid, the Destroyer helped Florence bury her father. Later admitting his suspicions that the Scar would strike again at the German ration lines, the Destroyer set out to find the Scar. Soon arriving to see German residents looting a store for clothing, the Destroyer appeared on the scene just as the Scar was pulling up in his car with a small group of soldiers. When the Scar pulled out the death ray he had used against Florence's father, the Destroyer rushed up and punched the gun from the Scar's hand. He then turned the gun on the Nazis but found himself unable to operate the experimental weapon. The soldiers quickly surrounded the Destroyer and he fought back until the Scar knocked the hero out with his cane. Awaking in the Scar's home lab, the Destroyer was ushered out into the Scar's personal torture yard and bound to a stake in front a large device the Scar referred to as the Burning Glass. Secretly pulling out of his knives, the Destroyer was subjected to the Burning Glass's augmented solar rays, only surviving the burning heat due to his protective costume while he secretly cut at his bounds with the knife. With seconds to spare, the Destroyer broke free and turned the Burning Glass against his captors, forcing their surrender. He then tied up the Scar's Nazi soldiers, leaving them with a sign that read "We have been very bad little Nazis, and we are very sorry." as he made his escape.
The next day, the Destroyer disguised himself as a German citizen and attempted to locate the Scar. He soon came across a group of Nazi soldiers gathered around a new anti-aircraft gun and overheard that it had been invented by the Scar. Deciding to return that evening to sabotage the new weapon, the Destroyer waited until RAF planes flew overhead before turning on spotlights to point out the anti-aircraft gun. Upon seeing the Destroyer-illuminated weapon, RAF pilot Ronald and his co-pilot bombed the anti-aircraft gun, blowing it to pieces as the smiling Destroyer watched. A day later, "Keen" Marlow was spending time with Florence von Ward when an announcement came over the radio of the execution of a prisoner at the hands of the Scar. Despite Florence's warnings that the announcement could be a trap, Marlow donned his Destroyer costume and rushed into action, noting that even if it was a trap, the Scar's death ray must be destroyed. Basing himself from a nearby rooftop, the Destroyer watched as the Scar prepared to execute a prisoner and, suspecting it to be a trap as well, the Destroyer nonetheless hurled a knife at the Scar's head. Quickly freeing the prisoner before the Scar and his terrified men could react, the Destroyer defeated the Scar's soldiers and when the Scar confronted the Destroyer personally with his death ray, the Destroyer hurled a knife through the Scar's wrist, causing the villain to drop his weapon and flee. Pursuing the Scar into a trap door escape room, the Destroyer battled the villain hand-to-hand and when the Scar began strangling the hero, the Destroyer punched him aside. In desperation, the Scar pulled out a small bomb and hurled it at the Destroyer, who caught the bomb in mid-air, only to be tackled by the Scar. As he lost his grip on the bomb and it slowly rolled away, the Destroyer managed to kick the Scar off of him and the villain hit a wooden post and fell onto the bomb, causing it to explode. With the Scar seemingly dead in the explosion, the Destroyer returned to Florence van Ward's house, where Florence admitted hopes that the Scar was truly dead.
(Official Handbook of the Marvel Universe A to Z HC Vol. 3 - Destroyer (Marlow/Aubrey) entry - BTS) - Florence decided to continue working with the Destroyer under the cover identity of "Florence von Banger" and the Destroyer ultimately revealed his true identity of "Keen" Marlow to her.
(All-Winners Comics I#3 / 6 (fb) - BTS) - "Keen" Marlow soon became engaged to Florence von Banger.
(Mystic Comics I#6 / 4 - BTS) - Dictating a response to the question of how they chose certain
superheroes to feature in their Mystic Comics comic books by his
editor, writer Stan Lee, who also learned of the Destroyer's secret
identity as "Keen" Marlow, noted how his editor had heard of the
now-famous Destroyer and chose him as the star of the comic book. In
the dictation, Stan also noted "Keen" Marlow's connection with the
United States FBI and how Marlow had helped bund and Communist leaders
get imprisoned following a drive against fifth columnists. Stan also
dictated his editor's well wishes and gratitude to the Destroyer in
hopes that the Destroyer would continue his noble work within Germany.
(Invaders I#18 (fb) - BTS) - At some point, Captain America heard reports of the Destroyer's true identity as American reporter "Keen" Marlow.
 (All-Winners Comics I#2 / 4) - The
Destroyer arrived to rescue an old man from being whipped by a Nazi
soldier, snatching the whip and using against the soldier himself. Once
the soldier fell to his knees to beg for mercy, the Destroyer halted
his attack and helped the rescued old man to his feet, promising that
no old person would be harmed as long as there was blood in his veins.
After assisting the old man, the Destroyer walked over to the
now-unconscious Nazi stormtrooper and pinned one of his calling cards
on the fallen soldier before picking up the soldier and carrying him to
the Nazi stormtroopers headquarters. Punching the stormtrooper to
prevent him from fully regaining consciousness, the Destroyer hung the
unconscious soldier from a window so his head with in a pig trough and
his legs were pinned, preventing him from getting back into the window.
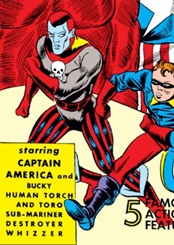
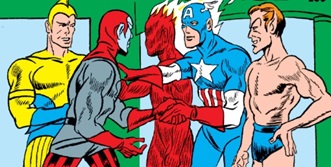
Having heard of the Destroyer's actions, his fellow superheroes Captain
America, Human Torch, Namor the Sub-Mariner, Bucky and Toro summoned
the editor of the All-Winners Comics comic book as well as "Keen"
Marlow and the heroic Whizzer's alter ego Bob Frank. Proclaiming that
the Destroyer and his fellow hero the Whizzer were the receive the
prestigious All Winners award for their bravery and courage, the
superheroes asked the comic book editor if the Destroyer and the
Whizzer's stories could share the pages of All-Winners Comics with the
other superhero stories being published in the comic. The editor
happily agreed and Namor welcomed the Destroyer and Whizzer's stories
into the
comic book.
(All-Winners Comics I#2 / 4) - The
Destroyer arrived to rescue an old man from being whipped by a Nazi
soldier, snatching the whip and using against the soldier himself. Once
the soldier fell to his knees to beg for mercy, the Destroyer halted
his attack and helped the rescued old man to his feet, promising that
no old person would be harmed as long as there was blood in his veins.
After assisting the old man, the Destroyer walked over to the
now-unconscious Nazi stormtrooper and pinned one of his calling cards
on the fallen soldier before picking up the soldier and carrying him to
the Nazi stormtroopers headquarters. Punching the stormtrooper to
prevent him from fully regaining consciousness, the Destroyer hung the
unconscious soldier from a window so his head with in a pig trough and
his legs were pinned, preventing him from getting back into the window.
Having heard of the Destroyer's actions, his fellow superheroes Captain
America, Human Torch, Namor the Sub-Mariner, Bucky and Toro summoned
the editor of the All-Winners Comics comic book as well as "Keen"
Marlow and the heroic Whizzer's alter ego Bob Frank. Proclaiming that
the Destroyer and his fellow hero the Whizzer were the receive the
prestigious All Winners award for their bravery and courage, the
superheroes asked the comic book editor if the Destroyer and the
Whizzer's stories could share the pages of All-Winners Comics with the
other superhero stories being published in the comic. The editor
happily agreed and Namor welcomed the Destroyer and Whizzer's stories
into the
comic book.
(Official Handbook of the Marvel Universe A to Z HC Vol. 3 - Destroyer (Marlow/Aubrey) entry - BTS) - Despite having also escaped numerous times, the Destroyer had been captured by Nazis on multiple occasions to the point where his true identity was discovered.
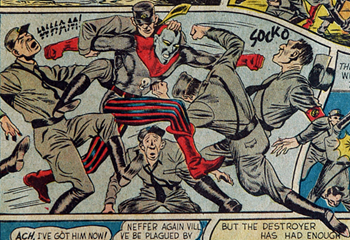
 (All-Winners Comics I#3 / 6) - While working
in Germany in September 1941, the Destroyer witnessed an oncoming Nazi
supply train and
he opted to stop the train by placing logs onto the train track,
causing a train wreck. Checking the wreckage for survivors, the
Destroyer found the old engineer, who had been held captive and
tortured by the Nazis into helping construct a secret invasion tunnel
to Britain. A surviving Nazi soldier soon spotted the Destroyer and
trained his gun onto the hero but the Destroyer snatched the gun away
and used it to bat the soldier away, refusing to leave the scene. Now
determined to learn more about the secret invasion tunnel, the
Destroyer soon spotted a series of Nazi supply trucks and he
commandeered one of them, traveling to the next roadblock. When the
soldiers at the roadblock stopped the truck for inspection, the
Destroyer punched the two soldiers from the truck window and continued
on his way.
(All-Winners Comics I#3 / 6) - While working
in Germany in September 1941, the Destroyer witnessed an oncoming Nazi
supply train and
he opted to stop the train by placing logs onto the train track,
causing a train wreck. Checking the wreckage for survivors, the
Destroyer found the old engineer, who had been held captive and
tortured by the Nazis into helping construct a secret invasion tunnel
to Britain. A surviving Nazi soldier soon spotted the Destroyer and
trained his gun onto the hero but the Destroyer snatched the gun away
and used it to bat the soldier away, refusing to leave the scene. Now
determined to learn more about the secret invasion tunnel, the
Destroyer soon spotted a series of Nazi supply trucks and he
commandeered one of them, traveling to the next roadblock. When the
soldiers at the roadblock stopped the truck for inspection, the
Destroyer punched the two soldiers from the truck window and continued
on his way.
 The next day,
two Nazi soldiers were tasked with
following the "stranger" "Keen" Marlow and they entered his apartment
as Marlow was shaving. Thinking he could get more info on the secret
invasion tunnel from the Nazi officers, Marlow fought back and forced
the officers to reveal the tunnel's location but a guard barged in with
a whip and threatened to kill Marlow. Revealing his Destroyer costume
beneath his civilian clothes, Marlow knocked out the guard and departed
to take care of the secret tunnel. Traveling to an airplane factory
hours away and unaware his fiancee Florence had been captured by Nazis,
the Destroyer commandeered a German plane and used it to destroy the
German airplane factory before flying to Britain to warn them of the
German secret invasion tunnel being constructed. Suspicious of the
Destroyer since he had arrived in a German plane, the British
government informed the Destroyer that he would be held prisoner to use
as a prisoner exchange with Germany in an effort to get Florence von
Banger back. Upon hearing that Florence had been captured from the
British government official, the Destroyer became determined to rescue
Florence and used a dangling rope to swing over the walls of the
British prison and escape into the ocean. Swimming across the English
Channel, the Destroyer arrived at the German concentration camp housing
Florence by nightfall. Tracking down Florence's location within the
concentration camp, the Destroyer arrived in the room as the Nazi
Doctor Dragon was trying to torture information out of Florence. The
Destroyer grabbed the whip from the surprised Doctor Dragon's hand and
quickly disposed of the villain, absconding with Florence towards the
camp's exit. Hurling grenades at the armored car sent after himself and
Florence, the Destroyer blew up the car. When more guards arrived to
stop the duo's escape, Florence leaped the camp's fence and the
Destroyer battled the guards. Outside the camp, the Destroyer and
Florence hid beneath a pile of rubble while the guards ran past and the
Destroyer then suggested Florence remain in hiding there while he
departed to take care of the important job of destroying the Germans'
secret invasion tunnel.
The next day,
two Nazi soldiers were tasked with
following the "stranger" "Keen" Marlow and they entered his apartment
as Marlow was shaving. Thinking he could get more info on the secret
invasion tunnel from the Nazi officers, Marlow fought back and forced
the officers to reveal the tunnel's location but a guard barged in with
a whip and threatened to kill Marlow. Revealing his Destroyer costume
beneath his civilian clothes, Marlow knocked out the guard and departed
to take care of the secret tunnel. Traveling to an airplane factory
hours away and unaware his fiancee Florence had been captured by Nazis,
the Destroyer commandeered a German plane and used it to destroy the
German airplane factory before flying to Britain to warn them of the
German secret invasion tunnel being constructed. Suspicious of the
Destroyer since he had arrived in a German plane, the British
government informed the Destroyer that he would be held prisoner to use
as a prisoner exchange with Germany in an effort to get Florence von
Banger back. Upon hearing that Florence had been captured from the
British government official, the Destroyer became determined to rescue
Florence and used a dangling rope to swing over the walls of the
British prison and escape into the ocean. Swimming across the English
Channel, the Destroyer arrived at the German concentration camp housing
Florence by nightfall. Tracking down Florence's location within the
concentration camp, the Destroyer arrived in the room as the Nazi
Doctor Dragon was trying to torture information out of Florence. The
Destroyer grabbed the whip from the surprised Doctor Dragon's hand and
quickly disposed of the villain, absconding with Florence towards the
camp's exit. Hurling grenades at the armored car sent after himself and
Florence, the Destroyer blew up the car. When more guards arrived to
stop the duo's escape, Florence leaped the camp's fence and the
Destroyer battled the guards. Outside the camp, the Destroyer and
Florence hid beneath a pile of rubble while the guards ran past and the
Destroyer then suggested Florence remain in hiding there while he
departed to take care of the important job of destroying the Germans'
secret invasion tunnel.
Making his way into the secret invasion tunnel, the Destroyer was knocked out from behind by Doctor Dragon and tied up in the tunnel's control room. A short time later, as Doctor Dragon was ordering preparations for a British invasion, the recovering Destroyer realized his ropes were loose and he wiggled free. Surprising Doctor Dragon with a punch, the Destroyer hit a dynamite switch that blew up the secret invasion tunnel, causing a flood of ocean water that further destroyed the tunnel. The Destroyer then contacted the British government and informed them that the Germans' secret invasion tunnel had been destroyed, allowing the British to take care of the cleanup. Doctor Dragon then pulled a gun on the Destroyer and ordered his remaining men to capture the hero but the Destroyer easily knocked out the three men inside the control room. He then picked up the unconscious Doctor Dragon and carried him to a German plane, taking down two Nazi guards along the way and noting that he would be taking Doctor Dragon into British custody.
(Official Handbook of the Marvel Universe A to Z HC Vol. 3 - Destroyer (Marlow/Aubrey) entry - BTS) - While "Keen" Marlow was traveling to Britain to turn Doctor Dragon in to British authorities, Brian Falsworth began his own German sabotage campaign using the Destroyer identity.
(All-Winners Comics I#5 / 9 (fb) - BTS) - At some point, "Keen" Marlow became acquainted with anti-Nazi German Paul Voltz and he acquired an intelligence operative position in Washington.
(Official Handbook of the Marvel Universe A to Z HC Vol. 3 -
Destroyer (Marlow/Aubrey) entry - BTS) - Returning to Germany as an
authorized Allied Intelligence officer, Marlow allowed Falsworth to
continue using the Destroyer identity to confuse efforts to capture
either of them, although it was unrevealed if the two ever met again to
formalize the arrangement.
 (Mystic Comics I#7 / 4 (fb)) -
In an effort to capture the Destroyer, Ludlow, the
leader of a squad of Nazi stormtroopers, began arresting citizens of a
small German town, knowing the Destroyer would investigate and be led
into a trap. As predicted, the Destroyer did hear of the citizens of
the town being arrested in the dead of night by Nazi stormtroopers and
he predictably decided to investigate the town disguised as a German
farmer. After mingling with the townspeople and making friends with
some of them, the Destroyer learned that the townspeople were being
arrested to lure him into a trap. Despite knowing that his life was at
risk from the trap, the Destroyer determined that he must try to rescue
the arrested German townspeople and he ducked into an alley to discard
his disguise and go into action. Reaching the concentration camp where
the prisoners were being kept, the Destroyer defeated one of the camp
guards and utilized the guard's uniform as a disguise to venture
further into the camp. He was soon discovered and knocked out. Awaking
some time later to find himself tied to a chair, the Destroyer was led
to a stone wall, where he faced a firing squad. Ludlow revealed that he
had freed the German townspeople now that he had captured the Destroyer
and the Destroyer opted to go out fighting so he sprang into action
seconds before Ludlow's sword came down to signal his men to fire.
Taking Ludlow hostage, the Destroyer forced Ludlow to lead him to the
outer gates but before escaping, the Destroyer decided to force Ludlow
to show his true cowardice by challenging Ludlow to a duel to the
death. Easily defeating Ludlow in sword duel within five seconds, the
Destroyer watched as Ludlow fell to his knees to beg for his life,
proving to his men how cowardly he truly was. Having humiliated Ludlow,
the Destroyer escaped the concentration camp into a car and sped away.
(Mystic Comics I#7 / 4 (fb)) -
In an effort to capture the Destroyer, Ludlow, the
leader of a squad of Nazi stormtroopers, began arresting citizens of a
small German town, knowing the Destroyer would investigate and be led
into a trap. As predicted, the Destroyer did hear of the citizens of
the town being arrested in the dead of night by Nazi stormtroopers and
he predictably decided to investigate the town disguised as a German
farmer. After mingling with the townspeople and making friends with
some of them, the Destroyer learned that the townspeople were being
arrested to lure him into a trap. Despite knowing that his life was at
risk from the trap, the Destroyer determined that he must try to rescue
the arrested German townspeople and he ducked into an alley to discard
his disguise and go into action. Reaching the concentration camp where
the prisoners were being kept, the Destroyer defeated one of the camp
guards and utilized the guard's uniform as a disguise to venture
further into the camp. He was soon discovered and knocked out. Awaking
some time later to find himself tied to a chair, the Destroyer was led
to a stone wall, where he faced a firing squad. Ludlow revealed that he
had freed the German townspeople now that he had captured the Destroyer
and the Destroyer opted to go out fighting so he sprang into action
seconds before Ludlow's sword came down to signal his men to fire.
Taking Ludlow hostage, the Destroyer forced Ludlow to lead him to the
outer gates but before escaping, the Destroyer decided to force Ludlow
to show his true cowardice by challenging Ludlow to a duel to the
death. Easily defeating Ludlow in sword duel within five seconds, the
Destroyer watched as Ludlow fell to his knees to beg for his life,
proving to his men how cowardly he truly was. Having humiliated Ludlow,
the Destroyer escaped the concentration camp into a car and sped away.
(Mystic Comics I#7) - Weeks later, as the Nazi Herr Sin
demonstrated his drone planes that would magnetically attract
themselves to British ships, one of his soldiers warned against the
Destroyer but Herr Sin gloated that he would wipe the Destroyer out
just as he had done to a British ship mere moments earlier. Herr Sin
then announced the Destroyer to be his next victim as the Destroyer
himself assisted malnourished German civilians Eric and Martha. The
Destroyer ordered Eric and Martha to go to the second floor of a nearby
building and wait for him then he antagonized some nearby Nazi soldiers
into attacking him. After easily defeating the Nazi soldiers, the
Destroyer took advantage of the newfound lack of guards to demand food
from a nearby grocer despite not having any food stamps. The terrified
grocer willingly gave the Destroyer armfuls of food and the Destroyer
warned that if the grocer refused to give any hungry person food going
forward, he would have to answer to the Destroyer. Smiling, the
Destroyer departed the grocery store and hurled the food (complete with
the Destroyer's calling card) up into the second floor window of the
room housing Eric and Martha.
Later, "Keen" Marlow and Florence von Ward (now
using the assumed name of "Florence von Banger") walked up to Herr
Sin's base of operations claiming to be lost hikers and feigned
ignorance of what the Nazis were up to. Unaware of Marlow's true
identity, Herr Sin allowed them to witness his impending destruction of
another British ship and, quickly realized what Herr Sin intended to
do, Marlow faked a stumble and fell into Herr Sin, causing him to lose
control of the drone plane he intended to use as a weapon of
destruction and thereby saving the British ship. Angry that Marlow had
ruined his attack on the ship, Herr Sin ordered Marlow and Florence to
be sent off to a concentration camp. As they were led away, Marlow
apologized for involving Florence in the mission and promised to find a
way to escape the camp and destroy Herr Sin's drone plane inventions. A
short time later, during a meeting with Adolf Hitler, Herr Sin was
ordered to capture the Destroyer while the already-captured "Keen"
Marlow attempted to think of a way out of the concentration camp. A
soldier soon arrived and ordered Marlow to be taken out of his cell to
a firing squad. Seconds before the squad fired on him, however, Marlow
backflipped over the stone wall he was placed against. He quickly
changed into his Destroyer costume outside and returned to the camp,
surprising a guard that he easily defeated. Finding another guard, the
Destroyer interrogated him to learn Herr Sin's location before dunking
the guard in a water trough. When more guards appeared, the Destroyer
took them all on at once and, as more and more guards dogpiled onto
him, the Destroyer quietly sneaked out from the dogpile, leaving the
guards battling each other as he made his way to Crolor Mountain, where
Herr Sin planned to attack the British Army. Arriving at Herr Sin was
bragging to a soldier about the medal Hitler would give him for
destroying the Army, the Destroyer hurled a knife, hitting the photo of
the medal Herr Sin was showing his soldier. The Destroyer then engaged
Herr Sin in hand-to-hand combat as Herr Sin launched his drone planes
and during the battle, Herr Sin managed to hit the Destroyer in the
shoulder with his wooden cane.
The downed and weakened Destroyer attempted to crawl towards the drone planes' control deck but Herr Sin noticed and ordered soldiers to stop the hero. Pushing his way through a swarm of Nazi soldiers inch by inch, the Destroyer managed to grab the control deck and down the drone planes just a few feet from their targets. Herr Sin attacked the Destroyer himself, announcing plans to kill the hero, but, despite his wounded shoulder, the Destroyer managed to hurl Herr Sin from the side of the mountain to his death. With Herr Sin dead, the Destroyer turned his attention towards Sin's soldiers but the soldiers opted to surrender and devote their lives fighting for liberty. Convinced of the soldier's claims, the Destroyer allowed them to go free then used Herr Sin's control deck to impersonate Herr Sin and order Florence to be freed from the concentration camp. The next day, Adolf Hitler fumed at another plan ruined by the Destroyer while the freed Florence commended "Keen" Marlow on a job well done.
(Mystic Comics I#7 / 4 (fb) - BTS) - In December 1941, the Destroyer broke into a Nazi prison and freed fifteen important political prisoners who were being tortured.
(Mystic Comics I#7 / 4) - The Destroyer raced off into the night with one of the freed prisoners as Nazi soldiers pursued, firing on the escaping duo. After the Destroyer and the former prisoner got far ahead of their pursuers, they stopped at the grass of a nearby forest to rest and the former prisoner mentioned how thrilling the Destroyer's many adventures must be. Admitting that the adventures kept him from getting rusty, the Destroyer vowed to not completely rest until the threat of Nazism had been destroyed and when the former prisoner laughed that their escape must have been the most narrow escape the Destroyer had ever made, the Destroyer joked that their escape was nothing compared to some of the tight spots he had been in. He then related to the former prisoner the story of his duel with the Nazi stormtrooper leader Ludlow and how he had made a narrow escape after humiliating the leader. Following the story, the Destroyer noted to the former prisoner that if every German citizen came to realize how cowardly the Nazi leaders truly were, they could overthrow them and free themselves. The hero then proclaimed that it was his duty to make the German citizens realize that before bidding the former prisoner goodbye, wishing him luck, and parting ways.
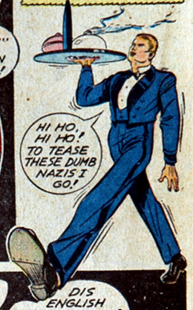 (Mystic Comics I#8 / 3) - Still posing as an idle
tourist in Germany during March 1942, "Keen" Marlow happened upon a group of Nazi
soldiers beating a man in the street for painting the letter "V" on
buildings. Rushing into a nearby alley, Marlow donned his Destroyer
costume and ran back out to rescue the beaten man, fiercely battling
the soldiers to allow the beaten man to escape. Once the man had gotten
a safe distance away, the Destroyer opted to run off himself and when
the soldiers fired on him, the hero ducked into a nearby hotel for
cover, quickly finding a waiter's uniform to disguise himself. When the
soldiers entered the hotel, they asked the "new waiter" if he had seen
the Destroyer enter the hotel and Marlow, feigning a bad German accent,
claimed he had seen the Destroyer head down the street. He then laughed
as the Nazi soldiers ran off down the street in search of the hero.
Noticing a "waiter wanted" sign, the disguised Marlow decided to apply
for the job and was soon hired. His first task was to deliver hot soup
to a table and when Marlow overheard the two soldiers at the table
bragging about torturing some professors in a concentration camp,
Marlow deliberately dumped the hot soup onto the soldiers and claimed
it was an accident. When Marlow then harshly beat at one of them while
claiming to be helping him clean up, the two soldiers angrily left and
Marlow was reported to his boss by the hotel's cook. Uncaring of
Marlow's excuses for the "accident," his boss ordered him to deliver
food to one of the hotel rooms. Upon seeing that the room housed two
Nazi soldiers who were attempting to torture a British officer for
information, Marlow returned the room minutes later as the Destroyer,
forcing the two soldiers to flee by hurling their own hot poker at
them. The Destroyer then freed the British officer and the two escaped
the hotel together.
(Mystic Comics I#8 / 3) - Still posing as an idle
tourist in Germany during March 1942, "Keen" Marlow happened upon a group of Nazi
soldiers beating a man in the street for painting the letter "V" on
buildings. Rushing into a nearby alley, Marlow donned his Destroyer
costume and ran back out to rescue the beaten man, fiercely battling
the soldiers to allow the beaten man to escape. Once the man had gotten
a safe distance away, the Destroyer opted to run off himself and when
the soldiers fired on him, the hero ducked into a nearby hotel for
cover, quickly finding a waiter's uniform to disguise himself. When the
soldiers entered the hotel, they asked the "new waiter" if he had seen
the Destroyer enter the hotel and Marlow, feigning a bad German accent,
claimed he had seen the Destroyer head down the street. He then laughed
as the Nazi soldiers ran off down the street in search of the hero.
Noticing a "waiter wanted" sign, the disguised Marlow decided to apply
for the job and was soon hired. His first task was to deliver hot soup
to a table and when Marlow overheard the two soldiers at the table
bragging about torturing some professors in a concentration camp,
Marlow deliberately dumped the hot soup onto the soldiers and claimed
it was an accident. When Marlow then harshly beat at one of them while
claiming to be helping him clean up, the two soldiers angrily left and
Marlow was reported to his boss by the hotel's cook. Uncaring of
Marlow's excuses for the "accident," his boss ordered him to deliver
food to one of the hotel rooms. Upon seeing that the room housed two
Nazi soldiers who were attempting to torture a British officer for
information, Marlow returned the room minutes later as the Destroyer,
forcing the two soldiers to flee by hurling their own hot poker at
them. The Destroyer then freed the British officer and the two escaped
the hotel together.
 The next day,
reports of the Destroyer's rescue
of a British spy reached Adolf Hitler and the Nazi leader ordered the
hero captured. In an effort to accomplish the task, one of the Nazi
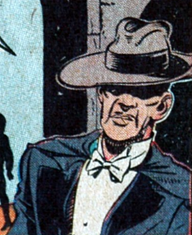
officers summoned the Gestapo's manhunter, Von Maus, who devoted his
life to the capture of the Destroyer. Unaware that Von Maus was
searching for him, the disguised "Keen" Marlow returned to his waiter
job and soon found himself waiting on Von Maus, who had entered the
large hotel in hopes of finding a trace of the Destroyer. Noticing
Marlow's false German accent, Von Maus soon became suspicious when he
also overheard Marlow grumbling an insult about Nazis despite Marlow's
quick attempt to cover for his words. Suspecting his waiter was the
Destroyer, Von Maus claimed he would be executing the captured
Destroyer later and, falling for Von Maus' ruse, Marlow secretly
followed Von Maus when he departed the hotel, worried that he might be
executing an innocent man thought to be the Destroyer. When Marlow
followed Von Maus into a dark alleyway, Von Maus revealed his ruse and
Marlow ditched his disguise to reveal his Destroyer costume as Von Maus
prepared to kill the hero. Dodging Von Maus' attempts to stab him with
his cane sword, the Destroyer ultimately kicked the sword from Von
Maus' hand and knocked the manhunter out with an uppercut.
The next day,
reports of the Destroyer's rescue
of a British spy reached Adolf Hitler and the Nazi leader ordered the
hero captured. In an effort to accomplish the task, one of the Nazi
officers summoned the Gestapo's manhunter, Von Maus, who devoted his
life to the capture of the Destroyer. Unaware that Von Maus was
searching for him, the disguised "Keen" Marlow returned to his waiter
job and soon found himself waiting on Von Maus, who had entered the
large hotel in hopes of finding a trace of the Destroyer. Noticing
Marlow's false German accent, Von Maus soon became suspicious when he
also overheard Marlow grumbling an insult about Nazis despite Marlow's
quick attempt to cover for his words. Suspecting his waiter was the
Destroyer, Von Maus claimed he would be executing the captured
Destroyer later and, falling for Von Maus' ruse, Marlow secretly
followed Von Maus when he departed the hotel, worried that he might be
executing an innocent man thought to be the Destroyer. When Marlow
followed Von Maus into a dark alleyway, Von Maus revealed his ruse and
Marlow ditched his disguise to reveal his Destroyer costume as Von Maus
prepared to kill the hero. Dodging Von Maus' attempts to stab him with
his cane sword, the Destroyer ultimately kicked the sword from Von
Maus' hand and knocked the manhunter out with an uppercut.
Donning Von Maus' clothing to disguise himself, the Destroyer then traveled to pay a visit to Adolf Hitler himself. When Hitler asked if "Von Maus" had caught the Destroyer, the disguised Destroyer performed an uppercut into Hitler's face disguised as a Nazi salute. Feigning an apology, the Destroyer next asked Hitler to sit down while he explained about the Destroyer, only to knock the chair out from underneath Hitler as he sat down. Revealing his ruse by tossing away Von Maus' clothing, the smiling Destroyer then announced that he must be going, forcefully smacking Hitler on the back before plowing his way through Hitler's guards to escape. As the hero ran off, Hitler groaned that the Destroyer had gotten away again, unaware that the hero had taped a big letter "V" on the dictator's back.
(Invaders I#18 - BTS) - While meeting the Destroyer
(Brian Falsworth) and perhaps to keep his true knowledge of the
Destroyer ("Keen" Marlow) a secret due to Brian's British accent (see comments), a suspicious Captain
America (Steve Rogers) commented only that he had heard of the
Destroyer and thought he was American.
Perhaps to keep the cover of there being multiple Destroyers active at
the time, Brian replied back that perhaps Captain America had not heard
nearly enough about the Destroyer. After Brian recounted his origin
story, Captain America questioned whether Brian had ever been an
American reporter named "Keen" Marlow, as the FBI had thought and who
Brian truly was, at which point Brian removed his mask to reveal
himself as Brian Falsworth.
 (All-Winners Comics I#4 / 6) - Hitler summoned
Gestapo head Heinrich Bungler and ordered him to either capture the
Destroyer or die. Unaware that Bungler was planning to trap the
Destroyer, the hungry "Keen" Marlow waited in a restaurant to dine with
Florence. Soon overhearing some men discussing the impending death of
Pastor Muller at the hands of Heinrich Bungler, Marlow left a note for
Florence and departed the restaurant. Changing into his Destroyer
costume, Marlow hurled a note back into the restaurant through a window
and the men opened the note to read a proclamation from the Destroyer
that Pastor Muller would not be beheaded. The Destroyer then rushed
over to the Gestapo prison where Heinrich Bungler based himself but
when the hero tried to climb the wall, he found the top of the wall
covered in sharp glass. His hands cut up, the Destroyer dropped down
into the prison, where he was immediately attacked by Nazi guards.
Despite his injured hands, the Destroyer furiously fought back until he
was seemingly overcome by sheer numbers. When Heinrich Bungler came to
check on the limp body of the Destroyer, the hero sprang back to his
life, having feigned defeat, and he took Bungler hostage. Utilizing
Bungler as a human shield, the Destroyer tried to venture further into
prison but when the terrified Bungler fainted, the Destroyer left his
unconscious body behind and escaped the prison. Unsure of where to go
about his hands while the Gestapo was still in pursuit, the Destroyer
traveled to Florence's home in hopes that she could bandage his wounds.
(All-Winners Comics I#4 / 6) - Hitler summoned
Gestapo head Heinrich Bungler and ordered him to either capture the
Destroyer or die. Unaware that Bungler was planning to trap the
Destroyer, the hungry "Keen" Marlow waited in a restaurant to dine with
Florence. Soon overhearing some men discussing the impending death of
Pastor Muller at the hands of Heinrich Bungler, Marlow left a note for
Florence and departed the restaurant. Changing into his Destroyer
costume, Marlow hurled a note back into the restaurant through a window
and the men opened the note to read a proclamation from the Destroyer
that Pastor Muller would not be beheaded. The Destroyer then rushed
over to the Gestapo prison where Heinrich Bungler based himself but
when the hero tried to climb the wall, he found the top of the wall
covered in sharp glass. His hands cut up, the Destroyer dropped down
into the prison, where he was immediately attacked by Nazi guards.
Despite his injured hands, the Destroyer furiously fought back until he
was seemingly overcome by sheer numbers. When Heinrich Bungler came to
check on the limp body of the Destroyer, the hero sprang back to his
life, having feigned defeat, and he took Bungler hostage. Utilizing
Bungler as a human shield, the Destroyer tried to venture further into
prison but when the terrified Bungler fainted, the Destroyer left his
unconscious body behind and escaped the prison. Unsure of where to go
about his hands while the Gestapo was still in pursuit, the Destroyer
traveled to Florence's home in hopes that she could bandage his wounds.
Arriving at Florence's home, the Destroyer warned
of the Gestapo's impending approach and Florence quickly cleaned and
bandaged his wounds. When the Destroyer asked for milk bottles,
Florence at first thought he was crazy but when the Gestapo came
knocking on Florence's door, the Destroyer filled the bottles with
benzine before forcing the Gestapo back by breaking Florence's door off
its hinges. Commending Florence on the padded bandages and suggesting
he might start padding his gloves with the bandages going forward, the
Destroyer noticed the fleeing soldiers getting into armored cars. He
then grabbed one of the benzine-filled milk bottles and hurled it at
one of the cars, only to miss, hitting only the car's tire and causing
the bottle to fall harmlessly on the ground. He succeeded in hitting
the car's gas tank with a second bottle, blowing it up. After hitting
two more cars, the remaining armored car sped away from the scene and
the Destroyer revealed to Florence his mission to rescue Pastor Muller
from Heinrich Bungler. When Florence expressed interest in accompanying
the Destroyer on his mission, the Destroyer refused, instead getting
Florence to the safety of the American Hotel, where he asked Florence
to stay and wait for him to return. Remarking that men were all alike,
a tearful Florence expressed hatred for the hero but the Destroyer
claimed he couldn't help matters, as his mission was no job "for a
woman."
Returning to the prison, the Destroyer scouted the outside of the prison walls before finding a guard that he took down. The Destroyer then attempted to scale the prison wall but only managed to slide off the wall's glass-like surface. Determined to rescue Pastor Muller, the Destroyer subsequently climbed a power pole and tightrope-walked across the power lines into the prison. Making his way to Heinrich Bungler's office, the Destroyer took down two guards outside the office door and entered the room to find two elite guards inside. Defeating the two elite guards, the Destroyer forced them to tell him where Bungler was and, upon learning that Bungler was at the execution block about to behead Pastor Muller, the Destroyer rushed out into the courtyard and leaped to attack the executioner just as the executioner's axe was coming down. Turning the axe towards Bungler himself, the Destroyer was talked out of beheading Bungler by the rescued Pastor Muller, who reminded the hero that taking a life was a sin. The terrified Bungler collapsed and as the Destroyer and Pastor Muller fled the scene, the Destroyer revealed that he was only trying to scare Bungler and Muller admitted he'd been fooled by the Destroyer's scare tactics. Once safe, the Destroyer brought Pastor Muller to visit Florence at her new apartment.
 (Mystic Comics I#9) - From his new apartment,
"Keen" Marlow listened to an announcement of an impending Adolf Hitler
speaking engagement over the radio with Florence von Banger. After
Florence they go listen to Hitler rant and rave, Marlow accompanied
Florence to the speaking engagement, where Florence poked fun at the
dictator. Soldiers soon walked over to Marlow and Florence, demanding
they salute Hitler or be sent to a concentration camp. Marlow and
Florence then watched as the Freedom Station broadcasted over Hitler's
microphone, taunting and heckling the dictator. Assuming the culprit
behind the heckling to be the Destroyer, Hitler subsequently ordered
his soldiers to bring him the Destroyer dead or alive. Subsequently
paying a visit to one of the Freedom Station's alternating bases of
operations, the Destroyer was commended for his work and he guested on
the Station's broadcast that night, urging the listeners to overthrow
the Nazis to restore peace and democracy. The broadcast was interrupted
by the arrival of Nazi soldiers led by Baron Uuh and the Destroyer
leaped into battle against them. Defeating the soldiers as Baron Uuh
fled, the Destroyer forced the soldiers to denounce Nazism and promote
democracy over the Freedom Radio's broadcast. Following the broadcast,
the Destroyer aided the Freedom Station in gathering all of their
equipment to move to another location before Baron Uuh sent more
troops. As the Destroyer and the Freedom Station moved to the woods,
Baron Uuh began a manhunt for the Destroyer, offering one million marks
as a reward to whoever provided the Destroyer. Baron Uuh and a squadron
of soldiers soon visited "Keen" Marlow's new apartment, where they
found and captured Florence von Banger for refusing to give up any
information.
(Mystic Comics I#9) - From his new apartment,
"Keen" Marlow listened to an announcement of an impending Adolf Hitler
speaking engagement over the radio with Florence von Banger. After
Florence they go listen to Hitler rant and rave, Marlow accompanied
Florence to the speaking engagement, where Florence poked fun at the
dictator. Soldiers soon walked over to Marlow and Florence, demanding
they salute Hitler or be sent to a concentration camp. Marlow and
Florence then watched as the Freedom Station broadcasted over Hitler's
microphone, taunting and heckling the dictator. Assuming the culprit
behind the heckling to be the Destroyer, Hitler subsequently ordered
his soldiers to bring him the Destroyer dead or alive. Subsequently
paying a visit to one of the Freedom Station's alternating bases of
operations, the Destroyer was commended for his work and he guested on
the Station's broadcast that night, urging the listeners to overthrow
the Nazis to restore peace and democracy. The broadcast was interrupted
by the arrival of Nazi soldiers led by Baron Uuh and the Destroyer
leaped into battle against them. Defeating the soldiers as Baron Uuh
fled, the Destroyer forced the soldiers to denounce Nazism and promote
democracy over the Freedom Radio's broadcast. Following the broadcast,
the Destroyer aided the Freedom Station in gathering all of their
equipment to move to another location before Baron Uuh sent more
troops. As the Destroyer and the Freedom Station moved to the woods,
Baron Uuh began a manhunt for the Destroyer, offering one million marks
as a reward to whoever provided the Destroyer. Baron Uuh and a squadron
of soldiers soon visited "Keen" Marlow's new apartment, where they
found and captured Florence von Banger for refusing to give up any
information.
Unaware of Florence's capture, the Destroyer
helped the Freedom Station set up a mobile base and from it he
broadcasted a signal over an Adolf Hitler speech threatening the
dictator and urging the German people to rid themselves of Adolf
Hitler. When they finished the broadcast, the Destroyer and Freedom
Station found their mobile truck headquarters surrounded by Nazi
soldiers. The Destroyer jumped into battle but was quickly overwhelmed
and as he was dragged to the ground, the hero valiantly ordered the
Freedom Station to flee for their own safety. Once the Freedom
Station's truck had sped away, the Destroyer again tried to fight the
Nazis but he was soon knocked out by one of them. He was then brought
before Adolf Hitler himself and the dictator ordered the Destroyer
bound for torture. Taken to a dungeon and chained to a wall, the
Destroyer noticed Florence von Banger, prompting a futile attempt to
break free. Inspired by seeing the swastika branding iron Baron Uuh was
preparing to use on Florence, the Destroyer managed to snatch the brand
from the Baron and put it to his chest, burning through his chains. He
then went straight for Hitler, putting the dictator in a headlock, but
when the Destroyer heard Florence screaming for help, he turned his
attention towards Baron Uuh. Hurling the branding iron and hitting
Baron Uuh in the rear end, the Destroyer forced the Baron to flee and
he rescued Florence. The two then fought their way through a squadron
of Nazi soldiers and escaped over the camp walls.
Fleeing into the woods, the Destroyer and Florence decided to locate the Freedom Station's new base. Hours later, they succeeded and the Destroyer regrouped with Freedom Station. After helping the group move to yet another location inside a bomber plane, the Destroyer told Florence to stay safe inside the Freedom Station's secret headquarters before he and the Freedom Station's leader, Hans, flew off. From the air, the Destroyer overheard a broadcast of Hitler's latest speech and he took to the airwaves once more to urge the people to revolt against Hitler. The airborne Freedom Station was soon tracked by German aircraft using a radio directional finder. Despite attempts to evade the German planes, the Destroyer's bomber was soon hit and the hero parachuted out of the plane with the Freedom Station's equipment intact. Burying the equipment after landing, the Destroyer ventured through the woods and made his way back to Florence's new apartment.
(Official Handbook of the Marvel Universe: Golden Age 2004 -
Destroyer entry - BTS) - As Marlow's brought him in and out of Germany,
it occasionally became unclear which of the Destroyer's adventures in
Germany were Marlow and which were either Brian Falsworth or Roger
Aubrey.
 (All-Winners Comics I#5 / 9 (fb))
- In an effort
to save the captured Paul Voltz from execution in June 1942, the Destroyer and a
group of rebels waited for the executioner, Nazi villain the Headsman, and escort to depart for the
execution before downing both of them and taking their place. Entering
Voltz's prison in disguise, the Destroyer brought with him a rubber
cast of Volt'z head from Voltz's self-portrait and tied it loosely to
his executioner's axe. After the Destroyer's allies took down Voltz's
guards, they located the confused Voltz and led him to his impending
"execution," telling him to make sure to drop his head against the
execution block to give the appearance of losing his head.
(All-Winners Comics I#5 / 9 (fb))
- In an effort
to save the captured Paul Voltz from execution in June 1942, the Destroyer and a
group of rebels waited for the executioner, Nazi villain the Headsman, and escort to depart for the
execution before downing both of them and taking their place. Entering
Voltz's prison in disguise, the Destroyer brought with him a rubber
cast of Volt'z head from Voltz's self-portrait and tied it loosely to
his executioner's axe. After the Destroyer's allies took down Voltz's
guards, they located the confused Voltz and led him to his impending
"execution," telling him to make sure to drop his head against the
execution block to give the appearance of losing his head.
(All-Winners Comics I#5 / 9) - Still posing as the Headsman, the Destroyer watched as the guards lowered Paul Voltz
onto the execution block. He then brought down his axe in such a way
that he shook lose the rubber cast of Voltz's head, causing the cast to
fall as if it had been decapitated from Voltz's body. Claiming that the
job had been done, the Destroyer feigned a salute to the Nazi soldier
overseeing the execution and the Destroyer's men placed the
still-living Paul Voltz into a coffin and he was placed in a truck so
his "remains" could be delivered to his daughter. One hour later, the
Destroyer's men and Voltz's daughter arrived at her home, where Voltz
revealed to his daughter that he was still alive. The Destroyer then
revealed his ruse by discarding the executioner's clothing and Voltz
questioned how the Destroyer was able to accomplish the feat of faking
Voltz's death and sneaking him out of prison. Relating how he and his
men had replaced the real executioner, escort and soldiers, the
Destroyer noted that they now had to ensure Paul Voltz made it safely
out of the country.
Later, the Destroyer changed out of his costume to make an appearance at Voltz's daughter's home in his true identity of "Keen" Marlow to pay his respects for the seemingly deceased Paul. Unaware of Marlow's identity of the Destroyer or his involvement in her father's rescue, Fraulein Voltz went along with Marlow's comments about her father being dead and Marlow soon suggested they go eat together in an effort to keep Voltz's daughter from sitting and grieving. While out eating with Voltz's daughter, Marlow overheard two men discussing an impending attack on three liberal publishers, Luther, Kleinman and Goetz. Refusing to let the trio die, the Destroyer opted to first close out the rescue mission of Paul Voltz by hurling the rubber cast of Voltz's head through the window of Nazi Captain Achhimmel with a note that gloated about Voltz escaping to America. Infuriated that Voltz had escaped with the help of the Destroyer, Captain Achhimmel ordered the wily Inga von Leche to assist in capturing the Destroyer and a short time later, "Keen" Marlow witnessed Captain Achhimmel and Inga enter the restaurant he frequented. Suspecting Inga to be a spy, Marlow kept an eye on her and when Achhimmel arranged for Inga to trip into Marlow's arms, Marlow introduced himself as writer Louis Kramer and struck up a conversation with Inga. Feigning to be pro-Nazi, "Kramer" suggested they capture the Destroyer by appealing to his vanity and utilizing a Destroyer impostor to draw the hero out. Inga volunteered "Kramer" to be the impostor and suggested they could create a fake prisoner escape. Agreeing to be his own double, Marlow suggested the three condemned publishers could be used in the fake escape and the plan was set.
The next day, after Inga and Captain Achhimmel
made the arrangements for the fake escape, Marlow returned to Inga and
Achhimmel and donned his Destroyer costume, with Inga and Achhimmel
none the wiser as to his true identity. "Louis Kramer" then arranged
for Achhimmel and Inga to get into the prison cell with the condemned
publishers and act like prisoners themselves to quiet suspicions,
assuring them that he would return in two hours to take down the lone
guard and free them. As he claimed, the Destroyer did indeed return to
free Achhimmel and Inga alongside the three condemned publishers. Once
they had all gotten to safety, Captain Achhimmel began to worry their
plan to draw out the real Destroyer had failed but the Destroyer
arranged for a note to arrive announcing his presence and assuring the
publishers they would be freed by nightfall. The Destroyer then ran
outside to confront six arriving Nazi soldiers. Removing his mask to
prove he was "Louis Kramer, the impostor Destroyer," the real Destroyer
suggested three of the soldiers tie up the other three and empty their
rifles to further convince the "real" Destroyer of the escape attempt.
After the soldiers did as ordered, the Destroyer revealed his ruse to
the soldiers by taking them down. He then returned to the Inn where
Achhimmel, Inga and three publishers were taking refuge to reassure
them as "Louis Kramer" before changing back into his Destroyer costume
to make an appearance as the "real" Destroyer, whom they all assumed
had been led right into their trap. Taking down a Nazi cook at the Inn,
the Destroyer entered the room with Achhimmel and Inga, prompting Inga
to fire her gun at the hero, accidentally hitting and killing Captain
Achhimmel. Keeping up his fake identity of Louis Kramer, the Destroyer
captured Inga and claimed "Kramer" had attempted to trap him numerous
times but he always escaped.
The Destroyer then led the three publishers outside, where the allies who had helped him get Paul Voltz out of the country arrived to meet him and pick up the publishers. After ordering his men to get the publishers out the same way they had with Voltz, the Destroyer asked for one of the men to hit him in the eye to help him keep up his dual identity as Louis Kramer. He then returned to Inga in his civilian clothes (and with a new black eye) and when Inga questioned where "Kramer" had been, Marlow claimed the Destroyer had gotten to him. The lying Inga then claimed the Destroyer had killed Achhimmel and "Kramer" congratulated her on the promotion. Later returning to Berlin to meet with Voltz's daughter, "Keen" Marlow thought to himself how talented of a multiple personality he must be, as he was a liberal German to Voltz's daughter, a Nazi agent with Inga von Leche and Louis Kramer to the Washington Secret Service, with none of them knowing he was really the Destroyer.
(Official Handbook of the Marvel Universe A to Z HC Vol. 3 -
Destroyer (Marlow/Aubrey) entry - BTS) - Marlow's actions tricking Inga
von Leche laid the groundwork for further manipulations of the Nazis.
(Mystic Comics I#10) - During a visit with
Florence von Banger in August, "Keen" Marlow looked over reports that more
prisoners were coming into Germany from occupied countries and Florence
suspected the new prisoners would be used as slave labor. When Marlow
expressed an opinion that the prisoners would fight back with the
proper leader, Florence deduced that Marlow would soon be going back
into action as the Destroyer. Insisting that someone had to stand up to
the Nazis, Marlow departed and he soon came across some Nazi soldiers
beating prisoners of war for not working fast enough. Refusing to stand
by and let the beatings continue, Marlow ducked into a nearby doorway
and changed into his Destroyer costume. Recognizing the Destroyer from
Hitler's wanted list, the soldiers attacked the Destroyer but the
Destroyer gallantly fought back, inspiring the prisoners to join in the
fight against the soldiers. The Destroyer and the prisoners quickly
defeating the soldiers and the hero got the prisoners to the safety of
a nearby empty store, where he promised to get them more food and
ammunition to assist in their fight against the Nazis.
The next day, Florence von Banger witnessed Nazi production expert Herr Gruber leaving a conference with Adolf Hitler and she reported back to "Keen" Marlow. Suspecting that Hitler had moved Gruber to a new mission, Marlow announced plans to sabotage any Nazi factories wherever they were found. The following day, Marlow witnessed Herr Gruber enter his base and he quietly followed as the Destroyer, overhearing Gruber's plans to build production plants underground. The Destroyer was soon spotted by a soldier and attacked but the Destroyer escaped into Herr Gruber's office, where he fought Gruber and his men directly. He soon escaped through Gruber's window, dodging gunfire and promising Gruber they would meet again. Days later, Marlow discussed with Florence how he had not heard any news about Gruber, promising to search every forest in hopes of finding Gruber's hidden factories. The hero subsequently spent weeks searching forests to no avail and when he stopped in the third forest he searched to rest, the rock he was resting on flipped up and he realized he had stumbled across a secret entrance to one of Gruber's factories. Jumping back, the Destroyer accidentally stepped on a stick, alerting the exiting Nazi soldiers to his presence. After defeating the soldiers to keep his presence a secret, the Destroyer snuck in through the rock entrance and was shocked to see slave laborers building all sorts of Nazi munitions. Realizing that he had his work cut out for him, the Destroyer soon leaped into action against the Nazis inside the hidden factory, downing as many as he could and eventually making his way into the factory's radio room. The Destroyer utilized the radio to speak to the laborers in the factory, rallying them to turn against their captors. Gruber himself started firing on the prisoners and the Destroyer forced Gruber to flee by hitting him in the head with a propeller. The Destroyer then uppercutted Gruber and helped evacuate the rest of the secret factory. He then ignited a fuse in the factory's powder room and quickly exited the factory himself mere minutes before an explosion destroyed the factory and all munitions inside. After assuring the prisoners had weapons to continue their own fight against the Nazis, the Destroyer returned to Florence to tell her how the freed prisoners would destroy any other munitions factories wherever they were found.
(All Winners Comics I#6 / 2) - From London,
"Keen" Marlow broadcasted over BBC Radio to report on the Destroyer
(Roger Aubrey)'s encounter with the animated stone Sculpture and how
the Sculpture had been blasted to immobility at the former factory site
where the battle took place. He also noted that the inert Sculpture's
remaining presence there stood as a a lasting monument to a brave
commando's fearlessness.
(Marvel Atlas I#1 - France entry - BTS) - At some point, Marlow was
active in occupied France as the Destroyer.
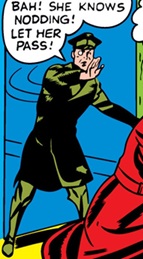 (USA Comics I#6 / 3 (fb) - BTS) -
Florence von Banger was captured
by Nazis and the Destroyer worked out a plan to rescue her by posing as
Gestapo chieftain Capt. Maik von Nieusance.
(USA Comics I#6 / 3 (fb) - BTS) -
Florence von Banger was captured
by Nazis and the Destroyer worked out a plan to rescue her by posing as
Gestapo chieftain Capt. Maik von Nieusance.
(USA Comics I#6 / 3) - The Destroyer blew up a Nazi base of operations in December 1942, killing Hieler and others inside. When Capt. Maik von Nieusance arrived to investigate, he found among the rubble the Destroyer's calling card and ordered the Destroyer's death. Moments later, the Destroyer revealed his presence and he bound and gagged von Nieusance. Wearing von Nieusance's clothing, the Destroyer then posed as von Nieusance and ordered Florence brought to him due to her knowledge of the Destroyer. Once he was alone with Florence, the Destroyer removed his disguise and explained how he had assumed Capt. von Nieusance's identity to free her. He then gave Florence a pass signed by "Capt. von Nieusance" that would get her safely out of Nazi custody then tricked the soldiers nearby by feigning anger and claiming she knew nothing of importance about the Destroyer. With Florence safe, the Destroyer, still posing as Capt. von Nieusance, ventured further into the Nazi base to investigate. Finding a torturous brander preparing to torture prisoners, "Capt. von Nieusance" snatched the keys to the prisoners' chains from the torturer, prompting the torturer to suspect he wasn't the real Capt. von Nieusance. Removing Nieusance's clothing, the Destroyer jumped into battle against the torturer, ultimately pinning him down and using the branding iron on the back of the Nazi's head. Kicking the Destroyer aside, the brander activated an alarm before the Destroyer knocked him out by swinging an iron ball and chain. When Nazi guards arrived on the scene, the Destroyer tossed the brander's brazier at the soldiers and slammed the door on them to hold them back.
Regrouping with the prisoners including Mueller, the Destroyer was shown a secret door in the back of the torture area and together, they escaped, sealing the door behind them. When the Nazis and the real Capt. von Nieusance arrived, they found the Destroyer and the prisoners gone without a trace. The Destroyer discovered a printing press beneath the area and the prisoners revealed the exit to the hero, promising to continue their fight against fascism while the Destroyer continued his. The Destroyer then bid goodbye to Mueller and the other prisoner and promised that their secret printing press would be safe with him.
(Official Handbook of the Marvel Universe A to Z HC Vol. 3 -
Destroyer (Marlow/Aubrey) entry - BTS) - After her role as the
Destroyer's aide was uncovered, Florence von Banger may have died, as
there were no further reports of her accompanying the hero.
(USA Comics I#10 / 2 (fb) - BTS) - Allied
with German resistance fighters by September 1943, the Destroyer mentioned to Frank
Craben about having some ideas as to how the RAF could successfully bomb the
Ludorff Munitions Plant. The Destroyer and some of the resistance then
contacted British military intelligence to inform them that they would
point out the target for them.
(USA Comics I#10 / 2) - At one of the resistance meetings in Frankfort, Germany, Frank Craben introduced the Destroyer and informed the other anti-Nazi Germans that the Destroyer had ideas on how the Ludorff Munitions Plant could be bombed. When the Destroyer explained how they planned to point the target out to the British RAF using "wine," a skeptical Frank Craben watched as the Destroyer grabbed a wine glass and had the lights turned out, revealing the "wine" to be an unidentified luminous liquid solution. He then informed the resistance that they could paint the munitions plant with the luminous solution to identify it for the RAF before suggesting they split up into three groups, each with "wine" that they could use for painting. Pretending to be drunken revelers, the Destroyer and the other resistance fighters snuck past Nazi guards with the luminous solution in wine barrels and began painting the munitions plant. They were soon interrupted by Nazi soldiers and when the soldiers rounded up the resistance, the Destroyer discarded his disguise and admitted things were not going as planned. The resistance soon learned that Frank Craben had double-crossed them and that he was working with the Gestapo when he demanded to know the Destroyer's location. When Craben lined up the resistance members to be shot down, the Destroyer intervened and used a Nazi machine gun to mow down most of the Nazi soldiers present. He then got to a radio and pretended to be Frank Craben while calling for reinforcements. When the real Craben pulled a gun on the hero, confused as to what he was up to, the Destroyer knocked Craben unconscious as both the Gestapo and the British RAF appeared on the scene. Watching from nearby at the Gestapo members were killed in the subsequent RAF bombing, the Destroyer opted to leave the scene, content to continue his fight against the Nazis.
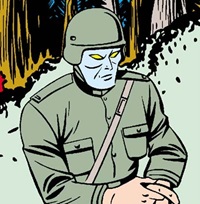
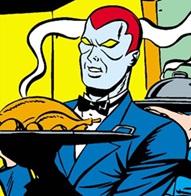 (All-Winners Comics I#10 / 5) - Watching from
a distance as Nazis commandeered the home of Ruth Piraud, sister of
French resistance fighter Frank Piraud, the Destroyer witnessed one of
the Nazis leave the home to deliver a letter and he grabbed the singing
Nazi soldier before he could reach his motorcycle. The hero then donned
the motorcyclist's uniform to use as a disguise and sped off on a
stolen motorcycle to Frank Piraud. Arriving at Frank's hill
headquarters under a flag of truce, the Destroyer demanded to speak
with Frank and when Frank appeared, the Destroyer removed his disguise
to reveal his true identity. He then delivered the letter Ruth Piraud
was forced to write stating that Frank would be given amnesty if he
surrendered by 6pm but if Frank refused, his village would be burned to
the ground. Shocked at the threat, the Destroyer recalled overhearing
the Nazis in Ruth's home talk of a party that evening and he came up
with a plan.
(All-Winners Comics I#10 / 5) - Watching from
a distance as Nazis commandeered the home of Ruth Piraud, sister of
French resistance fighter Frank Piraud, the Destroyer witnessed one of
the Nazis leave the home to deliver a letter and he grabbed the singing
Nazi soldier before he could reach his motorcycle. The hero then donned
the motorcyclist's uniform to use as a disguise and sped off on a
stolen motorcycle to Frank Piraud. Arriving at Frank's hill
headquarters under a flag of truce, the Destroyer demanded to speak
with Frank and when Frank appeared, the Destroyer removed his disguise
to reveal his true identity. He then delivered the letter Ruth Piraud
was forced to write stating that Frank would be given amnesty if he
surrendered by 6pm but if Frank refused, his village would be burned to
the ground. Shocked at the threat, the Destroyer recalled overhearing
the Nazis in Ruth's home talk of a party that evening and he came up
with a plan.
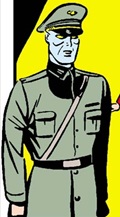 Later that
evening, the Destroyer and Frank
Piraud snuck into the back of Ruth's chateau and asked the butler to
give them as many butler uniforms as they could manage. A short time
later, the Destroyer and Frank, disguised as butlers, entered the room
where the Nazi soldiers were dining. The two heroes then smashed the
food in the Nazis' faces, distracting them long enough for Frank
Piraud's resistance fighters to gun down the Nazis. The Destroyer then
informed Frank that the butler had revealed that Ruth Piraud was being
held captive upstairs by the Nazi Colonel Von Bitters. Rushing
upstairs, the Destroyer knocked out Col. Von Bitters with a single
punch with Frank Piraud adding a second punch to the falling colonel.
The Destroyer then disguised himself as Col. Von Bitters and Frank
donned the uniform of one of the deceased Nazis and the two drove to a
German bivouac area, where the Destroyer (posing as Col. Von Bitters)
ordered the soldiers to assemble for an attack on Frank Piraud's
mountain hideout. After leading the Nazi soldiers up a mountain pass,
the Destroyer and Frank Piraud discarded their disguises and Frank's
resistance fighters detonated explosives on the mountain, causing a
cave-in that downed the Nazis. With the Nazis taken care of, the
Destroyer suggested Frank get back to his village and a short time
later, the Destroyer bid goodbye to both Frank and Ruth Piraud, who
opted to keep hiding in the hills until they could return as freemen.
Later that
evening, the Destroyer and Frank
Piraud snuck into the back of Ruth's chateau and asked the butler to
give them as many butler uniforms as they could manage. A short time
later, the Destroyer and Frank, disguised as butlers, entered the room
where the Nazi soldiers were dining. The two heroes then smashed the
food in the Nazis' faces, distracting them long enough for Frank
Piraud's resistance fighters to gun down the Nazis. The Destroyer then
informed Frank that the butler had revealed that Ruth Piraud was being
held captive upstairs by the Nazi Colonel Von Bitters. Rushing
upstairs, the Destroyer knocked out Col. Von Bitters with a single
punch with Frank Piraud adding a second punch to the falling colonel.
The Destroyer then disguised himself as Col. Von Bitters and Frank
donned the uniform of one of the deceased Nazis and the two drove to a
German bivouac area, where the Destroyer (posing as Col. Von Bitters)
ordered the soldiers to assemble for an attack on Frank Piraud's
mountain hideout. After leading the Nazi soldiers up a mountain pass,
the Destroyer and Frank Piraud discarded their disguises and Frank's
resistance fighters detonated explosives on the mountain, causing a
cave-in that downed the Nazis. With the Nazis taken care of, the
Destroyer suggested Frank get back to his village and a short time
later, the Destroyer bid goodbye to both Frank and Ruth Piraud, who
opted to keep hiding in the hills until they could return as freemen.
 (Stan Lee Meets the Thing #1 / 2)
- When comic book
writer and Signal Corpsman Sgt. Stan Lee was ordered to produce a new
military training film in 1944, Lee bragged that he could get three superheroes
to appear it due to his connections at Timely Comics before reaching
out to comics editor Vince Fago, who contacted the Destroyer, Father
Time and Jack Frost. Summoned back to the east coast of the United
States, the Destroyer and Father Time arrived at Lee's military base,
surprising Stan Lee, who assumed Vince Fago would be sending Captain
America, the Human Torch and Namor the Sub-Mariner. The Destroyer
explained how they were all Fago could spare at the moment and Lee
assumed Fago had chosen the Destroyer, Father Time and the
late-arriving Jack Frost because Sgt. Lee had written the stories that
introduced them into Timely Comics. When the heroes grew slightly
impatient, Lee explained how he needed them to come up with some
villain to pretend to fight for a new training film he'd be assigned
to. When Lee asked if the heroes understood the assignment, the
Destroyer asked if Lee meant for him to destroy some nasty Nazi with
his Super-Soldier fists as he smashed Lee's desk, terrifying Lee.
(Stan Lee Meets the Thing #1 / 2)
- When comic book
writer and Signal Corpsman Sgt. Stan Lee was ordered to produce a new
military training film in 1944, Lee bragged that he could get three superheroes
to appear it due to his connections at Timely Comics before reaching
out to comics editor Vince Fago, who contacted the Destroyer, Father
Time and Jack Frost. Summoned back to the east coast of the United
States, the Destroyer and Father Time arrived at Lee's military base,
surprising Stan Lee, who assumed Vince Fago would be sending Captain
America, the Human Torch and Namor the Sub-Mariner. The Destroyer
explained how they were all Fago could spare at the moment and Lee
assumed Fago had chosen the Destroyer, Father Time and the
late-arriving Jack Frost because Sgt. Lee had written the stories that
introduced them into Timely Comics. When the heroes grew slightly
impatient, Lee explained how he needed them to come up with some
villain to pretend to fight for a new training film he'd be assigned
to. When Lee asked if the heroes understood the assignment, the
Destroyer asked if Lee meant for him to destroy some nasty Nazi with
his Super-Soldier fists as he smashed Lee's desk, terrifying Lee.
Lee then asked if the heroes to go find a villain
to fight and the Destroyer accompanied Father Time and Jack Frost out
of Lee's office. Later, after an impatient Sgt. Lee went looking for
the heroes and encountered the real Red Skull, the Destroyer and the
other two heroes came to Lee's rescue, with Father Time slicing the
Skull's Luger in tow, Jack Frost freezing up the Skull's getaway car
and the Destroyer finalizing the attack by punching the Red Skull in
the face, remarking that while he might share some parts of his origin
with Captain America, Cap had nothing on the mighty Destroyer. With the
Red Skull's defeat, the Destroyer commented that he could now get back
to occupied Europe and when both Jack Frost and Father Time mentioned
needing to depart, Sgt. Lee tried to convince them to stay while he
rounded up a film crew. The heroes nonetheless left the scene, with the
Destroyer commenting that they would drop the Red Skull off at Captain
America's place as Lee frantically tried to figure out how he would
complete his assignment.
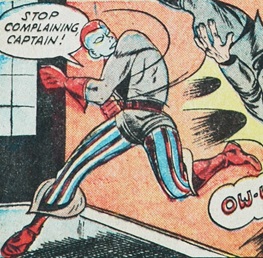 (USA Comics I#12 / 2) - After the Destroyer was
spotted in Berlin, Nazi Major von Glib berated his men for not having
yet captured the hero and ordered them to leave his presence and not
return without the Destroyer. Major von Glib then summoned Captain
Freitag to his office and when the grumbling Freitag ventured out of
his office, the Destroyer, having already infiltrated the office,
delivered a knockout punch to the complaining Nazi. Donning Freitag's
clothing to disguise himself, the Destroyer entered Major von Glib's
office posing as Freitag and the fooled von Glib ordered "Captain
Freitag" to apprehend bookseller Fred Kurt under suspicion of being a
British spy. Accepting the mission, the disguised Destroyer was warned
to watch out for the Destroyer, who had been reported in Berlin.
Knowing for a fact that Fred Kurt was indeed a British spy, the
disguised Destroyer insisted on entering Kurt's bookstore alone and
once inside, the Destroyer feigned placing Kurt under arrest, prompting
Kurt to pull a gun on who he thought was a Gestapo officer. Admitting
he had not expected that reaction, the Destroyer revealed his true
identity to Kurt and informed the bookseller that the Nazis were on to
his true nature. He then came up with a plan to aid Kurt.
(USA Comics I#12 / 2) - After the Destroyer was
spotted in Berlin, Nazi Major von Glib berated his men for not having
yet captured the hero and ordered them to leave his presence and not
return without the Destroyer. Major von Glib then summoned Captain
Freitag to his office and when the grumbling Freitag ventured out of
his office, the Destroyer, having already infiltrated the office,
delivered a knockout punch to the complaining Nazi. Donning Freitag's
clothing to disguise himself, the Destroyer entered Major von Glib's
office posing as Freitag and the fooled von Glib ordered "Captain
Freitag" to apprehend bookseller Fred Kurt under suspicion of being a
British spy. Accepting the mission, the disguised Destroyer was warned
to watch out for the Destroyer, who had been reported in Berlin.
Knowing for a fact that Fred Kurt was indeed a British spy, the
disguised Destroyer insisted on entering Kurt's bookstore alone and
once inside, the Destroyer feigned placing Kurt under arrest, prompting
Kurt to pull a gun on who he thought was a Gestapo officer. Admitting
he had not expected that reaction, the Destroyer revealed his true
identity to Kurt and informed the bookseller that the Nazis were on to
his true nature. He then came up with a plan to aid Kurt.
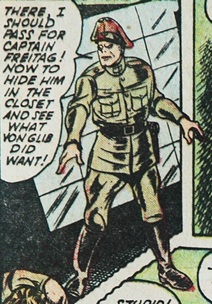 Minutes later,
the Destroyer used his whistle to
summon Nazi soldiers Kurt and his partner and when the two Nazis rushed
inside the bookstore, the Destroyer defeated them and gave them
sleeping pills to keep them docile. The hero then phoned Major von Glib
and, still posing as Captain Freitag, claimed he had captured both Fred
Kurt and the Destroyer, much to von Glib's joy. The Destroyer then
waited for von Glib to arrive on the scene to personally kill the hero,
only to witness the surprise on Major von Glib's face when he found
himself facing the free Destroyer. Knocking von Glib out, the Destroyer
then had Fred Kurt help put von Glib into the Destroyer's uniform while
the hero resumed his disguise as Captain Freitag. As Freitag, the
Destroyer next brought the unconscious Major von Glib (in the Destroyer
costume) to von Glib's men and claimed they would be given the honor of
executing the Destroyer. Leaving the unknowing Nazis to execute the
costumed Major von Glib, the real Destroyer returned to Fred Kurt so
the two could leave Berlin together.
Minutes later,
the Destroyer used his whistle to
summon Nazi soldiers Kurt and his partner and when the two Nazis rushed
inside the bookstore, the Destroyer defeated them and gave them
sleeping pills to keep them docile. The hero then phoned Major von Glib
and, still posing as Captain Freitag, claimed he had captured both Fred
Kurt and the Destroyer, much to von Glib's joy. The Destroyer then
waited for von Glib to arrive on the scene to personally kill the hero,
only to witness the surprise on Major von Glib's face when he found
himself facing the free Destroyer. Knocking von Glib out, the Destroyer
then had Fred Kurt help put von Glib into the Destroyer's uniform while
the hero resumed his disguise as Captain Freitag. As Freitag, the
Destroyer next brought the unconscious Major von Glib (in the Destroyer
costume) to von Glib's men and claimed they would be given the honor of
executing the Destroyer. Leaving the unknowing Nazis to execute the
costumed Major von Glib, the real Destroyer returned to Fred Kurt so
the two could leave Berlin together.
(USA Comics I#13 / 2) - Upon hearing that Lt. Jerry Crane was one of several prisoners that would be going home during an upcoming prisoner exchange with Nazi Germany's Herr Schink, the Destroyer secretly visited Crane's cell and asked if he could send a message to his friends outside Germany that all was going well with "Keen" Marlow. Crane agreed and the Destroyer thought how it must be nice to return to America and England but that his work was not yet finished in Germany. A short time later, the Destroyer secretly witnessed Herr Schink activate a trap door as the prisoners were being led to a car for the exchange. Determined to ensure that Herr Schink stuck to his word regarding the prisoner exchange, the Destroyer investigated the area the trap door led to and overheard a group of Nazi saboteurs including Fritz bragging about taking the place of the real prisoners. The Destroyer then busted into the room to stop the plot, battling the saboteurs with the assistance of the three Allied prisoners. While the prisoners took care of the saboteurs, the Destroyer confronted Herr Schink, who fled to summon armed reinforcements. Returning to aid the prisoners in taking down the saboteurs, the Destroyer discussed with the prisoners a plan to stop the saboteurs.
When Herr Schink returned with armed guards, he found the three "saboteurs" (actually the disguised Allied prisoners) holding the Destroyer captive. Happy to see the Destroyer captured, Herr Schink led the "prisoners" (actually the saboteurs) to a firing squad and had them killed despite Fritz insisting he was one of the saboteurs. Once the saboteurs had been killed, Herr Schink investigated and discovered the real Fritz's corpse, realizing he had been duped. The Destroyer then revealed his ruse and the embarrassed Herr Schink opted to stop the Allied prisoners from escaping to the airport, leaving more guards to deal with the Destroyer. Quickly defeating the guards, the Destroyer hitched a ride to the airport on the back of Herr Schink's car and before Schink could stop the prisoner exchange, the Destroyer grabbed Schink's steering wheel, causing the car to crash. With Herr Schink unconscious from the crash, the Destroyer greeted Lt. Crane and the other Allied prisoners, reminding Crane to tell his overseas friends he was okay. Crane agreed and as the prisoners flew off on a plane, the Destroyer gave a "V for Victory" sign with his hand before running off into the night to continue his mission against the Axis powers.
(Mystic
Comics II#1/4 / Official Handbook of the Marvel Universe A to Z HC
Vol. 3 - Destroyer (Marlow/Aubrey) entry - BTS) - Emerging from hiding
following a series of Allied bombings in Berlin, the disguised
Destroyer surveyed the damage and decided that Germany seemed to be
well taken care of, especially with two Destroyers active there. Noting
that perhaps it was time to move his base of
operations from Germany to Japan, he then visited a secret hideout of
the German underground to inform them of his decision. When he
expressed uncertainty as to how he would get from Germany to Japan, one
of the resistance members informed the hero of a German plane about to
take off with a message for Tokyo. An hour later, the still-disguised
Destroyer attempted to stow away on the German plane but he was spotted
by a soldier, whom the hero quickly dispatched. Once the plane took
off, the Destroyer discarded his disguise and attacked the two German
pilots to commandeer the plane for himself. Shortly after, the
Destroyer safely landed the plane in Japan and emerged from it into
battle against three Japanese soldiers, leaving behind a note
announcing his presence in Japan. He was soon attacked by a small
squadron of Japanese soldiers and overwhelmed. Taken before the
Japanese commander, General Sakki, the Destroyer was informed that he
would be forced to battle Japan's champion, the Juggernaut.
Later that night, the Destroyer was led into a gym where he was to fight the Juggernaut to the death. The Juggernaut quickly gained the upper hand, unleashing blow after devastating blow to his Allied foe using ju-jitsu. Hours later, the Juggernaut managed to down the Destroyer and General Sakki ordered the Juggernaut to finish his foe. Summoning all of his remaining strength into a single attack, the Destroyer delivered a punch that launched the Juggernaut into the wall, breaking his neck. Angered at his champion being killed, General Sakki prepared to fire on the Destroyer but the hero managed to knock out Sakki with another punch. The Destroyer then fled the scene, promising to kill, destroy and sabotage Japan much as he had done in Germany.
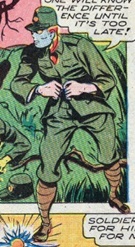 (Amazing Comics I#1 / 4) - While on patrol, the
Destroyer came upon an emaciated American Intelligence officer and when
he asked the man what had happened, the man explained how he had been
ordered to the Valley of Death and encountered the enigmatic Face.
After the man died trying to tell the Destroyer his plans to go back to
capture the Face, the Destroyer reported the situation to Allied
Intelligence and decided to pay the Valley of Death a visit. Braving
the climb into the Valley of Death, the Destroyer tripped a wire that
sounded an alarm and he was soon beset by Japanese soldiers serving the
Face. The Destroyer easily defeated the soldiers and donned one of
their uniforms to disguise himself as he infiltrated the Face's temple
fortress. Shortly after discovered boxes of gas capsules, the Destroyer
was recognized by one of the soldiers he had earlier encountered and he
hurled one of the gas capsules at the approaching soldiers, only to
witness the gas destroy the flesh of the soldiers, leaving them with an
emaciated appearance. Realizing the Face was created a weapon of mass
destruction in the form of the flesh-destroying gas, the Destroyer
ditched his disguise but was immediately knocked out by the butt of a
gun. Awaking to find himself facing the Face, the Destroyer learned of
the Face's plan to fly the first shipment of the flesh-destroying gas
to the war front lines and he freed himself. In the ensuing battle
between the Destroyer and Japanese soldiers, a stray shot hit the Face,
killing him, and the Destroyer rushed to the airport to stop the Face's
plane from taking off. Punching out the plane's pilot, the Destroyer
boarded the plane himself and flew it around the Face's fortress,
dropping the gas in an effort to stop the Face's henchmen and save the
world at the same time.
(Amazing Comics I#1 / 4) - While on patrol, the
Destroyer came upon an emaciated American Intelligence officer and when
he asked the man what had happened, the man explained how he had been
ordered to the Valley of Death and encountered the enigmatic Face.
After the man died trying to tell the Destroyer his plans to go back to
capture the Face, the Destroyer reported the situation to Allied
Intelligence and decided to pay the Valley of Death a visit. Braving
the climb into the Valley of Death, the Destroyer tripped a wire that
sounded an alarm and he was soon beset by Japanese soldiers serving the
Face. The Destroyer easily defeated the soldiers and donned one of
their uniforms to disguise himself as he infiltrated the Face's temple
fortress. Shortly after discovered boxes of gas capsules, the Destroyer
was recognized by one of the soldiers he had earlier encountered and he
hurled one of the gas capsules at the approaching soldiers, only to
witness the gas destroy the flesh of the soldiers, leaving them with an
emaciated appearance. Realizing the Face was created a weapon of mass
destruction in the form of the flesh-destroying gas, the Destroyer
ditched his disguise but was immediately knocked out by the butt of a
gun. Awaking to find himself facing the Face, the Destroyer learned of
the Face's plan to fly the first shipment of the flesh-destroying gas
to the war front lines and he freed himself. In the ensuing battle
between the Destroyer and Japanese soldiers, a stray shot hit the Face,
killing him, and the Destroyer rushed to the airport to stop the Face's
plane from taking off. Punching out the plane's pilot, the Destroyer
boarded the plane himself and flew it around the Face's fortress,
dropping the gas in an effort to stop the Face's henchmen and save the
world at the same time.
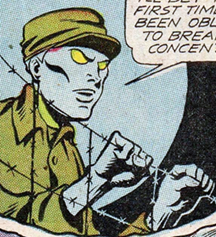 (Mystic Comics II#2 / 5) - Disguised as a Chinese
soldier, the Destroyer snuck into a Japanese concentration camp, where
he learned from Chinese prisoners that the base of a new Japanese
anti-invasion weapon was inside Mt. Fuji. An hour later, the Destroyer
discarded his disguise as he made his way to Mt. Fuji and when he
looked inside the volcano, he discovered a large launch base for flying
torpedoes. Investigating further inside, the Destroyer found that the
torpedoes contained poison gas moments before he was discovered and
surrounded by Japanese soldiers. Briefly putting up quite a fight, the
Destroyer ultimately allowed himself to be captured and during his
subsequent interrogation, he deliberately gave false answers to the
questions in an effort to rile the interrogating general, Muki, into
providing the real answers he sought. After learning from the gloating
General Muki that the torpedoes had to be flown slowly, as the friction
of a fast flight would destroy the torpedoes' casing, the bound
Destroyer thanked Muki for the information and kicked the general.
Freeing his hands, the Destroyer then took care of the guards before
rushing towards the launching ramp. Arriving to destroy the launching
ramp mere seconds after it successfully launched one of the gas
torpedoes, the Destroyer found himself surrounded by General Muki and
his men.
(Mystic Comics II#2 / 5) - Disguised as a Chinese
soldier, the Destroyer snuck into a Japanese concentration camp, where
he learned from Chinese prisoners that the base of a new Japanese
anti-invasion weapon was inside Mt. Fuji. An hour later, the Destroyer
discarded his disguise as he made his way to Mt. Fuji and when he
looked inside the volcano, he discovered a large launch base for flying
torpedoes. Investigating further inside, the Destroyer found that the
torpedoes contained poison gas moments before he was discovered and
surrounded by Japanese soldiers. Briefly putting up quite a fight, the
Destroyer ultimately allowed himself to be captured and during his
subsequent interrogation, he deliberately gave false answers to the
questions in an effort to rile the interrogating general, Muki, into
providing the real answers he sought. After learning from the gloating
General Muki that the torpedoes had to be flown slowly, as the friction
of a fast flight would destroy the torpedoes' casing, the bound
Destroyer thanked Muki for the information and kicked the general.
Freeing his hands, the Destroyer then took care of the guards before
rushing towards the launching ramp. Arriving to destroy the launching
ramp mere seconds after it successfully launched one of the gas
torpedoes, the Destroyer found himself surrounded by General Muki and
his men.
Plowing through the soldiers and taking General Muki hostage, the Destroyer ran outside and stole a boat. Traveling in the flying torpedo's direction, the Destroyer noticed a Japanese ship guarding against prisoner escape until the torpedo exploded. Quickly docking on an island housing American prisoners, the Destroyer warned against the oncoming gas torpedo and ushered all of the prisoners onto his speedboat. He then forced General Muki to broadcast a message to his men claiming the torpedo launch had been delayed and ordering them to proceed to the island that had housed the prisoners. The Destroyer, the captured General Muki and the American prisoners then watched as Muki's men did as ordered and were killed by the exploding gas torpedo. From his speedboat, the Destroyer assured the prisoners that they would be taken to the nearest American base and announced his plans to return to Japan to continue fighting.
(USA Comics I#14 / 5) - After a series of
underwater mines hit every Allied seaport at once, costing thousands of
lives and ships, the Allied intelligence officer opted to summon the
Destroyer, feeling as if he could deal with anything the Axis Japanese
could think of. A short time later, the Destroyer arrived at Allied
Intelligence and after learning that the Allies had received reports of
strange activity on Kupan Island off Timor, the Destroyer suspected the
island to the base of operations for the new underwater weapon.
Deciding to fly to Kupan Island himself to investigate, the Destroyer
was warned that three men had died trying to get onto the island but
the hero assured Allied Intelligence he would not be killed and that he
would smash the new weapon. Later, as he flew over Kupan Island, he
found himself under attack and he feigned a plane crash, landing in the
water surrounding the island and sneakily exiting the plane underwater.
Emerging on the opposite side of an investigating Japanese boat, the
Destroyer confronted the Japanese soldiers, stealing a Tommy gun from
one of them and using it to kill the soldiers. Stealing the boat, the
Destroyer drove it towards the Japanese base and when the Japanese
commander halted firing, thinking the hero planned to surrender, the
Destroyer dove into the water to swim to a nearby schooner. Waiting on
the wrecked schooner for some time, the Destroyer soon witnessed
Japanese soldiers boarding the schooner and going down into its hold,
he quietly followed and discovered a hidden weapon base beneath the
schooner. Finding the base filled with chained mines, the Destroyer
quickly found himself ambushed by a single Japanese soldier, whom he
easily defeated and interrogated for information on the chained mines.
Upon learning from the soldier of the destructive plans for the mines, the Destroyer had the soldier direct him to the base's airfield before ordering the soldier to turn over his uniform. Disguising himself as a Japanese soldier, the Destroyer made his way to the airfield, where he found a bomber being serviced. Attempting and failing to convince the guards there that he was one of them, the Destroyer ultimately punched out the two guards and commandeered the Japanese bomber, using it to bomb the schooner. The bomber was quickly hit but the Destroyer managed to destroy the schooner and mines before parachuting from the crashing bomber. Before the hero could be captured by the Japanese, the Destroyer was rescued by American planes and upon his return to Allied Intelligence, he was thanked for his efforts. He returned the thanks for the rescue.
 (Mystic Comics II#3 / 4 (fb) -
BTS) - At some point, the Destroyer
learned of the legendary Mother Ting, who had become known worldwide as
the leader of the Japanese resistance group known as the Kore.
(Mystic Comics II#3 / 4 (fb) -
BTS) - At some point, the Destroyer
learned of the legendary Mother Ting, who had become known worldwide as
the leader of the Japanese resistance group known as the Kore.
(Mystic Comics II#3 / 4) - After the Destroyer became trapped in the Okaie industrial district, the Japanese General Kolie ordered the hero's death. The Destroyer soon found himself relentlessly pursued by Japanese soldiers and despite his attempts to fight some of them off, the hero ultimately found himself surrounded. Ducking for cover under the roof of an alleyway hut, the Destroyer was beckoned into the hut by the aged Mother Ting. Mother Ting quickly hid the Destroyer beneath his floorboards and when the Japanese soldiers searched her hut, they found no sign of the Destroyer. The soldiers ultimately departed in frustration and the Destroyer learned of the resistance Mother Ting had organized. She then led the Destroyer into the underground headquarters of the Kore resistance, revealing the Kore's plans to destroy a naval unit anchored in Tokyo Harbor. Happily agreeing to assist the Kore, the Destroyer learned that the resistance lacked the explosives to properly destroy the naval unit and when the Destroyer mentioned the large amount of explosives within the Yuanie arsenal, the group discussed how to acquire the explosives since General Kolie had made the area his headquarters. The Destroyer suggested disguising the Kore as Japanese soldiers in an effort to infiltrate the Yuanie arsenal.
That night, the disguised Kore led the Destroyer
to the Yuanie arsenal, where they convinced the guards that they were
Japanese soldiers that had captured the Destroyer. The arsenal's
curious guards joined in the subsequent procession to General Kolie's
office, at which point the Kore opened fire on the Japanese soldiers
inside. General Kolie managed to escape and the Destroyer quickly led
the Kore to the arsenal's powder magazine, where they loaded up on
explosives before escaping. While later assisting the Kore in loading
up their boat with explosives, the Destroyer and Kore were attacked by
Japanese soldiers sent by General Kolie. Risking his life to buy the
Kore more time, the Destroyer leaped into battle against the soldiers,
eventually hurling a box of explosives at the soldiers while the Kore
made their way towards the Japanese naval unit in Tokyo Harbor. The
Destroyer joined them soon after they arrived and was there to witness
the explosives destroying the naval ships in the harbor. As the ships
sunk, Mother Ting remarked that the sinking ships were a beautiful
sight and the Destroyer responded that it was more a symbol of how
people of two different races could unite for a common cause against a
shared enemy.
 (Complete Comics I#2 / 3) - While
undercover as a Japanese man, the Destroyer witnessed the downing of a
large, American Super-Fortress plane but when Japanese soldiers took
the American plane's crew captive, the Destroyer decided to investigate
further. To get a better perspective of what was happening to the
American soldiers, the Destroyer downed a guard and utilized his
uniform as a disguise to get into the base where the soldiers were
being held. Following the Japanese colonel as he made his rounds, the
Destroyer killed a guard, leaving his corpse in a chair as he donned
the guard's uniform as a disguise. He then took the guard's place as he
tried to learn more about what the colonel planned to do with the
downed Super-Fortress plane. When the guard's corpse was discovered,
the Destroyer discarded his disguise and ran down to the dungeon to
question the American prisoners on when their next raid was, as the
Japanese planned to use the Super-Fortress to trail back to the
American base. Assuring the prisoners that they would stop the Japanese
plot, the Destroyer discussed a plan to halt the plot to begin the
following night and after relaying his plans, he escaped the base.
(Complete Comics I#2 / 3) - While
undercover as a Japanese man, the Destroyer witnessed the downing of a
large, American Super-Fortress plane but when Japanese soldiers took
the American plane's crew captive, the Destroyer decided to investigate
further. To get a better perspective of what was happening to the
American soldiers, the Destroyer downed a guard and utilized his
uniform as a disguise to get into the base where the soldiers were
being held. Following the Japanese colonel as he made his rounds, the
Destroyer killed a guard, leaving his corpse in a chair as he donned
the guard's uniform as a disguise. He then took the guard's place as he
tried to learn more about what the colonel planned to do with the
downed Super-Fortress plane. When the guard's corpse was discovered,
the Destroyer discarded his disguise and ran down to the dungeon to
question the American prisoners on when their next raid was, as the
Japanese planned to use the Super-Fortress to trail back to the
American base. Assuring the prisoners that they would stop the Japanese
plot, the Destroyer discussed a plan to halt the plot to begin the
following night and after relaying his plans, he escaped the base.
The next night, the Destroyer paid a visit to the
Okoshai Munitions plant and hurled a torch onto the building, igniting
the munitions there and causing a large explosion that revealed the
location of the plant for American bombers. In the ensuing chaos as the
Japanese soldiers scrambled to put out the fire that was making them a
target, the Destroyer freed the American prisoners from the Japanese
base and rushed them to the airport where their Super-Fortress plane
was being held. He then helped the American prisoners board their
plane, which had since been filled with Japanese bombs, and the
Destroyer suggested they could use the bombs against the Japanese. Once
the Americans had taken off and joined other American bomber planes in
the air, the Destroyer watched from the ground as the planes bombed the
Japanese base and munitions plant and noted that the spreading fires
were a symbol of the fall of the Japanese empire.
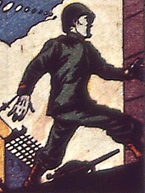 (All Select Comics I#6 / 3) - Following a radio
broadcast by the villainous Captain Suicide in March 1945, during which he claimed to
rain down invisible robot bombs onto the enemies of Japan, the
Destroyer hurled a rock into the broadcast station with a message
threatening Captain Suicide's life should he go through with his
claims. Realizing that the Destroyer must be on the premises, Captain
Suicide ordered his agent to alert the guards and prevent the
Destroyer's escape. When the hero was spotted by one of Captain
Suicide's guards, the Destroyer knocked the guard out and used his
uniform to pose as the guard to get past other guards. Deducing that
Captain Suicide's invisible robot bombs could only have been created by
Japan's foremost scientist, Haruda, the Destroyer made his way towards
Haruda's lab, only to hear a gunshot as he approached. Discarding his
disguise, the Destroyer leaped through one of the lab windows and
confronted Captain Suicide, who had just murdered Haruda for failing to
successfully create the bombs Captain Suicide had gloated about.
Following a brief battle, the Destroyer feigned an injury and allowed
Captain Suicide to escape so he could follow the Japanese agent to the
launching base for the robot bombs. Finding it strange that Captain
Suicide fled to the Henyi Airdrome, where the Japanese Strato-Zeppelin
was being held, the Destroyer kept his distance and continued following
Captain Suicide, unaware that the villain was leading him into a trap.
(All Select Comics I#6 / 3) - Following a radio
broadcast by the villainous Captain Suicide in March 1945, during which he claimed to
rain down invisible robot bombs onto the enemies of Japan, the
Destroyer hurled a rock into the broadcast station with a message
threatening Captain Suicide's life should he go through with his
claims. Realizing that the Destroyer must be on the premises, Captain
Suicide ordered his agent to alert the guards and prevent the
Destroyer's escape. When the hero was spotted by one of Captain
Suicide's guards, the Destroyer knocked the guard out and used his
uniform to pose as the guard to get past other guards. Deducing that
Captain Suicide's invisible robot bombs could only have been created by
Japan's foremost scientist, Haruda, the Destroyer made his way towards
Haruda's lab, only to hear a gunshot as he approached. Discarding his
disguise, the Destroyer leaped through one of the lab windows and
confronted Captain Suicide, who had just murdered Haruda for failing to
successfully create the bombs Captain Suicide had gloated about.
Following a brief battle, the Destroyer feigned an injury and allowed
Captain Suicide to escape so he could follow the Japanese agent to the
launching base for the robot bombs. Finding it strange that Captain
Suicide fled to the Henyi Airdrome, where the Japanese Strato-Zeppelin
was being held, the Destroyer kept his distance and continued following
Captain Suicide, unaware that the villain was leading him into a trap.
A confused Destroyer pursued Captain Suicide into the Henyi Airdome and wondered why there was no launching platforms, only to be hit from behind and brought into Captain Suicide's office. Gloating that the Destroyer would witness the very bombs he had arrived to stop, Captain Suicide led the Destroyer to the Strato-Zeppelin, from where Captain Suicide revealed that there were no invisible robot bombs but rather, pre-set mines set to explode via radio control. When Captain Suicide admitted that Haruda had failed to successfully create robot bombs, the Destroyer broke free from his bounds and delivered a devastating uppercut to Captain Suicide before destroying the radio control equipment. The Destroyer then fled, punching out several of Captain Suicide's men as the villain pursued. Soon realizing that the Strato-Zeppelin was filled with hydrogen gas rather than helium, the Destroyer warned against gunshots but Captain Suicide nonetheless shot at the Destroyer, igniting the hydrogen gas and setting the Strato-Zeppelin ablaze. Captain Suicide quickly grabbed the last remaining parachute but the Destroyer kicked the villain and stole the parachute for himself. Grabbing a list of the Japanese agents that had worked to set the explosive mines in hopes of later turning it over to the FBI, the Destroyer leaped from the falling Strato-Zeppelin moments before it was destroyed in a massive fireball that also killed Captain Suicide and his men. Later, after the invisible robot bomb threat was revealed as a fake via Allied radio broadcasts, the Destroyer watched as American planes bombed the industrial heart of Japan and noted that his work would not be finished until the final victory of the war.
(Official Handbook of the Marvel Universe A to Z HC Vol. 3 -
Destroyer (Marlow/Aubrey) entry - BTS) - The Destroyer briefly diverted
to Los Angeles to fight covert Axis operatives there.
(Mystic Comics II#4 / 2 (fb) - BTS) - Suspecting
a trick on behalf of the Imperial Japanese military, the Destroyer
tipped off the US Coast Guard to an approaching Japanese submarine off
the coast of California.
(Mystic Comics II#4 / 2) - Upon seeing the surrendering Japanese agents, the suspicious Destroyer watched as the agents staggered closer with several lagging behind. When a suicide bomber exploded, causing destruction to the area and knocking aside the Coast Guard members, the Destroyer went into action to find where the remaining Japanese agents were fleeing. He then spent hours searching Los Angeles but came up empty-handed before returning to the waterfront. Soon spotting one of the agents ducking into the shadows, the Destroyer punched him and terrified the man into revealing that four more agents were hiding out. Moments later, after the Destroyer had rounded up all five Japanese agents, he noticed that had seemed larger in size during his earlier encounter with them and quickly began to suspect they had smuggled something into the US. After being commended by a police officer for rounding up the Japanese agents, the still-suspicious Destroyer searched the area where the agents were hiding to find clues as to what they could have smuggled into the country. Soon finding a newspaper article advertising a captured Nazi buzz bomb on a display tour at Los Angeles Stadium, the Destroyer deduced that the Japanese agents planned to attack Los Angeles Stadium.
Rushing over to the Stadium, the Destroyer met one of the guards and was led into the entrance, where two other guards, Talley and Meyers, were dying on the floor. One of the guards that was barely alive managed to tell the Destroyer how he had witnessed Japanese agents load a robot with a bomb and the Destroyer deduced that the reason the agents had earlier looked larger was because they were smuggling bombs into the country in their oversized clothing. Leaping out onto the baseball field, the Destroyer jumped onto the displayed Nazi buzz bomber and determined that the bomber had been equipped with a time bomb. Grabbing the remote starter for the bomber, the Destroyer launched the buzz bomber with himself atop it and he struggled to steer the remote controlled bomber. Flying the bomber out to sea, the Destroyer spotted a surfaced Japanese submarine and steered the bomber towards the submarine, jumping off into the water mere moments before the bomber hit the submarine, destroying both. Making his way back to land, the Destroyer surveyed the sinking submarine and buzz bomber, noting that it was a magnificent sight to see the robot plane plot destroyed.
(Daring Comics I#11 / 3 (fb) - BTS) - Following a series of unexplained sinkings of American ships by the Japanese, Allied Intelligence assigned the Destroyer to investigate the situation.
(Daring Comics I#11 / 3) - Arranging for a parachute housing a dummy to be dropped over a Japanese-controlled island, the Destroyer used the parachute as a distraction while he sneaked onto the island. He later knocked out a Japanese guard and utilized his uniform as a disguise to move further into enemy territory, eventually making his way a series of covered docks with unusually high roofs. Two guards soon spotted the hero and attacked, only for the Destroyer to defeat them both. Reinforcements quickly arrived, however, and the Destroyer was soon overwhelmed and knocked out. When the hero later regained consciousness, he founded himself bound and witnessing the Japanese plot of disguising a submarine with the wrecked prow of a ship. The Destroyer angrily berated the Japanese commander for using such trickery against their enemies but he was punched in the face for his outburst.
The next day, the Destroyer managed to loosen his bounds and while the commander was looking through the submarine's periscope, the Destroyer broke free and attacked the Japanese soldiers. Making his way to the sub's controls, the Destroyer raised the sub, causing it to surface with the wrecked ship's prow displayed on top and drawing the attention of Allied forces. The Allied forces quickly fired on the submarine, eventually blowing it up and killing most of the enemy soldiers onboard while the Destroyer leaped into the water with the still-living Japanese commander. Brought aboard an Allied ship, the Destroyer was asked how he was able to get out of the submarine safely and the hero revealed that he had used the Japanese commander as a hostage.
(USA Comics I#16 / 2) - Active on a
Japanese-controlled island, the Destroyer spotted a Japanese tank
heading his direction down a jungle road and he leaped onto the tank,
defeating its driver and stealing his uniform for a disguise. Disguised
as a Japanese soldier, the Destroyer infiltrated the Surabi prison camp
that Japanese soldiers were being ordered to pack with explosives on
orders from the lethal Bloody Baron. Secretly listening to the Bloody
Baron's plans to kill all prisoners within the camp, the Destroyer
waited until the Bloody Baron left the room before grabbing the
remaining guard and lifting him into the air. When two more guards
arrived, the Destroyer used the guard in his grasp as a human baseball
bat and hit the two guards with the one other. He then knocked the two
guards' heads together to knock them out before realizing the American
prisoners were making a break for it, unaware that the Bloody Baron had
set up a tripwire meant to trigger the explosives beneath the prison
camp. Discarding his uniform disguise, the Destroyer yelled for the
prisoners to halt their progress lest they trigger the tripwire and the
prisoners did as ordered. The Destroyer then fiddled with the time
clock fuse on the explosives to give them four minutes to escape,
noting that they couldn't detach the time clock completely without
alerting the Bloody Baron to the prisoners' escape.
The Destroyer then helped get the American prisoners to safety and the explosives went off four minutes later, making the Bloody Baron and his men think the prison camp had been blown up with the prisoners inside. Having escaped prior to the detonation, the Destroyer and the prisoners carted some of the unused explosives up a nearby hill and when the Bloody Baron and his men traveled past the hill, the Destroyer and the prisoners lobbed grenades and other explosives down on the Bloody Baron and his men, killing them as American forces arrived on the scene.
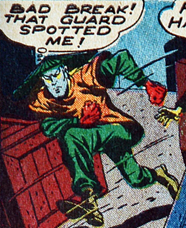 (Kid Komics I#9 / 3) - The Destroyer met with a
high-level Allied Intelligence officer at the Allied Intelligence's
South Pacific headquarters and he was assigned the task of
investigating the Japanese submarine base in Korea. Two days later, the
Destroyer reached the outer entrance of the submarine base and quickly
realized he would need to get past a slew of Japanese soldiers before
he could investigate the base. Soon spotting a group of non-military
Japanese being used as labor by a soldier, the Destroyer pulled them
both aside and knocked out the soldier. He then convinced the laborer
to don the soldier's uniform while the Destroyer utilized the laborer's
outfit. The two then got back in the labor line so the Destroyer could
venture further into the base. The laborer was eventually caught posing
as a soldier but the Destroyer managed to continue on, thinking to
himself how courageous the laborer was. He eventually discovered
submarines being outfitted with launching platforms for Nazi robot
planes but was quickly spotted. Ducking behind a large crate, the
Destroyer discarded his disguise and noticed some papers that he hoped
might clue him in to the objective of the submarines. When the Japanese
commander approached, the Destroyer ducked out of sight and listened as
the commander received a berating from a Nazi baron.
(Kid Komics I#9 / 3) - The Destroyer met with a
high-level Allied Intelligence officer at the Allied Intelligence's
South Pacific headquarters and he was assigned the task of
investigating the Japanese submarine base in Korea. Two days later, the
Destroyer reached the outer entrance of the submarine base and quickly
realized he would need to get past a slew of Japanese soldiers before
he could investigate the base. Soon spotting a group of non-military
Japanese being used as labor by a soldier, the Destroyer pulled them
both aside and knocked out the soldier. He then convinced the laborer
to don the soldier's uniform while the Destroyer utilized the laborer's
outfit. The two then got back in the labor line so the Destroyer could
venture further into the base. The laborer was eventually caught posing
as a soldier but the Destroyer managed to continue on, thinking to
himself how courageous the laborer was. He eventually discovered
submarines being outfitted with launching platforms for Nazi robot
planes but was quickly spotted. Ducking behind a large crate, the
Destroyer discarded his disguise and noticed some papers that he hoped
might clue him in to the objective of the submarines. When the Japanese
commander approached, the Destroyer ducked out of sight and listened as
the commander received a berating from a Nazi baron.
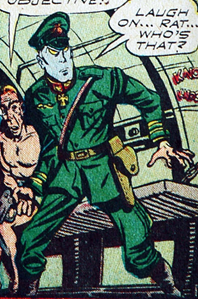 Deducing that
the baron was in charge of the
entire operation, the Destroyer followed the baron and punched him,
assuming the baron's identity as a disguise. He then forced the baron
at gunpoint to give orders to have new crews assigned to the submarines
within half an hour despite suspicions of the strange request from the
Japanese commander. The commander did as ordered and within half an
hour, the Destroyer and the captured baron were on a submarine bound
for an Allied port, where the Destroyer assumed they would be captured.
Seventy-two hours later, however, the Destroyer found the submarines
off the coast of Sydney and the Nazi baron gloated that the Japanese
commander had informed the new submarine crews of the original
objective. As they arrived at the destination for the launch of the
robot planes, the Destroyer realized he needed to stall and one of the
crewmen soon informed the Destroyer of a launching malfunction on one
of the subs. Hoping to buy himself some time, the Destroyer (still
posing as the baron) ordered all of the submarines inspected before any
launches took place.
Deducing that
the baron was in charge of the
entire operation, the Destroyer followed the baron and punched him,
assuming the baron's identity as a disguise. He then forced the baron
at gunpoint to give orders to have new crews assigned to the submarines
within half an hour despite suspicions of the strange request from the
Japanese commander. The commander did as ordered and within half an
hour, the Destroyer and the captured baron were on a submarine bound
for an Allied port, where the Destroyer assumed they would be captured.
Seventy-two hours later, however, the Destroyer found the submarines
off the coast of Sydney and the Nazi baron gloated that the Japanese
commander had informed the new submarine crews of the original
objective. As they arrived at the destination for the launch of the
robot planes, the Destroyer realized he needed to stall and one of the
crewmen soon informed the Destroyer of a launching malfunction on one
of the subs. Hoping to buy himself some time, the Destroyer (still
posing as the baron) ordered all of the submarines inspected before any
launches took place.
The Destroyer then personally inspected each of the submarines, secretly sabotaging them as Allied planes noticed the subs. After completing his sabotage by anchoring each of the explosive robot planes to the subs, the Destroyer jumped into the ocean waters moments before each of the submarines exploded. Unaware that the baron was the heroic Destroyer, one of the Allied planes attempted to scare him, prompting the Destroyer to discard his disguise and revealed his ruse to the Allied pilots. Brought aboard one of the planes, the Destroyer revealed how he had anchored the robot planes to the subs, causing them to explode on the submarines.
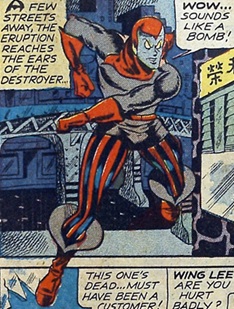 (USA Comics I#17 / 4 (fb) - BTS /
Official Handbook of the Marvel
Universe A to Z HC Vol. 3 - Destroyer (Marlow/Aubrey) entry - BTS) - Following the end of World War II, the Destroyer
returned to the United States, settling in New York.
(USA Comics I#17 / 4 (fb) - BTS /
Official Handbook of the Marvel
Universe A to Z HC Vol. 3 - Destroyer (Marlow/Aubrey) entry - BTS) - Following the end of World War II, the Destroyer
returned to the United States, settling in New York.
(USA Comics I#17 / 4) - Patrolling Chinatown, the
Destroyer overheard an explosion and he ran into action, arriving to
see Wing Lee's Tea Shop in ruins. Rushing to the injured Wing Lee, the
Destroyer asked if he was hurt and Wing Lee explained that he had been
confronted for protection money and the bomb had killed one of the
racketeers. Suspecting the work of the infamous Pineapple Gang, the
Destroyer noted that the entire scenario was odd and he wondered aloud
why the Pineapple Gang would bomb a shop with one of their own inside.
Wing Lee then asked the Destroyer to help stop the Pineapple Gang and
the Destroyer accepted the request, remarking that he would next visit
shop owner Chin Kiang to warn him about the Gang. The next day, the
Destroyer posed as a customer reading the newspaper in Kiang's shop
when one of the Pineapple Gang arrived to demand protection money from
Chin Kiang. As part of the Destroyer's plan, Kiang paid the protection
money and the Destroyer assured Kiang he would handle the situation
from there.
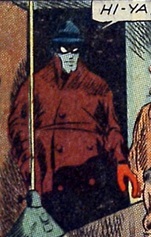 Trailing the gang member out of Chin Kiang's shop
and to the Pineapple Gang's headquarters, the Destroyer noticed that
the entire Gang was assembling there and when another gang member,
Spike, approached, the Destroyer knocked him out and assumed his
identity as a cover. He then entered the Pineapple Gang's headquarters
posing as Spike and witnessed the Gang's leader, "Killer" Sikes,
unfairly splitting up the protection money. Once Sikes had left the
room, the other Gang members discussed killing Sikes and the Destroyer
pretended to be interested as they determined who would do the job. He
then watched as gangster Flint drew the task and "Spike" was ordered to
trail Flint just to make sure he accomplished the murder. Claiming he
would kill Sikes if Flint failed, the Destroyer (still posing as Spike)
trailed Flint to the nearby train station and when Flint moved in for
the kill, the Destroyer leaped at Flint, discarding his disguise to
punch Flint in the face. A confused "Killer" Sikes then tried to flee
the scene but the Destroyer tackled him and turned both Flint and Sikes
over to the police. The hero then returned to the Pineapple Gang's
headquarters and defeated the rest of the criminals, turning them over
to the police as well. The following night, the Destroyer had dinner
with Wing Lee, Chin Kiang and other Chinatown business owners who
thanked him for his assistance against the Pineapple Gang.
Trailing the gang member out of Chin Kiang's shop
and to the Pineapple Gang's headquarters, the Destroyer noticed that
the entire Gang was assembling there and when another gang member,
Spike, approached, the Destroyer knocked him out and assumed his
identity as a cover. He then entered the Pineapple Gang's headquarters
posing as Spike and witnessed the Gang's leader, "Killer" Sikes,
unfairly splitting up the protection money. Once Sikes had left the
room, the other Gang members discussed killing Sikes and the Destroyer
pretended to be interested as they determined who would do the job. He
then watched as gangster Flint drew the task and "Spike" was ordered to
trail Flint just to make sure he accomplished the murder. Claiming he
would kill Sikes if Flint failed, the Destroyer (still posing as Spike)
trailed Flint to the nearby train station and when Flint moved in for
the kill, the Destroyer leaped at Flint, discarding his disguise to
punch Flint in the face. A confused "Killer" Sikes then tried to flee
the scene but the Destroyer tackled him and turned both Flint and Sikes
over to the police. The hero then returned to the Pineapple Gang's
headquarters and defeated the rest of the criminals, turning them over
to the police as well. The following night, the Destroyer had dinner
with Wing Lee, Chin Kiang and other Chinatown business owners who
thanked him for his assistance against the Pineapple Gang.
(Kid Komics I#10 / 2) - The Destroyer was summoned
by Jerry Crane to his Central Detective Agency. Noticing that Jerry
appeared to be leaving, the Destroyer asked where Jerry's newest case
was taking him and Jerry replied that he would be leaving for Mexico.
Jerry Crane then asked the Destroyer to take over his detective agency
while he was away and despite the Destroyer's annoyance and attempts to
protest, Jerry bid the Destroyer goodbye and left the hero in the hands
of his secretary, Kathy Dashiell.
(Official Handbook of the Marvel Universe A to Z HC Vol. 3 - Destroyer (Aubrey/Marlow) entry - BTS) - The Destroyer reluctantly accepted the job at Crane's detective agency as a way of repaying his debt to Crane.
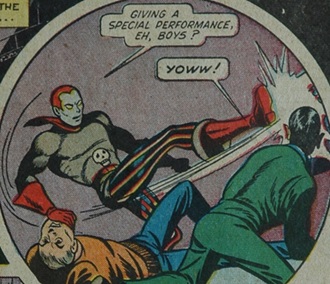 (Kid Komics I#10 / 2) - The next day, the agency
received a call from
Magma Cherni, one half of the Houdin and Cherni Magic Act, who informed
the Destroyer that her business partner, Ken Houdin, was a thief.
Before Magma could reveal what Houdin was planning to steal, Houdin
arrived to interrupt the call and Magma hung up on the Destroyer.
Learning from Kathy that Houdin and Cherni were performing that night
at a charity event held at the Hotel Clayton, the Destroyer decided to
join in the festivities to investigate the situation. Upon arriving,
the Destroyer and Kathy witnessed the arrival of Houdin and Cherni and
when Kathy remarked on the diamonds and jewelry present, the Destroyer
suspected that might influence why Houdin was there. He then made his
way around the back of the hotel, where he jumped by a group of thugs.
Easily gaining the early upper hand, the Destroyer was soon hit over
the head by one of the thugs' guns and the thugs escaped while the
Destroyer was stunned. Suspecting that the thugs could have been sent
by Houdin himself if he had overheard Magma's earlier phone call with
him, the Destroyer continued to make his way backstage, where he
witnessed Houdin's famous crystal vase magic trick.
(Kid Komics I#10 / 2) - The next day, the agency
received a call from
Magma Cherni, one half of the Houdin and Cherni Magic Act, who informed
the Destroyer that her business partner, Ken Houdin, was a thief.
Before Magma could reveal what Houdin was planning to steal, Houdin
arrived to interrupt the call and Magma hung up on the Destroyer.
Learning from Kathy that Houdin and Cherni were performing that night
at a charity event held at the Hotel Clayton, the Destroyer decided to
join in the festivities to investigate the situation. Upon arriving,
the Destroyer and Kathy witnessed the arrival of Houdin and Cherni and
when Kathy remarked on the diamonds and jewelry present, the Destroyer
suspected that might influence why Houdin was there. He then made his
way around the back of the hotel, where he jumped by a group of thugs.
Easily gaining the early upper hand, the Destroyer was soon hit over
the head by one of the thugs' guns and the thugs escaped while the
Destroyer was stunned. Suspecting that the thugs could have been sent
by Houdin himself if he had overheard Magma's earlier phone call with
him, the Destroyer continued to make his way backstage, where he
witnessed Houdin's famous crystal vase magic trick.
As Houdin was wrapping up the trick, the
Destroyer witnessed Magma Cherni get shot from behind and despite
Houdin's seeming panic, the Destroyer continued to suspect Houdin due
to a strong motive. The hotel manager Blake urged Houdin to continue to
show so as to not panic the audience and when Houdin did so, performing
his next trick with the famous Crown Diamond of Mrs. Farrell, the
Destroyer had Kathy get the diamond returned to Mrs. Farrell appraised
while he continued investigating Magma's murder. He then questioned
some of the workers in Houdin and Cherni's Magic Act and learned that a
curtain was not normally rung down at the end of the vase during
Houdin's crystal vase trick and that Houdin had changed that last
minute. Checking the curtains, the Destroyer discovered a pistol rigged
to fire whenever the curtains were rung down and deduced that Houdin
had murdered Magma using that rigged pistol. Deciding to confront
Houdin on stage, the Destroyer had Blake let him into Houdin's trap
door beneath the stage and when Houdin was performing a rug trick, the
Destroyer emerged from the trap door to surprise the criminal stage
magician. Proclaiming aloud how clever Houdin was to murder his
assistant when she discovered he had been stealing from the audience,
the Destroyer announced that Houdin's tricks could no longer help him.
Houdin responded by hurling a rug into the Destroyer's face and
escaping into a trunk with a trick bottom. Suspecting the trick trunk
exit led into the alleyway outside, the Destroyer rushed outside, only
to be accosted by Houdin's thugs. During the scuffle, Houdin pulled a
gun on the Destroyer but the hero punched one of the thugs into Houdin,
causing him to drop the gun, and the Destroyer quickly apprehended
Houdin. Kathy then met the Destroyer outside and when the Destroyer
asked what Kathy had learned about the diamond Houdin had returned to
Mrs. Farrell, Kathy confirmed that it was one of the best imitations
the appraiser had ever seen. The Destroyer then confirmed Houdin's
murder and theft crimes to the arriving police and Kathy commended the
Destroyer on completing his first case.
(Daring Comics I#12 / 5) - On a particularly boring day at the Crane Detective Agency, the Destroyer read the newspaper and commented to the secretary Kathy that Jerry Crane needed to return soon or he would "blow his top." The Destroyer light-hearted comments were interrupted when a man arrived at the door. Kathy opened the door and the man fell dead on the floor, prompting the Destroyer to jump out of his seat and rush over to the man. Confirming the man's death, the Destroyer identified him as notorious gunman "Trigger" Connolly and he quickly had Kathy call the police while he followed the trail of blood left behind by Connolly. Tracing the blood to Calhoun Park, the Destroyer found a pool of Connolly's blood and began investigating the murder, going over the placement of where and how the murder might have occurred. Two criminals soon jumped the Destroyer but he swiftly regained his balance and fought back, knocking one of them out cold and punching the other. The Park security officer soon arrived to find the Destroyer and one of the thugs hanging over a tree. He then helped the officer take the two thugs into police custody but when he overheard over the police band radio that a murder had occurred at 23rd and Elm Street, the Destroyer bid goodbye to the Park police officer and rushed over to 23rd and Elm.
Finding criminal "Knuckles" Bender murdered at the scene, the Destroyer again began trying to determine how the murder could have occurred and when police arrived soon after, the Destroyer informed the police of his intent to solve the gangland murders. Returning to Calhoun Park, the Destroyer began inspecting trees near where "Trigger" Connolly had been killed and he soon found a leaf with a bullet hole through it. Tying a handkerchief to the tree limb, the Destroyer worked to determine the angle at which the bullet was fired and he soon deduced that Connolly was killed by someone in the steeple of the Union State Building. He traveled there and climbed the empty elevator shaft to the 85th floor, exiting at the Union State Building's tower. Arriving to find Fred "Numbers" Bellman and several other mobsters with a gun preparing to kill mobster Joe the Stoolie, the Destroyer caught the gangsters off-guard and jumped into battle against them. During the battle, Numbers turned the gun against the hero but the Destroyer uppercutted the mobster, who leaped out of the skyscraper tower rather than face murder charges. Sad to see Numbers take what he considered the coward's way out, the Destroyer apprehended the two other gangsters before later returning to the Crane Detective Agency. Picking up a newspaper, the Destroyer pronounced the mystery of the "vanishing ghost gun" closed and when he expressed wishes that something exciting would happen, Kathy kicked the chair out from under the hero and ordered him never to say those words again.
(All Select Comics I#10 / 4) - After criminal
Rocky Scarpulla blackmailed her adoptive inspector father into aiding
him circa Summer 1946, Carol
Butts sought to reach out to the heroic Destroyer for assistance. A
short time later, the Destroyer was sitting in the offices of Jerry
Crane's detective agency, where he expressed to Kathy his wishes that
Jerry would return, as the place seemed to be run "like a morgue." The
conversation was interrupted by the arrival of Carol Butts, who asked
to speak with the Destroyer. After hearing Carol's story of her father
being blackmailed, the Destroyer asked who the criminals were and Carol
admitted she didn't know their names before presenting the Destroyer
with a drinking glass with criminal fingerprints on it. The Destroyer
quickly dusted the glass for fingerprints then phoned the police
headquarters to have them run the prints.
A short time later, after the fingerprints on the
glass had been run by police, the Destroyer learned the fingerprints
belonged to Rocky Scarpulla, at which the police officer informed the
hero that Scarpulla had went straight, opening a private investigative
firm alongside the now-retired Inspector Butts. Suspicious, the
Destroyer later tapped the phone lines at the newly-opened Butts
Detective Agency, from which he overheard Scarpulla promised to help
guard a money pickup at the First National Bank the following day. The
next day, the Destroyer parked a car near the First National Bank and
observed Rocky Scarpulla and his men, dressed as armed guards, arriving
at the Bank. Once Scarpulla and his men had the money inside the
armored truck picking up the money, the Destroyer trailed them. When
Scarpulla double-crossed the truck driver to take the money for
himself, the Destroyer dove into battle against Scarpulla and his men,
only to be knocked out by the butt of a gun while
Later, the Destroyer returned to the Butts
Detective Agency's office to witness Rocky and his men leaving on a
protection job and, suspecting something was up, the Destroyer opted to
break into the Butts offices to investigate. Once inside, the Destroyer
used graphite dust to reveal the last thing written on a notepad he
spotted, from which he learned that Rocky's protection job was for the
Warburton family on Park Avenue. Arriving at the Warburton home in time
to attack Rocky and his goons, the Destroyer leaped into battle, only
to quickly feign injury in an effort to take a fall and undercover the
whereabouts of Inspector Butts. He was then taken to Rocky's hideout
and just before he was led into a motorboat to be killed, the Destroyer
dove into the water and used the boat's propeller to cut through his
bounds. He then tipped over the boat, knocking Rocky's men into the
water before using the boat to pull the crooks to the shore. The police
soon arrived and the Destroyer turned the men over to the police,
informing them that stolen loot from the Warburton home could be found
at Rocky's hideout. Returning to the Warburton home, the Destroyer
learned of Carol Butts' adoption and that she was actually the
long-lost kidnapped daughter of the Warburtons.
(Official Handbook of the Marvel Universe A to Z HC Vol. 3 -
Destroyer (Marlow/Aubrey) entry - BTS) - "Keen" Marlow's subsequent
postwar activities went mostly unrecorded, leading many to wonder of
his ultimate fate.
(Destroyer IV#4 (fb) - BTS) - Following the war, the Destroyer decided to stop using guns.
(S.H.I.E.L.D. III#1 (fb) - BTS) - An avid fan of superheroes,
nine-year-old Phil Coulson personally hand-wrote amateur filecards on
various World War II-era superheroes, including one on the Destroyer.
(Destoyer III#3 (fb) - BTS) - At some point following the war, the
Destroyer learned that his enemy Scar had survived their first
encounter and the two battled again at the Liberty Tire Factory.
(Destroyer IV#1 (fb) - BTS) - The Destroyer ultimately began
working in secret, going on missions for an unidentified military
agency and earning the enmity of several supervillains. Having grown up
in the shadow of his younger brother "Keen," Richard "Dicky" Marlow
used his ability to transform into a monstrous form for evil acts, also
becoming a recurring enemy of the Destroyer. The Destroyer ultimately
apprehended Dicky and sent him to prison.
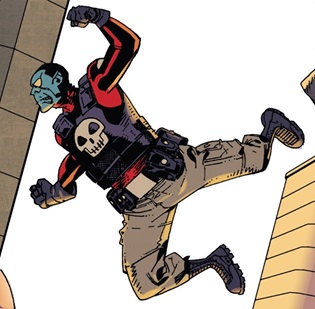 (Destroyer IV#2 (fb) - BTS) - A
woman named Harriet met and fell in
love with "Keen" Marlow.
(Destroyer IV#2 (fb) - BTS) - A
woman named Harriet met and fell in
love with "Keen" Marlow.
(Destroyer IV#1 (fb) - BTS) - After "Keen" and Harriet were married, they had a daughter, Felecia.
(Destroyer IV#3 (fb) - BTS) - The Scar severed the arm of the
Destroyer's wife, Harriet.
(Destroyer IV#2 (fb) - BTS) - At some point, the Destroyer began
working with a crimefighting partner codenamed Turret, whose real name
was Darius.
(Destroyer IV#4 (fb) - BTS) - After Darius and his daughter Felecia
became romantically involved, "Keen" Marlow ordered Darius to give up
being Turret for the sake of his daughter's happiness.
(Destroyer IV#2 (fb) - BTS) - Darius agreed to give up his heroic
identity and settle down, soon marrying Marlow's daughter Felecia.
Darius' old costume was placed in a basement museum of the Destroyer's
artifacts that also included the Destroyer's original costume and a
replica of Captain America's original shield.
(Destroyer IV#1 (fb) - BTS) - At two different points in his life,
the aging "Keen" Marlow suffered heart attacks.
(Destroyer IV#2 (fb) - BTS) - One foe he encountered was the
robotic Technotronica, who was known for escaping by uploading her
consciousness elsewhere. Another
that became a nemesis of the Destroyer was Doctor Devastation, who at
one point acquired a sample of the Destroyer's DNA, which he used to
try to track down the hero in his civilian identity.
(Destroyer IV#1 (fb) - BTS) - Months later, "Keen" Marlow agreed to
let
his daughter Felecia hold a birthday party at his home for his
granddaughter Haley.
(Destroyer IV#1) - The aging Destroyer arrived to take down the terrorist Horde organization, who were working to complete a bomb. Violently killing one of the Horde, the Destroyer then rushed towards the members working on the bomb, shrugging off bullets as he approached. When one of the bullets hit his facemask, causing his pain, the Destroyer angrily used a gun taken from the Horde member he killed to separate one of the Horde's jaw from his head. One of the terrified Horde began calling for backup but the Destroyer crushed the teleporter's face with his boot, killing him as well. The Horde teleporter attempted to retaliate but the Destroyer impaled him with the stolen gun moments after the Horde's bomb was activated. Realizing they could no longer escape the bomb's impending explosion, the remaining two Horde members threw the bomb over the side of a skyscraper and surrendered to the Destroyer. Instead of accepting the surrender, the Destroyer instead grabbed the two Horde members and leaped off the skyscraper's roof, informing them that they would be the only two casualties of the bomb. The bomb then exploded, killing the two Horde members and leaving the Destroyer sitting in the rubble naked, his costume having been incinerated by the bomb blast. He was subsequently approached by a soldier who asked if he was okay and Marlow asked to be dropped off at a Kmart for more clothes so he could arrive on time for a prior engagement.
A short time later, "Keen" Marlow arrived back at his home for Haley's birthday party. Felecia's boyfriend Darius slyly hinted to "Keen" about the explosion on the news, "Keen" smiled and claimed he didn't know anything about it. Felicia then thanked her father for letting them have the birthday party there and "Keen" happily reminded Felicia that they were there for her. He then asked where his wife Harriet was and after learning she was in the kitchen making potato salad, "Keen" ventured into the kitchen to greet her. Harriet asked if "Keen" had any heart episodes during the fight against the Horde and after "Keen" assured her he did not, Harriet reminded him of his doctor's appointment the next day.
The following day at his doctor's appointment,
"Keen" was told by his doctor that he was dying and that his heart
could go out doing something as relaxing as a crossword puzzle. When
the doctor suggested "Keen" retire, he replied that he couldn't. The
doctor then reminded Marlow of his two previous heart attacks and when
he mentioned his certainty that Marlow would not survive a third,
Marlow asked how much time he had left. The doctor remarked that it
could be one day or even one month but warned that if Marlow continue
his activities as the Destroyer, he would not be surprised to be at
Marlow's funeral the next week. That night, Marlow nearly revealed to
Harriet his prognosis but ultimately decided to keep it a secret.
Knowing that "Keen" felt guilty over the accident that cost Harriet her
arm, Harriet reminded "Keen" that there was nothing more he could have
done but an ashamed "Keen" claimed he could have been faster.
Deciding that he wanted to spend the little time he had left tying up loose ends and taking out any outstanding threats, the Destroyer visited his brother Dicky in prison and arranged for him to be unshackled so the two could have one final, fair fight. Claiming his evil acts were the result of living his life in the shadow of his younger brother, the unshackled Dicky attacked the Destroyer and the hero ultimately killed Dicky by plunging his fist down into Dicky's monstrous maw. When the warden entered, the bloody Destroyer remarked that his killing of Dicky had to be done and that he had lied to Dicky with his statement of it being a fair fight.
(Destroyer IV#2) - During Dicky's funeral, "Keen" Marlow noticed former criminal Bruiser and excused himself from his family to walk over to him. Bruiser insisted he had gone straight but Marlow, knowing Bruiser was being truthful, asked only if Bruiser knew where he could find Scar. A nervous Bruiser swore he was no longer connected to the world of criminals and had no idea where Scar was, prompting Marlow to give a sarcastic, disbelieving look. Marlow's sarcasm was quickly interrupted by a soldier who dropped in to inform Marlow that he was needed for a mission. After letting his family know that he had to leave, Marlow departed in a military helicopter and along the way to his mission, he discussed his intent to go after Scar. Having been briefed on the Destroyer's physical condition, his superior suggested leaving Scar be and going home to spend time with his granddaughter but the Destroyer insisted he had take down as many villains as he could before he died. The superior then admitted he understood the Destroyer's feelings and suggested the Destroyer take it easy before the hero leaped from the helicopter into a battle against a giant purple monster.
"Keen" Marlow later accompanied his family to a floating island country club, where he spoke with Darius about his medical issues and how his final acts might be drawing some villains out of the woodwork. Before he could continue, Marlow noticed his out-of-costume foe Doctor Devastation in the club and informed Darius that the villain had been tracking him using a sample of the Destroyer's DNA. In an effort to take down Doctor Devastation while he could, Marlow then feigned a heart attack and a worried Darius called for a doctor. Doctor Devastation, not yet aware of the Destroyer's true identity, came running up to assist the supposed heart attack victim but when Doctor Devastation got in close to assist, Marlow whispered "I win" before breaking Doctor Devastation's neck. Security quickly surrounded Marlow and he and his family were ordered to leave the floating island club. On the plane ride back, Marlow explained how he had to make the heart attack look real in order to get close enough to Doctor Devastation and he informed his family that once the authorities learned who Doctor Devastation was, their membership in the country club would be reinstated.
Later that night, Marlow helped Harriet remove her cybernetic arm and she confronted him about not telling her about his medical prognosis. "Keen" tried to explain how he didn't want Harriet to worry but Harriet accused "Keen" of not loving his family as much as his superheroic activities. When "Keen" remarked that he wouldn't be the man Harriet fell in love with if his heroic actions were not bigger than his family, prompting Harriet to remind him that she had fifty-three years of marriage to get used to coming in second. Marlow nonetheless got into bed with Harriet and she questioned how much time he had left to live. Marlow only replied with "Not long."
A short time later, the Destroyer went into action against Technotronica, destroying her robotic goons and making his way to Technotronica herself, from whom he demanded the location of Scar. When she warned against waking the "sleeping dragon," the angry Destroyer decapitated the villainess and kicked her severed head across the room. Later that night, his arm in a sling following his battle with Technotronica, "Keen" Marlow went to get a snack from the refrigerator when he began experiencing chest pains. The pains thankfully did not transition to a full heart attack but a knock soon came to the door and when Harriet opened it, they found a seriously injured Darius holding Haley in his arms. Darius exclaimed that there had been an attack on their house and while he was barely able to protect Haley, Felecia had been kidnapped. Darius then revealed that the culprit behind the kidnapping was Scar and he convinced Marlow to pull his old Turret costume out of the basement museum. After Darius donned his costume to resume his old Turret identity, the Destroyer put on his mask and proclaimed that, now more than ever, the Destroyer and Turret would be unstoppable.
(Destroyer IV#3) - During a battle with the villainous Scavenger, the Destroyer hung the criminal from a rooftop and demanded information as to Felecia's whereabouts. Scavenger ultimately died from the hanging and Turret argued that the continued killings couldn't be helping the Destroyer's medical condition but the Destroyer argued that he was trying to save Felecia before his time ran out and that killing criminals was the best thing for his heart. He also claimed that the stress on his heart was due to decades of fighting not to the criminals trying to take over the world or hurt his family before suggesting they return home. Upon arriving back at his house, "Keen" Marlow noticed a box on the doorstep with a threatening note. He quickly grabbed a knife and opened the box to find a severed finger. Darius soon deduced that the finger did not belong to Felecia and Marlow suggested having some tests run on the finger to determine who it belonged to.
A short time later, the Destroyer and Turret
resumed their search for Scar and when their search took them to a
residential neighborhood home, they were caught in the blast of the
exploding home. As they pulled themselves from the rubble, the
Destroyer and Turret realized they were on Liberty Road and the
Destroyer noted it as a reference to the Liberty Tire Factory, where he
had battled the Scar following the war. Traveling to the now-abandoned
Liberty Tire Factory, the Destroyer and Turret busted into the factory
via its skylight, only to be confronted by the horribly disfigured
Scar. Admitting that he had been content to live out his remaining
years in retirement, content at taking the arm of the Destroyer's wife,
the Scar proclaimed that he was ready to die at the Destroyer's hands.
The Destroyer ordered the Scar to release Felecia at the promise of a
quick death but the Scar instead activated a device that slit Felecia's
wrists in an attempt to make her bleed to death while the Destroyer and
Turret battled the Scar's goons, Bruiser, Crocodile and Organite.
Bruiser admitted to working with Scar in an effort to stop the
Destroyer from killing his old enemies as he and the two other
criminals severely beat the Destroyer, tearing his mask. Nearly beaten
to death, the Destroyer managed to attach an explosive to Bruiser,
killing him. Crocodile then attacked again and after he missed
attaching an explosive to Crocodile, the Destroyer headbutted him so
hard that it smashed Crocodile's face, also killing him.
The Destroyer then turned his attention towards the Scar himself, who pointed a gun at the hero at point blank range. Before the Scar could shoot him dead, however, the Destroyer ripped off the Scar's arm and shoved the arm into the Scar's mouth while Turret freed Felecia. He then pummeled the Scar into a bloody pulp, completely smashing his old enemy's face into the floor. After ensuring Felecia got emergency medical treatment, Turret calmed the Destroyer down and assured him the fight was over but Marlow, completely covered in blood, remarked that it wasn't over yet since his heart was still ticking.
(Destroyer IV#4) - Recovering in a hospital, "Keen" Marlow was
visited by his superior officer, who informed Marlow that Felecia would
survive her injuries. When his superior also presented documents
showing the Horde's headquarters, the still-bandaged Marlow leaped out
of bed, ready to go after the Horde. Harriet quickly reminded him that
his daughter was still being treated and when "Keen" noted that Felecia
was being released the next day, Harriet reminded him about his heart.
"Keen" replied by reminding Harriet that the Horde would eventually
come after them as well and Harriet reluctantly admitted her
understanding of "Keen"'s determination in taking down as many villains
as he could before she kissed him. "Keen" then left to gear up for his
mission against the Horde and as he traveled to the Horde's
headquarters, he was given a large gun that could shoot through twenty
men despite his insistence that he didn't use guns. Eight minutes
later, the Destroyer was leading a ground assault on the Horde. When
the Horde unleashed a squadron of humanoid beasts, the Destroyer took
several down before being overwhelmed. Turret came to the Destroyer's
rescue and despite the Destroyer being annoyed that Turret had left
their family to assist, the two soon found themselves confronting the
Horde's leader, a large monster called Krakoom. The two heroes teamed
up to pop Krakoom's eye out but when he was knocked to the ground, the
Destroyer began experiencing chest pains. As he laid there trying to
fight his way through the chest pains so he could assist Turret, the
impressed Destroyer witnessed Turret defeat Krakoom alone.
Later that night, "Keen" Marlow admitted to
Harriet that he was getting older, slower and weaker. The next day, he
accompanied his family to see Felecia as she released from the hospital
but after an angry Felecia slapped Darius for keeping secret his return
to action as Turret, Marlow blamed himself for their marital spat.
Harriet tried to reassure him but Marlow admitted that, after he had
seen Turret in action against Krakoom, he realized he had made a
mistake in previously forcing Darius to give up his identity of Turret.
(Destroyer IV#5) - After getting Haley to bed, Harriet entered her
bedroom, where "Keen" Marlow was reading "Savage Planet, Savage Beasts"
by Nolan Grayson and "Keen" asked if Darius and Felecia were still not
talking. Harriet claimed it was none of "Keen"'s business and "Keen"
changed the subject to how much longer it would be until Darius and
Felecia's home would be repaired. He then joked that if they were
twenty years younger, Harriet wouldn't be sleeping that night and
Harriet smiled and remarked that she remembered those days as being
nice. The two then expressed their love for one another and laid down
for some sleep. Not long after, "Keen" began experiencing chest pains
and suffered a heart attack. Fighting his way back from the afterlife,
"Keen" soon woke up to find himself surrounded by paramedics and his
family. Assuring them he was fine, "Keen" later saw his doctor, from
whom he learned his test results were actually slightly better than his
last ones, as if his heart had somehow healed a little. When the doctor
joked that "Keen" might have displayed a new superhuman power of
surviving three heart attacks, Marlow began thinking how he'd been
given a new chance at life. He soon noticed his superior officer
walking and learned that Technotronica had survived her decapitation by
downloading her consciousness elsewhere. Marlow jumped up, ready to
take on Technotronica, but his superior revealed that he was actually
there to see Turret instead. His superior thanked "Keen" for helping
bring Turret back into the fold of military service and Darius soon
entered the room, revealing his new costumed identity of the Destroyer.
The new Destroyer than ran off to stop Technotronica and "Keen" asked
Harriet if she knew Darius had succeeded him as the Destroyer. Harriet
admitted that she did know and Felecia soon entered the room, revealing
that she had accepted Darius' heroic life and what it meant for their
family. Not long after, a retired "Keen" relaxed outside with Harriet as Felecia
chased Haley, who had found an old domino mask, around the yard.
Looking over at Harriet with curiosity, "Keen" yelled for Haley to put
down the mask.
Comments: Created by Stan Lee and Jack Binder.
Originally,
the Destroyer was a
singular character, Kevin "Keen" Marlow, who fought during the 1940s
but later retcons revealed that the Destroyer identity was actually
shared by both Marlow and Briton Brian Falsworth, the lover of Roger
Aubrey, who assumed the mantle of the Destroyer himself in 1942 after
Brian assumed the mantle of Union Jack from his father. Both Falsworth
and Aubrey helped perpetuate the ruse to their enemies that there was
only one single Destroyer despite their being at least two at any given
time during World War II (either Marlow & Falsworth or Marlow &
Aubrey). It has also been established in modern retcons that both
Falsworth and Aubrey occasionally used the alias of "Keen" Marlow as
part of that ruse, leading to some slight difficulty determining which
Destroyer was which in the Golden Age stories. Having written Marvel
Appendix profiles on Roger Aubrey and Brian Falsworth both, and taking
in some of the confirmations given in the modern OHotMU profiles on
Marlow, Aubrey & Falsworth, I did my
best to separate the Destroyer appearances in between the two of them
and this profile on the real "Keen" Marlow.
Interesting note about the above mentioned retcon: While the original stories were written (and intended at the time) as if all of the Golden Age Destroyer stories were the same character, the later retcon that there were three different Destroyers active during the 1940s is kind of supported by a line in the Golden Age Destroyer story in Kid Komics I#6 (1944). In that issue, a Nazi leader reports back to his bosses that the Destroyer, "der REAL Destroyer" was there, suggesting that the Nazis had encountered more than one Destroyer at some point and deduced that some might be doubles or stand-ins. Perhaps that line was what inspired the later retcons that there were indeed three different Destroyers with at least two active at the same time at any given time during World War II.
The Marvel Database Wiki website
lists Keen Marlow's first appearance as All Winners Comics I#2,
claiming that the issue came out in September, 1941, while Marlow's
official modern day OHotMU profile (alongside Roger Aubrey) lists
Marlow's first appearance as Mystic Comics I#6 (October, 1941). Looking
at the issues while researching for this profile, I see nothing on All
Winners Comics I#2
that states it publication date as September, 1941. The copyright in
the
indicia does say 1941 but no month is given and the cover only says
"Fall, 1941." I'm guessing that is also why the official Marvel
publication
states Mystic Comics I#6 as Destroyer's first appearance. On a similar
note and possibly creating more confusion, the Marvel Chronology
Project website lists the story in Mystic Comics I#6 as occurring prior
to the one in All Winners Comics I#2 but the Destroyer (Marlow/Aubrey)
entry in the modern OHotMU A
to Z HC Vol. 3 confirms the All Winners Comics I#2 story as occurring
in June 1941 while the Mystic Comics I#6 story occurs "soon afterward."
Despite these conflicting accounts as to when the stories take place, I
am going with the official Marvel ruling in that the story in All
Winners Comics I#2 is before Mystic Comics I#6 while Mystic Comics I#6
is still the first appearance of Marlow, probably due to it being on
newsstands earlier in Fall 1941.
Similar date confusion happens
again with All Winners Comics I#3, where the Destroyer battles Dr.
Dragon. The issue has a cover date of December 1941 yet the modern
Destroyer (Marlow/Aubrey) OHotMU entry confirms that this story occurs
in September 1941 rather than December.
The text story "The Mystic
Line-Up" in Mystic Comics I#6 tells the story about how an unidentified
comic book editor (likely Joe Simon) chose to include stories of the
Destroyer as the lead story in Mystic Comics and how the editor tasked
writer Stan Lee with dictating the editor's response to the question of
why he chose the specific heroes he did for that comic series. While
the text story could have been nothing more than an article instead of
an in-universe story, it does provide additional story elements to the
characters in Mystic Comics at the time so I'm tending to treat it as
an actual story. If that is the case as I ASSume, I suppose that means
that at least the comic
book editor and Stan Lee were aware of the Destroyer's secret identity
of "Keen" Marlow. Perhaps that was part of the deal Marvel heroes had
with Timely/Marvel Comics to publish their adventures in comic book
form? In the story, Stan Lee expresses the editor's well wishes and
gratitude to "Keen" Marlow, confirming at least their knowledge of the
hero's true identity. However, the text story is what we the reader are
reading and perhaps there was fictionalized version of that article
that was published on Earth-616 that did not mention the Destroyer's
true identity.
The story in All-Winners Comics I#9 is a bit confusing, as there's a LOT going on in it, especially in regards to the various roles "Keen" Marlow plays in the story. To better explain the overall plot, here's a quick explanation: Marlow got a job in Washington as a secret agent/spy using his cover identity name of Louis Kramer and they were unaware he was truly Marlow or the Destroyer. As Marlow, he befriended anti-Nazi artist Paul Voltz and when Voltz was captured and set for execution, he arranged to fake Voltz's death and get him safely out of the country. He then met with Voltz's daughter as Marlow and overheard that three anti-Nazi publishers were also being condemned for death while Captain Achhimmel and Inga von Leche worked to capture the Destroyer. Suspecting their trap, Marlow used his Louis Kramer identity and convinced both Achhimmel and Inga that he was a spy for Germany and, as Kramer, he agreed to pose as the Destroyer as part of Achhimmel and Inga's trap for the hero (both of whom were completely unaware that they were actually working with the real Destroyer the whole time). He then basically pulled a "Mrs. Doubtfire" and had to be in the same place at the same time in two different identities (Kramer/Destroyer impostor & the real Destroyer). He successfully convinced the Nazis that he was both people and during the trap, he rescued the three condemned publishers. The story ends with Inga still working with Louis Kramer, still completely unaware that he was actually the real Destroyer OR that he was working with Washington, who was also unaware he was the Destroyer.
In two Golden Age stories, "Keen"
Marlow was seen immediately transitioning into his Destroyer costume,
in one case even while in the grasp of an enemy. It seems unlikely that
this would be some sort of superhuman power, as he was wearing
different civilian clothes each time. Perhaps it was some sort of early
experimental hologram technology or some other form of technology?
Marlow's fiancee Florence von Ward/Banger was referred to alternately by different first and last names. Originally, she was "Florence von Ward" but over the course of 1941 stories, she began to be referred to as "Florence von Banger" (not to be confused with the Destroyer's foe, Frederick von Banger). The modern-day profile on Destroyers "Keen" Marlow & Roger Aubrey established that "Florance von Banger" was a false name assumed by Florence von Ward and who knows? Perhaps she used "von Banger" as a surname to better trick the Nazis into believing she was pro-Nazi since Frederick von Banger was known to the Nazis. As 1942 dawned though, several Destroyer stories began to call her "Flora" instead of "Florence." Perhaps "Flora" was a nickname?
The last panel of the Destroyer story in USA Comics I#6 states that the Destroyer's adventures will continue in the next issue of USA Comics but USA Comics I#7 does not contain a Destroyer story. The Destroyer story in USA Comics I#8 stars the Roger Aubrey Destroyer not "Keen" Marlow.
Halfway through the Destroyer
story in USA Comics I#12, Major von Glib starts being referred to as a
colonel. For the purposes of this profile, I'm going with his rank of
Major since he was referred to as a major first and more often than
colonel.
On several story title pages from his appearances in 1944-1945, the Destroyer is depicted flying into battle ala Superman or something but in the actual stories themselves, he has never been depicted as having the power of flight. Since many of the story title pages don't exactly reflect how things went in the actual story itself, I'm guessing this was done just for artistic dramatic effect and not meant to show any actual superhuman power.
The villainous Japanese colonel seen in the Destroyer story in Complete Comics I#2 had a name that was partially revealed on his office but both times the name was shown, it was partially obscured by something. The most we get of the name was "Colonel --outo."
The publication date for Mystic
Comics II#4 just says "March" on the front cover and the indicia just
states a copyright of 1944. However, that issue would almost certainly
be
March 1945 not 1944 since the other Mystic Comics II issues came out in
late 1944. Timely probably just used the older copyright date in the
indicia because that's what they had used on the other three
issues...Daring Comics I#11 has a similar issue in that it just says
"Summer" on the front cover and copyrighted 1944 on the inside indicia.
It would also have likely been out in Summer 1945 not 1944.
Wow, there were a ton of the Destroyer's adventures that involved him knocking out an enemy and using their uniform as a disguise to infiltrate enemy territory. Hey, I guess when you're on a mission, you do what works!
Daring Comics I#12 is dated "Fall 1945" and Kid Komics I#10 is dated "Spring 1945-1946." Based on the dates, one might logically assume that Kid Komics I#10 was published after Daring Comics I#12 but the story in Kid Komics I#10 begins with the Destroyer taking over Jerry Crane's detective agency while Jerry Crane goes to Mexico and the story relates the Destroyer's first case while with the agency. Daring Comics I#12 begins with the Destroyer already in the role as head of the detective agency. Based on this information, it seems logical that the story in Kid Komics I#10 occurs prior to Daring Comics I#12 despite the publication date being later. Kid Komics I#10 couldn't take place in Spring 1945 because the Destroyer was still in the South Pacific at that point and didn't return to the US until Fall 1945. The story in Daring Comics I#12 is also dated Fall 1945 so the story in Kid Komics I#10 would likely also occur in Fall 1945 in between the Destroyer's return to the USA and subsequent defeat of the Pineapple Gang in Chinatown and his taking over of Crane's detective agency. I suppose one might argue that the publication date of Kid Komics I#10 might even support that since it says "Spring 1945-1946." The story still did occur between the spans of Spring 1945 & Spring 1946 if it occurred in Fall 1945, ha...
There are conflicting accounts as
to which Destroyer is present in Kid Komics I#5. The Marvel Chronology
Project states that it's "Keen" Marlow while the Marvel Database Wiki
and Roger Aubrey's own Appendix profile list the Destroyer in that
story to be Roger Aubrey. For the purposes of this profile and what has
already been established on the Marvel Appendix, I'm going with that
Destroyer being Aubrey rather than Marlow.
Captain America (Steve Rogers)
mentions to the Destroyer (Brian Falsworth) how he had heard of the
Destroyer in Invaders I#18 (set in 1942) but Captain America had met
the "Keen" Marlow Destroyer some months earlier in All-Winners Comics
I#2 (Fall 1941). One might try to argue that Cap was mentioning that
he'd heard of the Brian Falsworth Destroyer but at that point in the
conversation, Cap had no idea Brian Falsworth was the Destroyer he was
speaking to. It seems somewhat likely that since he'd heard (and knew
from his previous encounter with a Destroyer months earlier) the
Destroyer was American and he'd already noticed Brian's British accent,
Cap was deliberately not trying to let on that he knew the Destroyer in
case he was speaking to a spy posing as the Destroyer or
something...For what it's worth, in Invaders I#18, Cap also mentions
that he had heard FBI reports that the Destroyer was American reporter
"Keen" Marlow. Since Marlow is present in his civilian identity and as
the Destroyer in the All-Winners Comics I#2 (mostly) text story that
also involves Captain America, perhaps Captain America had heard those
FBI reports prior to All-Winners Comics I#2 and it was those same
reports that prompted him to summon "Keen" Marlow in that All-Winners
Comics I#2 story. That'd actually make a lot of sense!
"Keen" Marlow's height is
incorrectly listed as 6'5" in the Destroyer entry in OHotMU: Golden Age
2004. This was corrected to 6'1" in the Destroyer (Marlow/Aubrey) entry
in
OHotMU A to Z HC Vol. 3.
The Destroyer (Marlow/Aubrey) entry in OHotMU A to Z HC Vol. 3 lists the Destroyer's battle with the Pineapple Gang as occurring after he joined Jerry Crane's detective agency with his battles with Numbers and Houdin occurring after that. However, there's no mention of the Destroyer being a part of Crane's detective agency in USA Comics I#17 (the Pineapple Gang battle) and it's specifically mentioned that his battle with Houdin (Kid Komics I#10) was his first case for Crane's detective agency so it could not have happened the battle against Numbers and since again, there's no mention of the Destroyer being a part of the agency when he battled the Pineapple Gang, I'm inclined to think the Pineapple Gang battle happened shortly after he returned to New York but before he joined Crane's agency. Once he joined the agency, since Kid Komics I#10 specifically mentions Houdin being the Destroyer's first case, I'm inclined to place the Houdin story before the Numbers story.
Speaking of Jerry Crane's
detective agency, in most of its Golden Age appearances, it's just
referred to as "Jerry Crane's detective agency" but in Kid Komics I#10,
it's specifically named as the Central Detective Agency. The modern-day
OHotMU entries on the Destroyer in OHotMU: Golden Age 2004 & OHotMU
A to Z HC Vol. 3 list it as being named the "Crane Detective Agency."
However, I'm thinking this might be a situation where the actual title
of the company is "Central Detective Agency" rather than "Crane
Detective Agency" since it was named that in Kid Komics I#10 and the
other appearances don't specifically title it as "Crane Detective
Agency" so much as it was "Jerry Crane's detective agency." It's
possible that the writer of the modern OHotMU entries saw all of the
mentions of it as "Jerry Crane's detective agency" and it was
mistakenly pulled into the Handbook entry due to a misunderstanding of
its actual name. Then again, the OHotMU entries could've been
retconning the name to actually be "Crane Detective Agency." For the
purposes of this profile and barring any information that would
definitively confirm a retcon, I'm going with the "Central Detective
Agency," headed up by Jerry Crane.
By the way, it's worth noting
that, unlike most Golden Age stories of the time, several Destroyer
stories included nice nods to continuity and the past stories, which I
found to be very refreshing when re-reading them for this profile. For
example, we are clearly shown stories where the Destroyer decides to
leave Germany for the South Pacific front rather than just having him
suddenly be there like most Golden Age stories would have probably
done. We're also introduced to "Lt. Crane" in an early Destroyer story
and postwar, we see a now-civilian Jerry Crane show back and recruit
the Destroyer into his detective agency. The writers could have made
Jerry Crane be any other random character or even a new character but
they specifically chose to make it a character we'd previously seen
during the war, which I thought was a nice nod. Speaking of Jerry Crane
and his detective agency, it was nice to see the detective agency
remain the setting for the remainder of the Destroyer's postwar stories
after we see him join the company. Really, the writers (or at least,
the writers helping separate which Destroyer stories were Marlow,
Falsworth or Aubrey) did a good job keeping the status quo consistent
throughout the "Keen" Marlow Destroyer's Golden Age appearances...
The 2009 Destroyer MAX mini-series was originally
stated by its creator, Robert Kirkman, to not be in-continuity, leading
to information from it not be included in the text update for the
Destroyer (Marlow/Aubrey) entry when the OHotMU A to Z HC series was
reprinted in TPB form. However, as time has passed, it has
since been considered to be in-continuity for Earth-616, as there's
nothing in that mini-series to exclude it from being -616. There's some
lengthy discussion of whether or not this fits in -616 continuity on
the
Marvel Chronology Project message boards (thanks to Loki for
pointing me to the discussion!).
The Marvel Database Wiki states
that the Destroyer in the new story in USA Comics 70th
Anniversary Special#1 is "Keen" Marlow but the update text in the
Destroyer (Marlow/Aubrey) profile in OHotMU TPB Vol. 3 confirms that
the Destroyer in that story is Brian, not Marlow.
The Marvel Database Wiki also lists Marvel Comics
I#1001 as featuring a drawing of the Destroyer in the "Comics for
Victory!" story. However, in double-checking that issue, there is no
actual drawing of Destroyer in the issue. We do see the very top of the
cover of All Winners Comics I#2, which does feature the Destroyer, but
the cover is mostly obscured except for the title, preventing the
Destroyer...if he actually appears on the Earth-616 cover of that
issue...from being seen. Therefore, we don't actually see any drawing
of the Destroyer and it would not be an appearance of the character so
it is not included in this profile.
Though we never saw them interact (for obvious reasons), [Roger Aubrey]'s presumably affiliated with Keen Marlow to some degree - they must have co-ordinated if only just a little to maintain their pretense of being a single individual. - Loki
Big thanks to Loki for some better quality version of a few of the profile images!Profile by Proto-Man.
CLARIFICATIONS:
"Keen" Marlow should be
distinguished from:
Appearances:
Mystic
Comics I#6 (October, 1941) - "The Destroyer" story - Stan Lee (writer),
Jack Binder (art), Joe Simon (editor); 2nd story - uncredited writer,
Jack Binder (art), Joe Simon (editor); "The Mystic Line-Up" story -
Stan Lee (writer), uncredited artist, Joe Simon (editor)
All Winners Comics I#2 (Fall, 1941) - 3rd story -
Stan Lee (writer, editor), Jack Binder (art); "Winners All" story -
Stan Lee (writer, editor), Jack Kirby (art)
Mystic Comics I#7 (December, 1941) - 1st story - Stan
Lee (writer), Al Avison (art), Joe Simon (editor); "Heritage of
Destruction" story - Stan Lee (writer), uncredited artist, Joe Simon
(editor)
All
Winners Comics I#3 (December, 1941) - "Secret Tunnel of Death!" story -
Stan Lee (writer, editor), Chad Grothkopf, John Forte (art)
Mystic Comics I#8 (March, 1942) - 3rd story - Stan Lee (writer,
editor), uncredited artist
All Winners Comics I#4 (March, 1942) - "Death to the Nazi Scourge"
story - uncredited writer, Al Gabriele (pencils), George Klein (inks),
Stan Lee (editor)
Mystic Comics I#9 (May, 1942) - 1st story - Stan Lee (writer, editor),
Chad Grothkopf (art)
All Winners Comics I#5 (June, 1942) - "A Grim Game of Horror!" story -
uncredited writer, John Forte (art), Stan Lee (editor)
Mystic
Comics I#10 (August, 1942) - "Battling the Underground Factory Fiend!"
story - uncredited writer, John Forte (art), Stan Lee (editor)
All Winners Comics I#6 (September, 1942) - "The Stone-Man Slayer!"
story - uncredited writer, Mike Sekowsky (art), Stan Lee (editor)
USA Comics I#6 (December, 1942) - 3rd story - uncredited writer, Bob
Oksner (art), Stan Lee (editor)
USA Comics I#10 (September, 1943) - 2nd story - uncredited writer, Mike
Sekowsky (art), uncredited editor
All Winners Comics I#10 (September, 1943) - 5th story - uncredited
writer, Bob Oksner (art), Vince Fago (editor)
USA Comics I#12 (Spring, 1944) - 2nd story - uncredited writer, artist,
editor
USA Comics I#13 (Summer, 1944) - "Hour of Doom" story - uncredited
writer, artist, editor
Mystic Comics II#1 (October, 1944) - "Jap Juggernaut" story -
uncredited writer, artist, editor
Amazing
Comics I#1 (Fall, 1944) - "The Face,...Master of Evil!" story -
uncredited writer, Al Gabriele (pencils), Vince Alascia (inks),
uncredited editor
Mystic Comics II#2 (Fall, 1944) - "The Transparent
Death!" story - uncredited writer, Al Bellman (pencils), Don Rico
(inks), uncredited editor
USA Comics I#14 (Fall, 1944) - "The Jap Serpent Strikes!" story -
uncredited writer, artist, editor
Mystic Comics II#3 (Winter, 1944) - "The Isle of Mysterious Death!"
story - uncredited writer, Don Rico (pencils), Al Bellman (inks),
uncredited editor
Complete Comics I#2 (Winter, 1944-1945) - "Tokio's Toll of Death!"
story - uncredited writer, Mike Sekowsky (pencils), Al Bellman (inks),
uncredited editor
All
Select Comics I#6 (March, 1945) - "Master of Murders" story -
uncredited writer, Chad Grothkopf (pencils), Al Gabriele (inks),
uncredited editor
Mystic Comics II#4 (March, 1945) - "Robot Revenge" story - uncredited
writer, Mike Sekowsky (art), uncredited editor
Daring
Comics I#11 (Summer, 1945) - "Floating Death" story - Otto Binder
(writer), Mike Sekowsky (pencils), Alex Schomburg (inks), uncredited
editor
USA Comics I#16 (Summer, 1945) - "The Destroyer Battles the Bloody
Baron" story - uncredited writer, artist, Vince Fago (editor)
Kid Komics I#9 (Fall, 1945) - "The Robot Boomerang!!" story -
uncredited writer, artist, editor
USA Comics I#17 (Fall, 1945) - "Murder in Chinatown" story - uncredited
writer, artist, Vince Fago (editor)
Daring Comics I#12 (Fall, 1945) - "The Vanishing Ghost Gun" story -
uncredited writer, Al Bellman (art), uncredited editor
Kid Komics I#10 (Spring, 1945-1946) - "The Corpse in the Guilded Cage!"
story - uncredited writer, Ken Bald (art), uncredited editor
All Select Comics I#10 (Summer, 1946) - "Agency of Death!" story -
uncredited writer, Ken Bald (art), uncredited editor
Invaders I#18 (July, 1977) - Roy Thomas (writer, editor), Frank
Robbins, Frank Springer (art)
Official
Handbook of the Marvel Universe: Golden Age 2004 (2004) - Ronald Byrd,
Michael Hoskin (writers), Mike Sekowsky (Destroyer entry art), Pond
Scum
(art reconstruction), Jeff Youngquist (editor)
Stan Lee Meets the Thing#1 (December, 2006) - "So You Wanna Play, Eh?"
story - Roy Thomas (writer), Scott Kolins (art, colors), Tom Brevoort
(editor)
Marvel
Atlas I#1 (2007) - Michael Hoskin (head writer, coordinator), Anthony
Flamini, Stuart Vandal, Eric J. Moreels (writers), Eliot R. Brown
(cartographer), Jeff Youngquist, John Denning (editors)
Official Handbook of the Marvel Universe A to Z HC Vol. 3 (2008) - Jeff
Christiansen (head writer, coordinator), Madison Carter, Stuart Vandal
(coordination assistants, writers), Mike Fichera (coordination
assistant, art refurbishment, writer), David Wiltfong (art
refurbishment, writer), Sean McQuaid, Ronald Byrd, Michael Hoskin, Eric
J. Moreels, Mark O'English, Al Sjoerdsma, Chad Anderson, Chris Biggs,
Jacob Rougemont, Rich Green, Gabe Shechter (writers), David Sexton,
Bill Lentz, Barry Reese, Jonathan Couper-Smartt, Anthony Flamini (past
writers), Mike Sekowsky, John Forte, Alan Kupperberg, Frank Robbins
(Destroyer (Marlow/Aubrey) entry art), Abe Waranowitz (art
refurbishment), Pond Scum (art reconstruction), Jeff Youngquist,
Jennifer Grunwald (editors)
Destroyer IV#1 (June, 2009) - Robert Kirkman (writer), Cory Walker
(art), Axel Alonso (editor)
Destroyer IV#2 (July, 2009) - Robert Kirkman (writer), Cory Walker
(art), Axel Alonso (editor)
Destroyer IV#3 (August, 2009) - Robert Kirkman (writer), Cory Walker
(art), Axel Alonso (editor)
Destroyer IV#4 (September, 2009) - Robert Kirkman (writer), Cory
Walker (art), Axel Alonso (editor)
Destroyer IV#5 (October, 2009) - Robert Kirkman (writer), Cory Walker
(art), Axel Alonso (editor)
Official Handbook of the Marvel
Universe A to Z HC Vol. 12 (2010) - Jeff Christiansen (head writer,
coordinator), Mike Fichera (coordination assistant, art refurbishment,
writer), Markus Raymond, Mike O'Sullivan, Madison Carter (coordination
assistants, writers), Stuart Vandal, Sean McQuaid, Michael Hoskin,
Ronald Byrd, Rob London, Gabriel Shechter, David Wiltfong, Rich Green,
Jeph York, Jacob Rougemont, Eric J. Moreels, Mark O'English (writers),
Chris Biggs, David Sexton (writers, art refurbishment), Chad Anderson,
Al Sjoerdsma, Anthony Flamini, Jonathan Couper-Smartt, Bill Lentz,
Barry Reese (past writers), John Byrne, Alan Kupperberg (Union Jack
(Brian Falsworth) entry art), Gally Articola, Jason Lewis, Courtney
Via, J. Christopher Schmidt (art refurbishment), Pond Scum, Nelson
Ribeiro (art reconstruction), Jeff Youngquist, Jennifer Grunwald
(editors)
Official Handbook of the Marvel
Universe A to Z TPB Vol. 3 (2012) - Mike O'Sullivan (Softcover/Update
Appendix head writer/coordinator, art refurbishment/reconstruction),
Mike Fichera (Softcover/Update Appendix coordination assistant, Update
Appendix writer/contributor, art refurbishment/reconstruction), Markus
Raymond (Softcover/Update Appendix coordination assistant, Update
Appendix writer/contributor), Stuart Vandal (Softcover/Update Appendix
coordination assistant, Update Appendix writer/contributor), Paul
Bourcier, Chris Buchner, Madison Carter, Jeff Christiansen, Anthony
Cotilletta, Patrick Duke, Kevin Garcia, Michael Hoskin, Rob London,
Chris McCarver, Sean McQuaid, Jacob Rougemont (Update Appendix
writers/contributors), Roger Ott, David Wiltfong (Update Appendix
writer/contributor, art refurbishment/reconstruction), Gally Articola,
Pond Scum, Abe Waranowitz (art refurbishment/reconstruction), Jeff
Youngquist, Jennifer Grunwald (editors)
S.H.I.E.L.D.
III#1 (February, 2015) - Mark Waid (writer), Carlos Pacheco (pencils),
Mariano Taibo, Jason Paz (inks), Tom Brevoort, Ellie Pyle (editors)
History of the Marvel Universe II#6 (February, 2020) - Mark Waid
(writer), Javier Rodriguez (pencils, colors), Alvaro Lopez (inks), Tom
Brevoort (editor)
First posted: 05/20/2025
Last updated: 05/21/2025
Any Additions/Corrections? please let me know.
Non-Marvel Copyright info
All other characters mentioned or pictured are ™ and
© 1941-2099 Marvel Characters, Inc. All Rights Reserved. If you
like this stuff, you should check out the real thing!
Please visit The Marvel Official Site at: http://www.marvel.com
Special Thanks to www.g-mart.com for hosting the Appendix, Master List, etc.!