ROLFE HARRISON
Real Name: Rolfe Harrison
Identity/Class: Human (Australian World War II era)
Occupation: Soldier, marine, former engraver
Group Membership: Leatherneck Raiders
Affiliations: Howling Commandos (Isadore "Izzy" Cohen, Timothy "Dum-Dum" Dugan, Nick Fury, Eric Koenig, Gabe Jones, Dino Manelli, Percival "Pinky" Pinkerton, Robert "Reb" Ralston), Morton, Terry Reiker, Admiral Turner
Enemies: Herbert Cholmondeley, Japanese
Known Relatives: None
Aliases: None
Base of Operations: Australian military base, 1940's
First Appearance: Sgt. Fury and his Howling Commandos#49 (December, 1967)
Powers/Abilities: Rolfe Harrison was skilled at espionage, outdoor survival, and had been an engraver prior to the war. In combat, he wielded a machine gun.
History: (Captain Savage and his Leatherneck Raiders#5 (fb) - BTS) - Prior to enlisting in the Australian Army during World War II, Rolfe Harrison had been an engraver.
(Sgt. Fury and his Howling Commandos#49 (fb) - BTS) - Rolfe was sent to the Japanese-occupied island of Tarawa to spy upon the Japanese, and prepare for the Allies' invasion. He made a number of secret broadcasts to the Allies, but finally had to request his retrieval when things became too hot.
(Sgt. Fury and his Howling Commandos#49) - The Howling Commandos were sent to Tarawa to bring Harrison back, only to be captured by the Japanese there themselves. Rolfe witnessed their capture from a distance, and broke into the Japanese camp at nightfall. He was able to rescue all of the Howling Commandos except for Isadore "Izzy" Cohen who had been transferred, and they were forced to leave without him. Harrison and the Howlers fought their way past the Japanese, and managed to rendezvous with the U.S.S. Sea Wolf, the submarine commanded by Captain Simon Savage, and he brought them away safely.
(Sgt. Fury and his Howling Commandos#50) - The Howlers drowned their sorrows in a bar at Sydney, Australia over losing Cohen, but Harrison brightened their spirits by informing them that the invasion of Tarawa was on, thanks to the information he had provided to Admiral Turner. Harrison attended Turner's briefing with the Howlers, who were assigned to lead the first assault team on Tarawa. Harrison was about to leave, but Turner ordered him to accompany the Howlers. Harrison ably assisted the Howlers in the assault upon the Japanese base he had reconnoiterred himself. Fury defeated the Japanese commander himself, and the Allies occupied the base, but Harrison and the Howlers learned that Cohen had already been removed from Tarawa before their return.
(Captain Savage and his Leatherneck Raiders#5) - The Leathernecks helped manipulate Rolfe Harrison into an arm-wrestling match with Little Bear, which led to a barfight between the American and Australian troops who had been watching. Harrison was forced to assist the Leathernecks in order to avoid a court martial, and was placed undercover as an engraver in order to halt the operations of Herbert Cholmondeley, who was making fake money for the Japanese. The armed forces faked a discharge for Harrison so that he could join Cholmondeley's ranks, and provided Cholmondeley with the money plates he needed. However, Harrison ultimately destroyed Cholmondeley's presses, and stole the plates as he and the Leathernecks captured Cholmondeley, and they turned him over to commander Morton, who forced Cholmondeley to leave Australia. As Little Bear and Harrison resumed their arm-wrestling, Savage awarded all of the Leathernecks with a three-day pass.
(Captain Savage and his Battlefield Raiders#11) - Harrison was once again assigned to the Leathernecks, this time joining them and the Howling Commandos for a mission to a pacific island where the Japanese had employed the American scientist Terry Reiker, exploiting her anti-war beliefs. The Howlers and Leathernecks fought their way past scores of Japanese soldiers in the jungle of the island, and Harrison took a flame-thrower from one soldier, using it to drive out camoflaged soldiers. When the Leathernecks finally reached the castle where Reiker was, a sniper shot Lee Baker, killing him.
(Sgt. Fury and his Howling Commandos#64) - As the Leathernecks mourned for Lee Baker, Sgt. Fury reminded the Leathernecks that they had a mission to complete, and they carried on. The Leathernecks and Howlers broke into the fortress where Dr. Terry Reiker was being kept, and forced her to leave with them, despite her protestations. After the completion of the mission, Harrison parted company with the Leathernecks.
Comments: Created by Gary Friedrich, Dick Ayers and John Severin.
I would have thought that Rolfe would join the Leathernecks full-time after Lee Baker's death, but he just vanished. Maybe it was Friedrich's intent, but at that time he was only writing the book every other issue, so there wasn't much issue-to-issue continuity.
by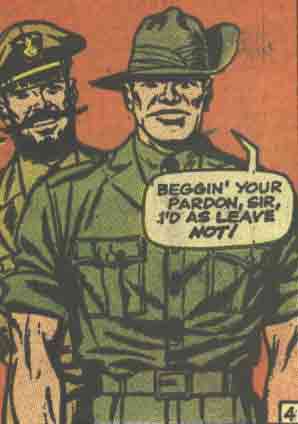
CLARIFICATIONS: Images taken from: Last updated: 06/21/05
Any Additions/Corrections? please let me know.
Non-Marvel Copyright info
Rolfe Harrison should not be confused with:
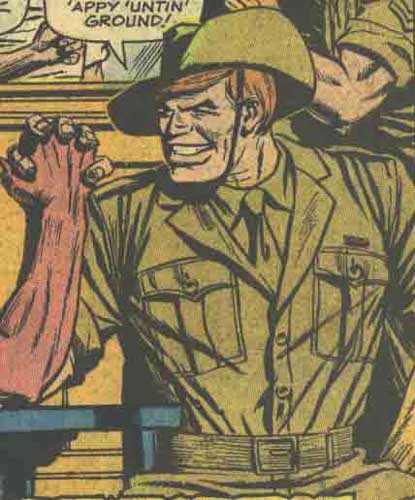
Captain Savage#5, page 1
Captain Savage#5, page 4, panel 6
Sgt. Fury and his Howling Commandos#49-50 (December, 1967 - January, 1968) - Gary Friedrich (writer), Dick Ayers (penciler), John Severin (inker), Stan Lee (editor)
Captain Savage and his Leatherneck Raiders#5 (August, 1968) - Gary Friedrich (writer), Dick Ayers (pencils), Syd Shores (inks), Stan Lee (editor)
Captain Savage and his Battlefield Raiders#11 (February, 1969) - Gary Friedrich (writer), Dick Ayers (pencils), John Severin (inks), Stan Lee (editor)
Sgt. Fury and his Howling Commandos#64 (March, 1969) - Gary Friedrich (writer), Dick Ayers (penciler), John Severin (inker), Stan Lee (editor)
All other characters mentioned or pictured are ™ and © 1941-2099 Marvel Characters, Inc. All Rights Reserved. If you like this stuff, you should check out the real thing!
Please visit The Marvel Official Site at: http://www.marvel.com