"TORPEDO" TAYLOR
Real Name: "Torpedo" Taylor (first name
unrevealed)
Identity/Class: Normal human (World War II era)
Occupation: Submarine officer (Chief Petty
Officer? - see comments)
Group Membership: U.S. Navy, crew of the
submarine USS Barracuda (SS-333) (seamen Bascombe, Carlson,
Carson, Lt. Hardy, Harrison, Bulkhead Jones, Sparky (Sparks) Jones,
Masters, Miller, Peters, Yardarm Yancy, Zawecki, others), Lt. Frazer,
Griggs
Affiliations: U.S. Navy
Enemies: Imperial Japanese Navy
Known Relatives: None
Aliases: None
Base of Operations: Mobile in the Pacific
Ocean aboard the USS Barracuda (SS-333)
First Appearance: Navy Combat#1/1 (June, 1955)
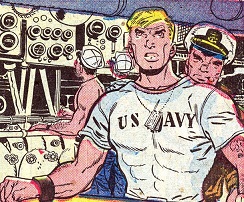
Powers/Abilities: "Torpedo" Taylor has had
basic and officer training in the US Navy. He is very familiar with WW
II submarine technology and torpedoes, and is an accurate shot with a
handgun. He can handle submarine deck gunnery, basic firearms and
explosives. Taylor is an excellent hand-to-hand combatant, using a mix
of WW II US military fighting style and brawling. He has athlete-level
fitness
and is an accomplished long-distance swimmer. He has rudimentary
training in underwater aqua-lung frogman gear. Taylor is focused (at
times too focused) on his task fighting the enemy and is a lateral
thinker in achieving objectives.
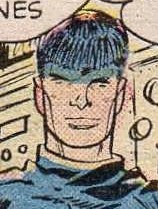
Height: 5'9"
Weight: 170 lbs.
Eyes: Blue
Hair: Red
History:
(Navy Combat#1/1 (fb) - BTS) - Taylor joined the
Navy,
finding placement on the USS Barracuda (SS-333) in charge of the
submarine's torpedo room. He maintained his intense fitness and had the
respect of his fellow crew.
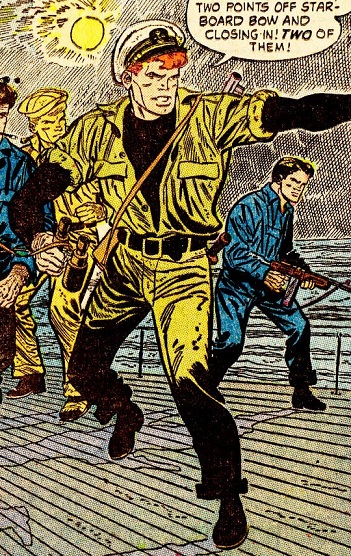
(Navy Combat#1/1) - In the Coral Sea, sailors on the
surfaced submarine spotted two enemy ships and the sub went to
periscope depth. "Torpedo" Taylor fired a torpedo at each Japanese
tanker, exploding each midship, but two unseen enemy destroyers rushed
to the Barracuda's position. The Americans dived and were pummeled by
depth charges. A long wait and as the detonations became more distant,
the captain ordered resurfacing; Taylor cheerfully backed his captain's
decision to some of the surprised crew. Two more torpedoes sunk one
destroyer, but new depth charges damaged the torpedo room; while the
torpedo-men evacuated, Taylor defied orders and stayed to seal the
rupture. The angered captain helped. The disabled sub later surfaced at
night for repairs but the remaining hunting destroyer spotted the
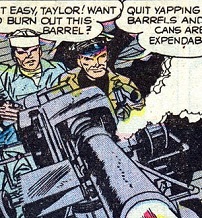
Barracuda. Taylor manned the guns, shattering the enemy spotlights.
Asked to shoot a torpedo at the destroyer, Taylor quickly found the
mark and hit the enemy midship.
(Navy Combat#2/1) - A sudden enemy airplane fighter
attack caused the captain to initiate a a rapid dive. Given their
distance from land, he determined a Japanese aircraft carrier was
nearby. At periscope depth, they hunted and found an enemy tanker
fueling a midget submarine. Once the mini sub had left, Taylor fired
two torpedoes that smashed the tanker. They pursued the midget sub on
the surface and damaged it with shells, forcing the crew's surrender.
Taylor led the boarding party and from the logs, identified the
location of the carrier. After quickly learning the basic controls,
Taylor and Bulkhead volunteered to steer the midget sub to the enemy
ship and found it near reefs. Getting close, the pair fired the four
torpedoes onboard and, after jumping off, sent the mini sub with its
fixed charge in its bow to hit the aircraft carrier. The two American
seamen were picked up by the Barracuda as the enemy aircraft carrier
blazed in the distance.
 (Navy
Combat#3/1) - The USS Barracuda lurked in the Japanese sea lanes,
waiting silently for a next potential victim. The communications sailor
alerted sub that officers that COMSOWESPAC (Commander, Southwest
Pacific Area) had alerted COMSUBPAC (Commander, Submarine Force, U.S.
Pacific Fleet) to an enemy radar contact. The Barracuda was nearest to
the contact point and encountered a Japanese cruiser; Taylor fired
three
torpedoes but only one hit, disabling the ship's engines. Three torpedo
bombers were dispatched to destroy the sub and successfully hit the
Barracuda's engine, forcing it to surface but also unable to steer and
out of torpedo-hit range. The sub's gun downed the planes while Taylor
came up with a cunning plan, approved by the captain. At nightfall,
Taylor straddled a torpedo with rope rigged to its steering fins and
guided it in the direction of the cruiser before letting go, yielding a
direct hit against the enemy. With the sub fixed, Taylor was soon
picked up and they left.
(Navy
Combat#3/1) - The USS Barracuda lurked in the Japanese sea lanes,
waiting silently for a next potential victim. The communications sailor
alerted sub that officers that COMSOWESPAC (Commander, Southwest
Pacific Area) had alerted COMSUBPAC (Commander, Submarine Force, U.S.
Pacific Fleet) to an enemy radar contact. The Barracuda was nearest to
the contact point and encountered a Japanese cruiser; Taylor fired
three
torpedoes but only one hit, disabling the ship's engines. Three torpedo
bombers were dispatched to destroy the sub and successfully hit the
Barracuda's engine, forcing it to surface but also unable to steer and
out of torpedo-hit range. The sub's gun downed the planes while Taylor
came up with a cunning plan, approved by the captain. At nightfall,
Taylor straddled a torpedo with rope rigged to its steering fins and
guided it in the direction of the cruiser before letting go, yielding a
direct hit against the enemy. With the sub fixed, Taylor was soon
picked up and they left.
(Navy Combat#4/1) - Roving blind on the surface sea,
the Barracuda barely had time to react to an oncoming Japanese
destroyer. Taylor kept up morale as the ram proved less damaging than
anticipated and let loose two torpedoes that yielded direct hits. The
sub dived as the crew assessed damage and later resurfaced with a
towline to a tender ship for repairs; but once completed, a sudden
attack by enemy fighters forced an emergency dive. Taylor and radioman
Sparky Jones, still on the sub's deck, used axes to sever the towlines
and allow the vessels to separate, but the sub dived before the duo
could return inside. Informed of the missing pair, the captain chose to
stay below surface and reckoned that the pair would swim to nearby
Japanese-occupied Matsu Island (near China), where the captain hoped to
rescue them. Taylor and Sparky swam to the island unobserved and spied
a Japanese sub moored in a narrow channel. Quickly overcoming the two
guards, Taylor and Sparky opened the Japanese sub's valves, causing it
to sink. The two Americans swam back out to sea where they were picked
up by the Barracuda.
(Navy Combat#5/1) - At night, Taylor and crew members
cheered from the decks as a Japanese tanker blazed, sinking from
Barracuda's torpedoes. But the sudden arrival of a Japanese submarine
forced an emergency dive. Taylor was the last on deck as the sub
lurched to avoid enemy attack and the Barracuda dived before he could
get inside. Floating in the sea, the enemy sub rescued him. Taylor was
belligerent when questioned by the Japanese; elsewhere the surprised
Barracuda captain set about to find him. The Japanese sub commander had
Taylor set adrift on a raft as bait for an American vessel so that it
could be picked off by the sub. Taylor was spotted by an American
cruiser, which steered to rescue him; the Japanese sub exposed its
position and prepared to launch at their foe, but the Barracuda's
quick-thinking captain found the enemy submarine and destroyed it.
 (Navy Combat#5/1 (fb) - BTS) -
Taylor was reunited with the Barracuda's crew.
(Navy Combat#5/1 (fb) - BTS) -
Taylor was reunited with the Barracuda's crew.
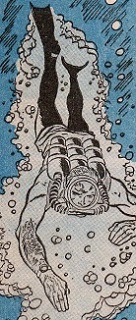
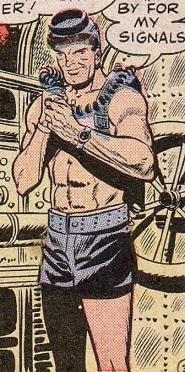
(Navy Combat#5/6) - <June 13, 1944> Taylor kept
watch for Barracuda's top secret mission as they quickly picked up
demolitions expert Griggs. The sub then submerged and traveled to
Subiya Bay where a small fleet of light Japanese naval ships were
protected by an underwater barrier. Taylor was assigned to liaise with
Griggs, who showed Taylor the basics of using frogman gear.
The Barracuda slowly made its way to the wall and Griggs left
underwater with a mine, but an air line problem forced him to return
barely alive. Taylor took on the mission and
successfully planted the mine underwater at the sea wall before
returning to the Barracuda. With the sea wall, destroyed, the crew then
watched from deck as American ships incinerated the Japanese harbor.
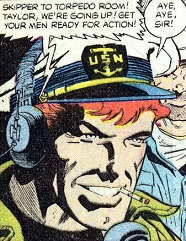
(Navy Combat#7/1) - On the sea surface with barely
enough time to react, the Barracuda was suddenly rammed by a Japanese
destroyer. Taylor commanded the deck gun as damage was quickly assessed
and the sub dived. With just 20 minutes before having to resurface, the
captain requested aircraft carrier support which (surprisingly) was
quick to arrive. The sub resurfaced; Taylor took control of the deck
cannon with his men and fired on the destroyer as the newly arrived
American fighter planes (also fitted with torpedoes) also attacked.
Continued small attacks eventually destroyed the ship but one fighter
was hit and fell into the sea. Taylor suggested picking up the pilot. A
charging enemy cruiser was obliterated by Taylor's torpedoes and the
pilot rescued, which boosted morale.
(Navy Combat#7/6) - <July 27, 1944> - The
Barracuda's crew endured a barrage of depth charges from three Japanese
destroyers until a decoy oil slick fooled the enemy and left. The
Americans continued their mission with Taylor and Yardarm Yancy
assigned to sabotage a long mined net at Subaya Bay that protected a
small Japanese fleet. The Barracuda sat at periscope depth, and Yancy
and Taylor quietly swam to the underwater net with linked mines. Taylor
affixed a grapple hook connected to the Barracuda, which slowly pulled
away the net and repositioned it. Once the pair were back onboard,
Taylor let loose a barrage of torpedoes at the exposed Japanese fleet.
The flaming havoc forced the Japanese to flee to open waters, but they
instead sailed into the repositioned mined net, resulting in more
losses. On the Barracuda, the captain thanked the swimming saboteurs.
 (Navy
Combat#6/6) - <August,
1944> The Barracuda sat vulnerable on the sea surface as it refilled
its tanks with air and recharged its batteries. Taylor spotted enemy
Zero fighters, which quickly attacked. Only half restored, the
Barracuda had to return fire until the sub could dive. They evaded a
Japanese destroyer when they received orders to find a missing US
tanker
full of much-needed oil. Finding nothing but an oil slick at the
tanker's last location, they followed the slick and found the tanker
under tow by a Japanese destroyer. Not wishing to risk losing the
tanker by torpedoing the destroyer, Taylor suggested cutting the ropes.
At nightfall, Bulkhead Jones joined Taylor and made it (apparently by
swimming) to the slowly towed tanker. Clambering aboard, the duo
overcame the lazy guards. It took Taylor 20 minutes to cut through the
dense thick rope but eventually the tanker was set free. The Barracuda
let loose two torpedoes and destroyed the enemy boat. Returning to the
sub, Taylor was miffed that he hadn't been the one at the torpedo
controls.
(Navy
Combat#6/6) - <August,
1944> The Barracuda sat vulnerable on the sea surface as it refilled
its tanks with air and recharged its batteries. Taylor spotted enemy
Zero fighters, which quickly attacked. Only half restored, the
Barracuda had to return fire until the sub could dive. They evaded a
Japanese destroyer when they received orders to find a missing US
tanker
full of much-needed oil. Finding nothing but an oil slick at the
tanker's last location, they followed the slick and found the tanker
under tow by a Japanese destroyer. Not wishing to risk losing the
tanker by torpedoing the destroyer, Taylor suggested cutting the ropes.
At nightfall, Bulkhead Jones joined Taylor and made it (apparently by
swimming) to the slowly towed tanker. Clambering aboard, the duo
overcame the lazy guards. It took Taylor 20 minutes to cut through the
dense thick rope but eventually the tanker was set free. The Barracuda
let loose two torpedoes and destroyed the enemy boat. Returning to the
sub, Taylor was miffed that he hadn't been the one at the torpedo
controls.
(Navy Combat#8/1) - The Barracuda sank one Japanese
destroyer, then sat silently on the seabed, the crew waiting for depth
charges from the newly arrived enemy cruiser, but the cruiser left,
leaving a lone survivor. Suspicious, the sub resurfaced and found the
survivor; Taylor was sent to retrieve the sailor and rescued him from a
menacing shark. Low on supplies and with just one torpedo left, the
Barracuda went to a nearby secret supply dump at night where they found
the Japanese cruiser moored. It was suggested that the last torpedo be
fired point blank at the cruiser, but the Japanese prisoner sitting
nearby interjected. Angry at the cruiser's captain's merciless
treatment to let the destroyer's survivors perish, the prisoner
revealed the cruiser's only vulnerable spot. Taylor fired the last
torpedo and destroyed the cruiser. The Japanese prisoner voiced hope
for a better Japan to go home to after the war.
(Navy Combat#8/6) - The Barracuda's captain responded
to an SOS from an American tanker attacked by an enemy submarine. There
they found only three survivors, who revealed the enemy's cruelty by
setting aflame the oil slick that killed others in the water. Full of
vengeance, the captain pursued the enemy sub and the crew immediately
followed orders. Finding the enemy killer sub, Taylor let loose three
torpedoes and the enemy sub was forced to surface immobile. Covered by
the crew's guns, the Japanese on deck surrendered and Taylor went over
to get the sub's commander. Climbing down the tower, he witnessed the
Japanese commander, who refused to be captured, order the valves be
opened and the submarine sank. Taylor managed to escape via the open
hatch but all the enemy sub crew were lost.
(Navy Combat#9/1) - With just two torpedoes left but
two enemy targets, the Barracuda's captain opted for the tanker.
Taylor's torpedoes struck home and the sub dived. The destroyer dropped
depth charges but the Barracuda escaped. Resurfacing later for air,
they were soon attacked by enemy fighters. The sub's deck guns provided
poor opposition and the Barracuda dived again. Taylor suggested
replacing the deck guns with six flak guns as an element of surprise
and two days later, the plan was implemented, but at the cost of
torpedoes due to weight. A week later, the Barracuda departed fitted
with flak guns but just four torpedoes. The Barracuda went into enemy
waters and soon found a Japanese Zero fighter squadron. The Barracuda's
flak gun quickly downed the overconfident pilots. The Americans then
went after the nearby aircraft carrier; Taylor's well-placed torpedoes
obliterated it.
(Navy Combat#9/6) - At the captain's command, Taylor
fired torpedoes at a Japanese tanker convoy. Its escort destroyer
retaliated with depth charges, which damaged the Barracuda. At
nightfall, the sub surfaced so that damage could be assessed and
repairs made; Taylor was put alone on deck for watch. The still-hunting
destroyer attacked and the sub lurched into an emergency dive, causing
Taylor to trip and be knocked unconscious. The Japanese retrieved his
floating body; once awake, the destroyer's captain was angered by
Taylor's silence and set him on a raft near Bewitok Atoll as a decoy to
lure the Barracuda as a target. Refusing to leave Taylor behind, the
captain resurfaced and saw Taylor but was suspicious of the makeshift
raft and stayed distant. Seeing his crewmates, Taylor used his pocket
knife's sun refection to message in Morse code the trap and enemy
location. The captain found and sunk the destroyer, and Taylor swam
back to the Barracuda.
(Navy Combat#10/1) - The Barracuda was sent on a
mission to destroy a Japanese ship secretly holding a conclave of
senior officers in Suribaya Bay. Taylor dispatched two torpedoes that
hit the destroyer midship, yielding a massive explosion. Japanese
rescue efforts
were stopped in favor of an intensive search-and-destroy against the
submarine. With increasing numbers of enemy ships approaching, the
Barracuda dived to the seabed, confined to the bay. Depth charges gave
way to sounding wires searching for the sub and the captain risked
rising to periscope depth to see the number of enemy ships. He ordered
Taylor be ready with torpedoes and made a successful dash out of the
bay, narrowly missing two charging cruisers that tried to ram the sub
(but instead crashed into each other).
(Navy Combat#10/6) - The Barracuda was caught by four
enemy ships. Taylor launched two torpedoes that each knocked out two
Japanese vessels. The sub dived as two enemy destroyers locked in on
the Barracuda's position and dropped depth charges. Near hits damaged
the stern torpedo room and engine room, causing significant leaks. A
slow rise to the surface resulted in a ram that forced a quick dive
again. The captain ordered a retreat to nearby island bay to effect
repairs, but sending a signal flare to the supply PT boat would give
away the sub's position. Having found an indigenous people's canoe,
Taylor and Bulkhead Jones volunteered and paddled out the open sea.
Stripped down to crumpled shorts, they put on a bizarre display when
the Japanese arrived to investigate, shouting gibberish and doing
handstands to distract the bemused enemy crew, who thought the duo to
be indigenous people. But Jones saw the PT boat in the distance behind
the Japanese ship and had Jones send the flare. Figuring out the
situation, the PT boat launched two torpedoes at the enemy destroyer,
which exploded, and picked up Taylor and Jones. Taylor directed the PT
boat's captain to the Barracuda's position.
(Navy Combat#11/1) - In fog, the surfaced Barracuda
had a very near miss with a Japanese destroyer, whose crew (on a secret
mission) were oblivious to the near-ram. The sub's captain ordered two
torpedoes fired at the destroyer, which damaged the ship and it began
sinking. The enemy ship was carrying a high-ranking suited man ferrying
Japanese naval fleet information, and he was prioritized with the case
onto a lifeboat. Taylor monitored the survivors through binoculars and
noted the out-of-place suit with his case, and the sub went and
collected him. Taylor forced the case open and discovered the plans. A
sudden enemy aircraft attack forced a quick dive and, once safe
underwater, they contacted COMSUBPAC with the enemy information (from
this, an American "marauding pack" sank many Japanese warships).
(Navy Combat#11/6) - As ordered, Taylor let loose
torpedoes that hit a giant Japanese oil tanker, but its additional hull
plating protected its cargo. The ship sped to ground itself on a reef
near an island bay so that its cargo could be salvaged. The Barracuda
pursued but enemy cruisers blocked the path and forced the sub to dive,
bottling the sub into the bay after surviving a depth charge attack.
The Barracuda surfaced at night, the captain still keen to destroy the
tanker. But Taylor suggested a plan that surprised the captain and he
had Lt. Hardy lead a small team to overpower the crew on the tanker.
Once onboard, several Barracuda crew got the ship's engines working
again while Hardy and Taylor laid charges at the oil tanks. The
Americans managed to clear the ship away from the reef and steered the
now-blazing tanker at the enemy ships blocking the bay. Hardy, Taylor
and the others quickly escaped and rejoined the Barracuda, which
submerged and followed the path that the fiery tanker had created as
the enemy ships tried vainly to escape damage from the blaze.
(Navy Combat#12/1) -The Barracuda's crew had sunk the
last of the Japanese supply tenders in the area (thereby impeding
Japanese sub activity) and dived as enemy destroyers rushed to attack
the sub. Taylor and available crew went to the Barracuda's prow to
provide added weight so the submarine would nose down at a sharper
angle. Escaping, the captain was later advised by COMSUBPAC that enemy
subs were still operating, so the captain ordered the Barracuda go on
24-hour patrol to find out. Three days yielded nothing but Taylor
spotted a seagull that couldn't fly because of an oil slick. Taylor
found
and and followed the oil slick back to a Japanese supply base hidden in
a small island's cove. The Barracuda found the inlet and Taylor fired
the two torpedoes that detonated the enemy oil dump and munitions.
(Navy Combat#12/6 (fb) - BTS) - A survivor of a
downed Japanese submarine was taken aboard an American supply tender
ship. With no apparent brig, the Japanese was free to roam, but he
secretly sabotaged many torpedoes meant for the American submarine
fleet. Later, the Barracuda picked up five of the sabotaged X211
torpedoes from the tender ship.
(Navy Combat#12/6) - At the Barracuda's captain's
command, Taylor launched two torpedoes at a Japanese cargo ship and
destroyer escort, but the torpedoes veered off mark and missed their
targets. The Barracuda had to quickly dive to escape the enemy
destroyer's depth charges. Taylor calmed his fellow confused
torpedo-men. The next day, the Barracuda crew found a Japanese tanker
and again let loose two torpedoes, but these also missed, despite the
closer range. The captain and Taylor identified the four torpedoes used
were from those recently picked up; the fifth one was dismantled and
Taylor soon identified the drive cam had been sabotaged. The Barracuda
quickly rendezvoused with the tender and the sub's command crew heard
of the roaming Japanese prisoner. Taylor spotted the saboteur, who,
realizing he had been discovered, intended to detonate the ship using a
grenade amongst explosives, but Taylor shot the foe's hand and bound
him up tight in rope. Reloaded with fully operational torpedoes, the
Barracuda went hunting again.
Navy Combat#14/1 (fb) - BTS) - Taylor saw a fuel dump
of high-octane gas go up in blue flames on Mindanao (Philippines).
(Navy Combat#13/1) - <April 3, 1945> - Having
already sunk five Japanese naval vessels earlier, the Barracuda sank an
enemy oil tanker while its destroyer escort, ablaze and sinking, tried
to do a last-ditch ram at the American sub, but two more torpedoes
destroyed that ship. The Japanese gave their location as the boat sank
so that the enemy sub could be located and destroyed. Having lost
control of the area near Mindanao due to the Barracuda's
interference, Japanese naval command dispatched their most modern
submarine, equipped with various electronic devices, to specifically
sink the Barracuda.
 (Navy Combat#13/1) - <April
6, 1945> - The
Barracuda floated on the sea surface recharging its batteries when
Taylor saw an incoming torpedo from the Japanese sub, which had jammed
the Barracuda's detectors. An emergency dive saved the Barracuda and
the captain soon realized that the Japanese pursuer had advanced
equipment that let it follow them. Taylor and his men rigged a
torpedo that would zigzag at a sub's speed, fooling enemy radar. The
Barracuda cut its engines and the Japanese sub chased the jigsawing
torpedo instead. With the enemy now in its sights, the captain and
Taylor accurately fired two torpedoes that demolished their foe.
(Navy Combat#13/1) - <April
6, 1945> - The
Barracuda floated on the sea surface recharging its batteries when
Taylor saw an incoming torpedo from the Japanese sub, which had jammed
the Barracuda's detectors. An emergency dive saved the Barracuda and
the captain soon realized that the Japanese pursuer had advanced
equipment that let it follow them. Taylor and his men rigged a
torpedo that would zigzag at a sub's speed, fooling enemy radar. The
Barracuda cut its engines and the Japanese sub chased the jigsawing
torpedo instead. With the enemy now in its sights, the captain and
Taylor accurately fired two torpedoes that demolished their foe.
(Navy Combat#13/6) - Having sunk a ship already, the
Barracuda was alone against three other enemy warships. The sub was
forced to the surface, its crew working hard to repair its diving gear
while Taylor led a gunnery crew against the ships. Temporary repairs
effected, the gun crew rushed inside for the dive but Taylor was
focused on his task, and lost in the smoke and noise to notice until
the water rushed up him as the sub submerged and he was left floating
alone in the sea. A sharp-eyed Japanese captain spotted Taylor and had
him hauled onboard. Taylor resisted interrogation but secretly intended
to trick his foes. Meanwhile, the Barracuda's crew took Taylor's
disappearance badly and the senior crew focused on finding him. On the
Japanese boat, Taylor fooled an engineer into letting him use oil pump
valves and covertly let loose a Morse code S.O.S. in oil slicks. The
Barracuda's captain soon identified this and unleashed a torpedo to
disable the Japanese ship. The explosion provided a diversion for
Taylor to leap overboard and swim for the Barracuda while the sub
finished off the ship. Taylor was happily welcomed back onboard the
Barracuda while the enemy vessel blazed.
(Navy Combat#6/1) - <May, 1945> The captain
targeted a Japanese
destroyer that had sunk a PT (patrol torpedo) boat and taken five
survivors with important battle information for Task Force 90. Taylor
fired two torpedoes
and smashed the destroyer. They picked up two survivors, including the
Japanese captain. Taylor took them below deck and watched the
interrogation as the two Japanese were coerced to reveal the location
of
the prisoners. The sub headed to Karaki Island, and Taylor and Bulkhead
Jones were assigned the rescue mission. The pair made their way to
shore by rubber dinghy and quickly overcame the guards, freeing the
four sailors and Lt. Frazer, who knew the secret code of the captured
battle
orders. The seven quickly fled back to the submarine by dinghy and
escaped. Taylor watched on as radioman Sparky Jones advised command of
success.
(Navy Combat#14/1) - The Barracuda's
captain spotted an enemy tanker and escort; he had Taylor let loose
torpedoes that hit the tanker. Blue flame (from 100 octane gas) erupted
that surprised the captain before they quickly dived to escape the
escort's depth charges. Taylor told the captain what the colored flame
was from
and the captain identified a nearby "uncharted" island as a potential
enemy base for the fuel. Taylor helped guide the Barracuda into the
shallow waters before taking a landing party to scout around. Taylor
soon found a squadron of bomb-laden Japanese seaplanes waiting for the
high-octane fuel. Back on the sub, Taylor readied every available
torpedo and, on command, unleashed them and incinerated the base,
although one small boat survived.
 (Navy Combat#16/6) - With the
Barracuda charging its
batteries on the surface, Taylor spotted an incoming small enemy bomber
and commanded the 3" gun as defense. Although hit, the plane's bombs
impacted and damaged the sub. Taylor went below and the sub escaped a
pursuing Japanese destroyer. However, they needed to clear Japanese
shipping lanes to effect repairs and Taylor suggested heading near
land, using fog for cover. The captain chose to go near Rabaul (New
Guinea) for its many small inlets. Once there at nightfall, the
crew worked while Taylor monitored the nearby cliffs with binoculars
and spotted a Japanese truck convoy. The captain ordered the sub go
closer to the cliffs and had the deck guns open fire on the convoy.
Japanese truck-mounted searchlights inadvertently made them easier
targets and the Barracuda's crew obliterated the convoy. The Barracuda
then fled before any Japanese naval retaliation could arrive. The
captain congratulated Taylor for his hunch.
(Navy Combat#16/6) - With the
Barracuda charging its
batteries on the surface, Taylor spotted an incoming small enemy bomber
and commanded the 3" gun as defense. Although hit, the plane's bombs
impacted and damaged the sub. Taylor went below and the sub escaped a
pursuing Japanese destroyer. However, they needed to clear Japanese
shipping lanes to effect repairs and Taylor suggested heading near
land, using fog for cover. The captain chose to go near Rabaul (New
Guinea) for its many small inlets. Once there at nightfall, the
crew worked while Taylor monitored the nearby cliffs with binoculars
and spotted a Japanese truck convoy. The captain ordered the sub go
closer to the cliffs and had the deck guns open fire on the convoy.
Japanese truck-mounted searchlights inadvertently made them easier
targets and the Barracuda's crew obliterated the convoy. The Barracuda
then fled before any Japanese naval retaliation could arrive. The
captain congratulated Taylor for his hunch.
(Navy Combat#19/1) - While Taylor and his torpedo-men
waited, the Barracuda's torpedoes hurtled toward an enemy cruiser and
destroyer; each found their mark. They surfaced to inspect the damage
but a Japanese dive bomber was ready and hit the sub with moderate
damage. The Americans dived but the sub was leaking oil. Hours later,
they evaded detection and found sanctuary in a hidden island cove.
COMSUBPAC advised a three-day wait for a tender but after scouting the
island, Taylor spotted a nearby Japanese oil tanker fortuitously
unguarded. Taylor suggested raiding that ship for its oil and come
nightfall, he led a raiding party, quickly overcoming opposition on the
tanker. Two hours later, the Barracuda had enough fuel. Taylor was
ordered to get the Japanese crew onto lifeboats and the Americans then
departed. The Barracuda then launched one torpedo at close range at the
crewless tanker, which exploded. Taylor was happy to see the sight.
Comments:
Created by uncredited writer & Don Heck.
Jeepers, Torpy! Take a hint! Abandoned THREE times on
the deck as the sub dives! Either the crew doesn't like you or the crew
isn't that great -- whichever, but get yourself transferred! (Although two
stories, #5/1 and #9/6, are pretty much duplicates).
His rank is never given in-story, but as near as I
can determine, it's Chief Petty Officer, as he's the most senior among
the torpedo-men and has the officer cap -- please
correct me if I'm wrong!
The introductory story for "Torpedo" Taylor begins
with
the heading "Another thrilling combat navy adventure starring "Torpedo"
Taylor"... it's not "another" if it's the first time you "meet" him (as
per the introductory story box).
I'm sticking with the stories as they were published
for Taylor's chronology unless stories indicate otherwise, although
#4/1 has him on Matsu Island, which
was very deep in enemy territory (contrasting to #1/1 in the Coral Sea,
the outer limit of Japanese naval activity at its height in 1942). I
guess it's still a possibility, so I'll leave it as is. I can't find a
Subiya Bay (#5/6), Subaya Bay (#7/6) , Suribaya Bay (#10/1) (maybe a
reference to
Surabaya in Indonesia?), Karaki Island (#6/1) or Bewitok Atoll (#9/6)
in the Pacific Ocean.
However, #6/1 refers to Task Force 90, which began operations in May
1945. Although the Japanese Navy had been pushed back markedly by 1945
since the major Coral Sea battle of 1942, the Japanese still occupied
parts of New Guinea in 1945, with Rabaul (see #16/6) freed only in
August 1945 by Australians.
Stories #5/6 and #7/6 are very similar, both to do
with secret missions, a protective wall guarding a Japanese fleet,
mines, underwater action for Taylor, and set in very similar-sounding
bays (Subiya vs. Subaya) and two of the few stories given specific
dates (6.13.1944 vs. 7.27.1944).
The cover to Navy Combat#13 takes artistic liberty
showing Taylor getting left topside as the sub dives; he's up
against a Soviet torpedo boat and the sub's considerably shorter
conning tower has the number 4 (the Barracuda is SS-333).
Taylor & company sometimes used the derogatory term
"skibbie" for their Japanese opponents; this was American army slang
for a female prostitute (usually spelled "skibby").
In Navy Combat#2/1, the Barracuda's captain
mistakenly refers to an attacking Japanese fighter as a "Betty"--but
that's a twin-engine bomber (Mitsubishi G4M). Seen only from the front,
the single-engine attacking fighter is most likely a Mitsubishi Zero
fighter. The same error is repeated in #3/1 and #6/6. It's evident that
the
writer's specialization is navy, not air force, given
the terminology used in-story, and I don't consider it a big issue
given the setting of the stories vs. the time of writing; it's just a
minor and simple error. Later, although not pictured clearly, the
seaplanes in
#14/1 look likely to have been the long-range single-engine Aichi E13A
"Jake", which could carry bombs and depth charges.
Navy Combat (and with it "Torpedo" Taylor) was a
casualty of the 1957 Atlas
retrenchments, which included artist Don Heck, but then there was also
no more call
for such purely war titles in the revamped Atlas-Marvel that followed
soon
after. Nevertheless, it would be great to see a cameo of "Torpedo"
Taylor
in a WWII flashback for Captain America or Nick Fury or any other
such storyline.
By coincidence(?), an (aging) American sub named "Barracuda"
(SS-163) operated in WWII in both the Pacific and Atlantic Oceans on
patrol and cargo duties, but apparently without enemy contact.
There are several reasons I consider the USS to be a Gato class
submarine, rather than the later (and most common in WWII) Balao class.
While the stories seem to be mostly set around
1944-1945,
the Barracuda saw action against the
Japanese around the Coral Sea, which could place it around 1942-early
1943) and the Balao class entered service in mid-1943. The two classes
were very similar in
appearance, but the Gato class had a smaller crew complement (60)
closer to the
Barracuda's complement of 50, while the Balao class had a complement of
80. Although Balao class submarines developed considerable variations
in gun layouts, the Balao class came with a 5" deck gun and two cannon
as standard, while the Gato class came with a 3" deck gun plus two
cannon as standard, and the Barracuda had a 3" deck cannon
(nevertheless, the Barracuda briefly changed its deck armament to flak
guns in #6/1 and also changed to two deck cannons, so this could be
moot); torpedo armament was the same
between the two classes. One possible extra consideration is that Balao
class
subs had a more robust hull and the Barracuda certainly endured a few
hard whacks. Any
extra expertise is welcome.
Profile
by Grendel
Prime.
CLARIFICATIONS
:
Torpedo Taylor has no known connections to:
- TAYLOR, ALEXANDER X. - 2005, first man on
Mercury--Speed Carter#2/4
- TAYLOR,
ANDY - sheriff, helped Rocket Racer stop
Packrats--Spectacular Spider-Man
Annual I#10/4
- TAYLOR,
BILLY - mutant youth, son of Wendy,
experimented on at Weapon X facility by Sinister--Weapon X II#5
- TAYLOR,
FRANK - lazy reporter,
duped the Alien Champion with sleeping contest--Strange Tales I#98
- TAYLOR,
HARRISON - geneticist, developed "Bigpox,"
possibly slain by Host--Mystique I#7
- TAYLOR, HUGH - Guardsmen, entered cell of Venom to
investigate, killed by him--Amazing Spider-Man I#315
- TAYLOR, JENNA - Firehart Industries, former
executive assistant to Thomas Firehart/Puma--Amazing
Spider-Man I#256
- TAYLOR, KYMBERLY
- SHIELD II, led group that
defended and freed William Connover from Humanity’s Last
Stand’s Mutant Liberation Front--Punisher
III#12
- TAYLOR, LEILA (a.k.a. Sister Sweet) - Daily Bugle
reporter, former
girlfriend of Falcon--Captain America
I#139
- TAYLOR,
MICHI - reporter, interviewed Matt Murdock
& Karen Page after their engagement--Daredevil I#86
- TAYLOR, Gen. ORWELL - Jury member, organized team
to gain revenge on Venom for the murder of
his son--Venom: Lethal Protector I#1
- TAYLOR,
Lt. REBECCA - cop, Paranormal Law
Enforcement Team, former ally of Vengeance, killed by
Diabolique--Marvel
Comics Presents I#152/3
- TAYLOR, ROLAND
- Captain Universe recipient,
schizophrenic, permanently empowered by the
Uni-Power--Cosmic Powers Unlimited#5/2
- TAYLOR,
TAXI (Jim Taylor) (WWII era) - used self-developed Wonder Car to
fight crime--Mystic Comics#2/7
- TAYLOR, TEX (Old West era) - roving cowboy who
fought frontier crime--Wild West#1
- TAYLOR,
W.C. - Friends of
Humanity member, Rogue foe--X-Men Unlimited I#30/3
- TAYLOR,
WENDY - sister of Billy, mutated at Weapon
X facility by Sinister--Weapon X II#5
- TAYLOR FOUNDATION - philanthropic
business organization--New Warriors I#1
- TORPEDO -
underworld assassin, hired by
Crimewave, killed when tackled off of building by Willie
Lincoln--Daredevil I#59
- TORPEDO
(Michael Stivak) - Yugoslavian scientist, followed Dire Wraith design
to develop costume
equipped with turbo jets--Daredevil I#126
- TORPEDO
(Brock Jones) - found dying Torpedo
(Stivak), used his costume to become crimefighter, ally of ROM,
later killed by Dire Wraiths--Daredevil I#126
- or any other "Torpedo" or
"Taylor" characters
Lt. Frazer
Lieutenant Frazer (first name unrevealed) of the
American Navy held
crucial coded battle orders for Task Force 90. Frazer was aboard a
torpedo
boat that was sunk by a Japanese destroyer; he and four other
survivors were captured, along with the documents, and taken to Karaki
Island. In turn, the American submarine USS Barracuda hunted and
destroyed the
enemy ship, capturing the Japanese captain, who revealed Frazer's
location. "Torpedo" Taylor and Bulkhead Jones were sent to the island
and
rescued Frazer, along with the four other sailors. The uncompromised
battle orders were also retrieved and the Americans all quickly escaped
to the submarine and fled.
--Navy Combat#6/1
Griggs
Griggs (first name and rank unrevealed) was an
American naval demolitions expert. He was a trained underwater frogman
and specialist in covert operations. He was part of a secret mission to
destroy a sea wall that protected a harbor in Subiya Bay holding a
small Japanese navy fleet. He was brought onboard the USS Barracuda,
which would take him there. "Torpedo" Taylor liaised with Griggs while
on
the sub and Griggs showed him the basics of using frogman gear and the
aqua-lung.
However, problems arose when Griggs set out to plant the first mine and
he returned barely alive. Taylor continued the mission, resulting in
resounding success.
--Navy Combat#5/6
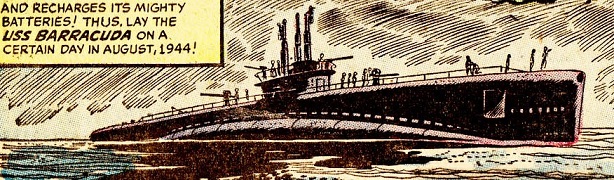
USS
Barracuda
The diesel-powered submarine USS Barracuda (SS-333)
had a complement of 50 crew members. It was most likely Gato class (but
possibly the later Balao class given its robust performance - see
comments). Manufactured in the USA, the Barracuda saw heavy action in
the Pacific theater of war in WWII, notably the Coral Sea and near New
Guinea, the Philippines, Indonesia and at least one mission deep into
Japanese territory. Evidently, there was
at least one crew member who was fluent in Japanese (e.g., having been
able to translate Japanese fleet position from enemy information in
#11/1). It survived numerous depth-charge attacks and several rams with
enemy ships. At one point, the Barracuda's deck armaments were briefly
changed to flak guns to surprise Japanese aerial attackers.
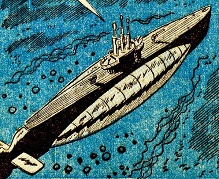
--Navy Combat#1/1
(2/1,3/1,4/1,5/1,5/6,6/1,6/6,7/1,7/6,8/1,8/6,9/1,9/6,10/1,10/6,11/1,11/6,12/1,12/6,13/1,13/6,14/1,16/5,19/1
images:
(without ads)
Navy Combat#6/6, p1, pan2 (main image)
Navy Combat#7/1, p, pan (headshot)
Navy Combat#3/1, p6, pan1 (riding torpedo)
Navy Combat#5/6, p5, pan1 (in frogman gear)
Navy Combat#6/6, p5, pan7 (bare-chested on deck)
Navy Combat#7/1, p4, pan1 (shooting deck gun)
Navy Combat#19/1, p4,pan7 (punching)
Navy Combat#6/1, p5, pan2 (Frazer)
Navy Combat#5/6, p3, pan1 (Griggs, headshot)
Navy Combat#5/6, p3, pan7 (Griggs, in frogman gear)
Navy Combat#6/6, p1, pan2 (Barracuda, surfaced)
Navy Combat#7/6, p1, pan3 (Barracuda, side view, submerged)
Navy Combat#6/1, p3, pan6 (Barracuda, near overhead view, submerged)
Navy Combat#3/1, p1, pan3 (Barracuda's seamen busy below decks)
Appearances:
Navy Combat#1/1 (June, 1955) - uncredited writer, Don Heck (pencils
& inks), Stan Lee (editor)
Navy Combat#2/1 (August, 1955) - uncredited writer, Don Heck (pencils
& inks), Stan Lee (editor)
Navy Combat#3/1 (October, 1955) - uncredited writer, Don Heck (pencils
& inks), Stan Lee (editor)
Navy Combat#4/1 (December, 1955) - uncredited writer, Don Heck (pencils
& inks), Stan Lee (editor)
Navy Combat#5/1 & 5/6 (February, 1956) - uncredited writer, Don
Heck (pencils & inks), Stan Lee (editor)
Navy Combat#6/1 & 6/6 (April, 1956) - uncredited writer, Don Heck
(pencils & inks), Stan Lee (editor)
Navy Combat#7/1 & 7/6 (June, 1956) - uncredited writer, Don Heck
(pencils & inks), Stan Lee (editor)
Navy Combat#8/1 & 8/6 (August, 1956) - uncredited writer, Don Heck
(pencils & inks), Stan Lee (editor)
Navy Combat#9/1 & 9/6 (October, 1956) - uncredited writer, Don Heck
(pencils & inks), Stan Lee (editor)
Navy Combat#10/1 & 10/6 (December, 1956) - uncredited writer, Don
Heck (pencils & inks), Stan Lee (editor)
Navy Combat#11/1 & 11/6 (February, 1957) - uncredited writer, Don
Heck (pencils & inks), Stan Lee (editor)
Navy Combat#12/1 & 12/6 (April, 1957) - uncredited writer, Don Heck
(pencils & inks), Stan Lee (editor)
Navy Combat#13/1 & 13/6 (June, 1957) - uncredited writer, Don Heck
(pencils & inks), Stan Lee (editor)
Navy Combat#14/1 (August, 1957) - uncredited writer, Don Heck (pencils
& inks), Stan Lee (editor)
Navy Combat#16/6 (February, 1958) - uncredited writer, Don Heck
(pencils & inks), Stan Lee (editor)
Navy Combat#19/1 (August 1958) - uncredited writer, Don Heck & Joe
Maneely (pencils & inks), Stan Lee (editor)
First posted: 08/24/2023
Last updated:
08/24/2023
Any Additions/Corrections? please let
me know.
Non-Marvel Copyright info
All other characters mentioned or pictured are ™
and © 1941-2099 Marvel Characters, Inc. All Rights Reserved.
If you like this stuff, you should check out the real thing!
Please visit The Marvel Official Site at: http://www.marvel.com.
Special Thanks to www.g-mart.com
for hosting the Appendix!
Back to Characters