
SPENCER SMYTHE
Real Name: Professor Spencer Smythe
Identity/Class: Normal human
Occupation: Inventor,
creator of Spider-Slayers,
criminal;
formerly scientific advisor to the city
of New York
Group Membership: None
Affiliations: The
Chameleon, Electro (Dillon), unidentified hired goons;
formerly Betty Brant, J. Jonah Jameson,
John Jameson, Peter Parker, Mark Raxton, the
Four Top Gang Leaders of New York, the New York City Police
Department
Enemies: J. Jonah Jameson, Spider-Man (Parker)
Known Relatives: Alistaire Smythe (son), unidentified wife
Aliases: "Smythey"
Base of Operations: Formerly several labs throughout New York, USA
First Appearance: Amazing Spider-Man I#25 (June, 1965)
Powers/Abilities: Professor Spencer Smythe had great technological expertise and understanding of robotics; his former position as scientific advisor to the City of New York suggests an understanding of other unrevealed sciences. Prior to his demise, Smythe's health deteriorated to the point where he encountered difficultly breathing and required the regular use of medication.
History:
(Amazing Spider-Man I#28/Amazing Spider-Man Annual I#19/Official Handbook of the Marvel Universe: Spider-Man: Back in Black #1 (Alistaire Smythe) (fb) - BTS) - Professor Spencer Smythe used his home as a lab for his study and creation of robotics, maintaining close proximity to his wife and young son, Alistaire, who took an interest in his father's work.
(Amazing Spider-Man I#105 (fb) - BTS) - Smythe accepted a position as the city of New York's scientific advisor.
Smythe noticed J. Jonah Jameson's editorials attacking Spider-Man in the Daily Bugle and saw an opportunity to profit from his expertise.
(Amazing Spider-Man I#191/Amazing Spider-Man I#192 (fb) - BTS) - Smythe built a Spider-Man sensing robot (later referred to as the Mark 1 Spider-Slayer), powering it with plutonium.
(Amazing Spider-Man I#25) - Taking his completed Spider-Man sensing robot to the Daily Bugle, Smythe introduced himself and pleaded for Jameson's attentions to demonstrate his work. Bolstered by Daily Bugle photographer Peter Parker, who expressed his curiosity to see if the robot would live up to Smythe's claims, Jameson agreed to a demonstration wherein Smythe gave Parker a spider in a glass sphere with the intention of having the robot seek it out. Impressed by Smythe's robot (and believing the fact the robot instead going after Parker was a minor glitch), Jameson agreed to pay Smythe whatever he wanted for his robot.
After a review of the robot, Smythe activated it and quickly found Spider-Man's signal (with Jameson observing its progress through a viewscreen). Standing alongside Jameson while the robot closed in on Spider-Man and successfully trapped him in its coils, Smythe suggested they follow the signal to its location and prevent Spider-Man from escaping. Arriving at the robot's rooftop location, Smythe and Jameson discovered Spider-Man had escaped by deactivating the robot's spider-seeking impulses and left a costume stuffed with webbing behind to fool Smythe and Jameson. Resigned to his failure, Smythe seemed to take it in his stride, opting instead to go back to the drawing board.
(Amazing Spider-Man I#58 (fb) - BTS) - Despite Smythe's first reaction to the failure of his robot, his frustration over the defeat and humiliation built over time.
(Amazing Spider-Man I#28 (fb) - BTS) - Working out of his home, Smythe repaired the damaged Spider-Slayer and moved on to other projects with the aid of his assistant, Mark Raxton.
(Amazing Spider-Man I#28) - Greeting a visiting Peter Parker, Smythe showed him around his lab, offering to show Parker the restored Spider-Slayer. Surprised that the Spider-Slayer would again attack Parker and beginning to suspect that Parker might actually be Spider-Man, Smythe's suspicions were rebuffed when Parker revealed a jar of spiders he'd brought with him for Smythe's research. Attending to another visitor while Parker photographed the Spider-Man costume left behind with the Slayer, Smythe learned the visitor was Raxton, who told Smythe he was leaving and taking his share of their project, a liquid metal alloy. Smythe tried to stop Raxton from leaving with the alloy, pushing him into a console that activated the Mark 1 Slayer (which promptly went after Parker once more). In the scuffle, Raxton fell, shattering the alloy's container, causing it to spill on him. Knocked unconscious during the skirmish, Smythe awoke and was attended to by Parker, who filled him in on the details of Raxton's departure. Learning of Raxton's exposure to the alloy and his subsequent departure, Smythe bemoaned the loss of his project.
(Amazing Spider-Man I#58 (fb) - BTS) - Following the loss of the liquid metal alloy, Smythe moved to a larger lab and focused on refining his Spider-Man seeking robot (see comments).
(Amazing Spider-Man I#58) - With his improved and more powerful Mark 2 Spider-Slayer completed, Smythe contacted Jameson, reassuring his skeptical associate that his new Spider-Slayer couldn't fail and wouldn't be a repeat of the earlier "fiasco". Showing Jameson the Mark 2 in his new lab, Smythe demonstrated the improvements made to the new model, including its "invincible" strength and ability to track down a spider's scent. Following the Mark 2 in his car with Jameson (who controlled the robot remotely), Smythe drove to Jameson's office at the Daily Bugle, urging Jameson to use greater force against their mutual foe for their earlier humiliating defeat. Wresting control of the Mark 2 from Jameson, Smythe began firing its Destructo-Beam at Spider-Man, causing a parking garage to collapse on the Mark 2. Barely slowed by the collapse, the Mark 2 followed Spider-Man to Smythe's lab. Growing confused as the Mark 2's controls began locking up, Smythe increased the Mark 2's power to its maximum levels, not realizing that the many spiders held on site caused the malfunction and caused the Mark 2 to deactivate. Berated for his repeat failure, Smythe angrily departed Jameson's office.
(Amazing Spider-Man Annual I#19/Official Handbook of the Marvel Universe: Spider-Man: Back in Black #1 (Alistaire Smythe) (fb) - BTS) - As Spencer grew more unstable and obsessed with Spider-Man's demise and the creation of his Spider-Slayers (possibly due to his exposure to the radioactive elements used to power the Slayers), he began spending less time with his now teen-aged son Alistaire and his wife. At an unspecified point, Spencer completely abandoned his family in favor of his research and production of Spider-Slayers.
(Amazing Spider-Man I#105 (fb) - BTS) - Smythe's dark hair quickly turned gray. (see comments)
Continuing to work as New York's scientific advisor, Smythe persuaded the city to install "video-scanners" throughout New York, convincing the Police Department that the scanners would be a powerful crime deterrent. The city agreed to finance the Master Unit, the small but powerful component that would control the video-scanners, while Smythe plotted behind the scenes to usurp control of the devices.
(Amazing Spider-Man I#106 (fb) - BTS) - In a bid for power, Smythe formulated a plan to offer access to the video-scanner to four of New York's top gang leaders.
(Amazing Spider-Man I#105 (fb) - BTS) - Putting aside their differences because of their mutual hatred of Spider-Man, Smythe agreed to work with Jameson once more. While accepting payment from Jameson for the rental of his new Spider-Slayers, Smythe remained more interested in Spider-Man's defeat than any sum of money.
(Amazing Spider-Man I#106 (fb) - BTS) - With the Master Unit all but within his grasp, Smythe contacted the gang leaders, promising them millions.
(Amazing Spider-Man I#105) - Smythe unveiled the Mark 3 Spider-Slayer to Jameson, explaining that its spider-like shape would be better able to defeat Spider-Man where the more humanoid Slayers failed. Offering a control panel to Jameson to control the Mark 3, Smythe secretly retained control of the Mark 3, disabling Jameson's connection to use it to steal the Master Unit. With the video-scanners under his control, Smythe tracked Spider-Man down, following him until Spider-Man unmasked (see comments).
(Amazing Spider-Man I#106) - Quickly realizing the video-scanner was directed at him, Spider-Man webbed it up, but not before Smythe saw his enemy unmasked. Pleased with having seen Spider-Man's true face (however briefly) and ready to continue with his master plan, Smythe met with the four gang leaders, showing them what was possible with his access to the video-scanners. Spotting an unmasked Spider-Man on one of the screens, Smythe was startled to see Spider-Man 'remove' his face, showing it to be a mask over his Spider-Man mask. Remarking on how Spider-Man must have spotted the video-scanners and planned the "unmasking" as a ruse, Smythe decided to send the Mark 4 Spider-Slayer after him, controlling it from within rather than remotely. Smythe tracked Spider-Man, trapping him in a giant-sized web and disabling his powers with ethyl-chloride gas.
(Amazing Spider-Man I#107) - With Spider-Man immobilized, Smythe returned to his lair to present the webslinger to the gang leaders. Convincing the gang leaders that with Spider-Man out of the way and the video-scanners under his control they could begin their crime spree, Smythe failed to notice Spider-Man free himself. Sealing the entrances to his lab with steel doors, Smythe began to panic as several video-scanners began shorting out and the gang leaders accused him of trying to double-cross them. Anticipating Spider-Man's return to the lab, Smythe reentered the Mark 4 and attacked Spider-Man, quickly finding the Mark 4's controls inoperative. Learning that Spider-Man had tampered with them during his earlier escape, Smythe was webbed into the Mark 4 and left dangling from the roof outside his lab.
(Amazing Spider-Man I#150 (fb) - BTS) - Smythe was taken into police custody and charged for his involvement in the video-scanner plot. After spending an unrevealed amount of time in prison, Smythe successfully escaped and used his remaining video-scanners to monitor sites that Spider-Man had previously been sighted at. While feverously searching for Spider-Man, Smythe repaired the Mark 4 and built three robots modelled after the Vulture, the Sandman, and the Kingpin.
(Amazing Spider-Man I#150) - Spotting Spider-Man near Dr. Curt Connors' New York lab, Smythe sent the robots after him, each failing to best their target. Finally confronting Spider-Man in the Mark 4 himself, Smythe used the hero's fatigue from the earlier fights to his advantage, easily trapping Spider-Man in webbing and wrapping him in one of the Mark 4's tentacles. Gloating that he'd finally be able to kill Spider-Man, Smythe again met defeat as Spider-Man freed himself from the tentacle, thanking Smythe for helping to resolve something important as he knocked the professor unconscious. (see comments)
(Amazing Spider-Man I#191 (fb) - BTS) - Smythe learned that the plutonium used to power the Spider-Slayers was killing him. Growing increasingly unstable as he neared death, Smythe began heaping equal blame toward J. Jonah Jameson, whom he started believing was forcing him to build Spider-Slayers over the years.
(Amazing Spider-Man I#190 (fb) - BTS) - Smythe began taking medication for his illness, but needed to increase his dosage over a short amount of time.
(Amazing Spider-Man I#186 (fb) - BTS) - Relocating to a lab somewhere in Westchester, Smythe conceived a plan that would avenge him before he finally succumbed to his fatal illness. Paying the Chameleon $25,000, Smythe hoped to have his shape-shifting abilities used to see Spider-Man discredited in the public eye.
(Amazing Spider-Man I#186) - Smythe watched the Chameleon's televised defeat at Spider-Man's hands, admitting that although the Chameleon proved unqualified to carry out his task, Spider-Man would still suffer.
(Amazing Spider-Man I#187 (fb) - BTS) - Smythe paid Electro $25,000 to destroy the Indian Point power station.
(Amazing Spider-Man I#188 - BTS) - In the aftermath of the destruction of the Indian Point power plant, a blackout hit Manhattan. Smythe hired men to remove John Jameson's frozen body from a Manhattan cryonic hospital.
(Amazing Spider-Man I#189) - Smythe charged John Jameson with his Energizer device and injected him with a radiation trace. Reverting into his Man-Wolf form, John successfully arrived at the Daily Bugle offices, mindlessly kidnapping his father. As Spider-Man arrived to rescue Jameson, Smythe spurred his lackey on remotely, observing the fight via his video-scanners.
(Amazing Spider-Man I#190) - Smythe continued to watch Spider-Man pursue the Man-Wolf, recounting the circumstances that brought him to this point and his desire to see the Man-Wolf make Spider-Man and Jameson suffer. The fight took Spider-Man, Jameson and the Man-Wolf to the top of the Brooklyn Bridge. Seeing Jameson reach out to his son, causing the Man-Wolf to revert to John Jameson, Smythe activated a device implanted in John, sending him off the bridge.
(Amazing Spider-Man I#191) - Blaming Spider-Man for John's seeming death, Jameson arrived at Smythe's apartment, pleading with him to build another Spider-Slayer. Surprised by the unexpected luck of having Jameson at his doorstep, Smythe agreed, presenting Jameson with the Mark 6 Spider-Slayer and locking a device to his wrist. With the device attached, Smythe revealed that the he'd strapped a bomb to Jameson, and was intent on seeing Jameson pay for corrupting him and ruining his life. Smythe next sent the Mark 6 after Spider-Man, successfully defeating him (at the expense of the Mark 6, which which was destroyed in the encounter). Arriving near the aftermath of the battle, Smythe recovered Spider-Man, transporting him to his lab. As Spider-Man woke, Smythe revealed that he and Jameson were shackled together, with 24 hours left before the bomb was set to explode.
(Amazing Spider-Man I#192) - Threatened to release them from the shackles, Smythe gloated to Spider-Man and Jameson that his dying wish was to see them pay for what they'd done to him.
(Amazing Spider-Man I#192 - BTS) - As Spider-Man and Jameson left the lab to free themselves, Smythe realized his hour was at hand and he recorded a message for Spider-Man and Jameson, assuming they would eventually return to the lab in an attempt to rid themselves of the bomb. Finishing the message, Smythe sat down in his chair and succumbed to his illness.
(Amazing Spider-Man I#192) - Returning to Smythe's lab with half an hour left on the bomb's timer, Spider-Man and Jameson discovered Smythe's body. After seeing Smythe's recording, Spider-Man began searching the lab for something to disable to the bomb. Finding a liquid oxygen tank that Smythe had used while storing John Jameson's body, Spider-Man froze and shattered the shackles holding the bomb. With seconds left, Spider-Man and Jameson leapt out of a nearby window; the bomb detonated, incinerating Smythe's corpse.
Comments: Created by Stan Lee (writer) and Steve Dikto (pencils and inks).
Smythe's relocation to a different lab is implied by the differences between the exteriors shown in Amazing Spider-Man I#28 and I#58, and that his lab is referred to as his home in I#28 and just a lab in I#58. There's also the fact that Spider-Man had to look up his new address rather than return to the address he'd been to previously. It's unclear, however, if Smythe's second lab was the same as that used in I#105-107.
When Smythe returned in Amazing Spider-Man I#105, his brown hair showed signs of graying, before going completely gray in the following issue. I'd assumed the graying was due to the stress caused by his growing obsession, but he later appeared in I#150 with dark hair. While possibly a coloring error, it's possible that Smythe used hair dye in his earlier appearances and, as he became more devoted to his Spider-Slayers, he used it less frequently.
Smythe did not recognize the unmasked Spider-Man as Peter Parker, who he'd already met twice, but the later revelations implied Smythe's radiation poisoning led to madness and delusions (specifically the abandonment of his wife and son, and the belief he was forced to create the Spider-Slayers by Jameson) imply a fractured mental state that would allow for this lapse in his memory.
Many, many thanks to David Wiltfong for the images from Amazing Spider-Man I#106.
The important thing Spider-Man resolved at the end of his fight with Smythe in Amazing Spider-Man I#150 was his confusion over whether or not he was the clone of Peter Parker. Believing his emotional response toward Mary Jane while trapped by Smythe was enough to prove he was the real Peter Parker, Spidey discarded the results of Dr. Connors' test that would have cleared this up with certainty. But then had he looked, we never would've gotten the 1990s Clone Saga. It's up to you, good reader, as to whether or not that's a good or bad thing.
Profile by G Morrow.
CLARIFICATIONS:
Spencer Smythe has no known connections to
The Four Top Gang Leaders of New York
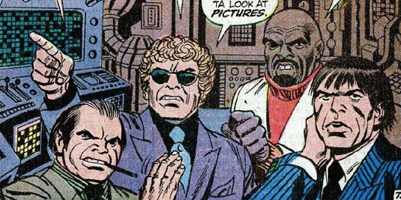
(Amazing Spider-Man I#106 (fb) - BTS) - Four of New York's top gang leaders were invited to Spencer Smythe's lab, having been promised they would be shown something worth millions to them.
(Amazing Spider-Man I#106) - Arriving at Smythe's lab, the gang leaders grew restless, demanding that they be shown Smythe's "million dollar" device. Presented with Smythe's video-scanner system, the gang leaders grew pleased at the idea of being able to circumvent police interference during robberies, but grew alarmed at the news that Spider-Man was aware of the video-scanners. Reassured that Spider-Man wouldn't pose a threat, the gang leaders eagerly watched Smythe seek out and trap Spider-Man with his Mark 4 Spider-Slayer.
(Amazing Spider-Man I#107) - Pleased to see Smythe return with Spider-Man in his clutches, the gang leaders put their trust in Smythe and allowed him to use his scanners to plan their next robbery. In contact with Smythe over video devices built into their cars, the gang leaders grew frustrated as their connection began to falter and they found themselves in the path of a police cruiser. Accusing Smythe of double crossing them, the gang leaders exited their vehicles to confront Spider-Man, who located the gang leaders as they returned to Smythe's lab. Quickly disarming the gang leaders and leaving them webbed to their cars, Spider-Man leapt away.
--Amazing Spider-Man I#106 (106-107
images:
(without ads)
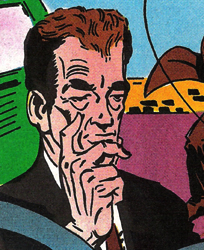
Amazing Spider-Man I#58, p8, pan1 (main image)
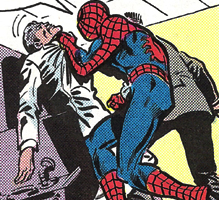
Amazing Spider-Man I#25, p19, pan4 (close-up)
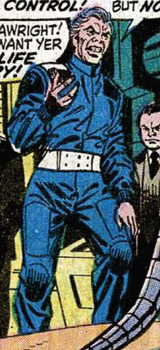
Amazing Spider-Man I#106, p10, pan1 (in jumpsuit)
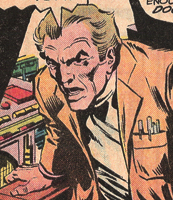
Amazing Spider-Man I#190, p3, pan2 (later appearance)
Amazing Spider-Man I#192, p14, pan7 (death)
Amazing Spider-Man I#106, p7, pan4 (gang leaders)
Appearances:
Amazing Spider-Man I#25 (June, 1965) - Stan Lee (writer), Steve Ditko
(artist), Stan Lee (editor)
Amazing Spider-Man I#28 (September, 1965) -
Stan Lee (writer), Steve Ditko (artist), Stan Lee (editor)
Amazing Spider-Man I#58 (March, 1968) -
Stan Lee (writer), Johnny Romita (pencils), Don
Heck (inks), Stan Lee (editor)
Amazing Spider-Man I#105 (February, 1972) -
Stan Lee (writer), Gil Kane (pencils), Frank Giacoia (inks), Stan Lee (editor)
Amazing Spider-Man I#106 (March, 1972) -
Stan Lee (writer), John Romita Sr. (pencils), Frank Giacoia (inks), Stan
Lee (editor)
Amazing Spider-Man I#107 (April, 1972) -
Stan Lee (writer), John Romita Sr. (pencils), Frank Giacoia (inks), Stan
Lee (editor)
Amazing Spider-Man I#150 (November, 1975) -
Archie Goodwin (writer), Gil Kane (artist), Mike Esposito &
Frank Giacoia (inks), Marv Wolfman (editor)
Amazing Spider-Man I#186 (November, 1978) -
Marv Wolfman (writer), Keith Pollard (layouts), Mike Esposito
(finishes), Marv Wolfman (editor)
Amazing Spider-Man I#187 (December, 1978) -
Marv Wolfman (script), Jim Starlin (co-plotter/layouts), Bob McLeod
(finishes), Marv Wolfman (editor)
Amazing Spider-Man I#188 (January, 1979) -
Marv Wolfman (writer), Keith Pollard (layouts), Mike Esposito
(finishes), Marv Wolfman (editor)
Amazing Spider-Man I#189 (February, 1979) -
Marv Wolfman (writer), John Byrne & Jim Mooney (illustrators),
Marv Wolfman (editor)
Amazing Spider-Man I#190 (March, 1979) -
Marv Wolfman (writer), John Byrne (layouts), Jim Mooney (finishes),
Marv Wolfman (editor)
Amazing Spider-Man I#191 (April, 1979) -
Marv Wolfman (writer), Keith Pollard & M. Esposito
(illustrators), Marv Wolfman (editor)
Amazing Spider-Man I#192 (May, 1979) - Marv
Wolfman (writer), Keith Pollard & Jim Mooney (illustrators),
Marv Wolfman (editor)
Amazing Spider-Man Annual I#19 (December,
1985) - Louise Simonson (writer), Mary Wilshire (pencils), Pat Redding
(inks), Jim Owsley (editor)
Official Handbook of the Marvel Universe:
Spider-Man: Back in Black#1 (April, 2007) - Mike Fichera (head
writer/coordinator), Jeff Youngquist & Jennifer
Grünwald (editors)
First Posted: 11/14/2008
Last updated: 10/25/2012
Any Additions/Corrections? please let me know.
Non-Marvel Copyright info
All other characters mentioned or pictured are ™
and
© 1941-2099 Marvel Characters, Inc. All Rights Reserved. If
you
like this stuff, you should check out the real thing!
Please visit The Marvel Official Site at: http://www.marvel.com
Special Thanks to www.g-mart.com for hosting the Appendix, Master List, etc.!